Category Archives for "Teach Drums"
Videos and articles on teaching drums, organization, tools, etc.
Videos and articles on teaching drums, organization, tools, etc.
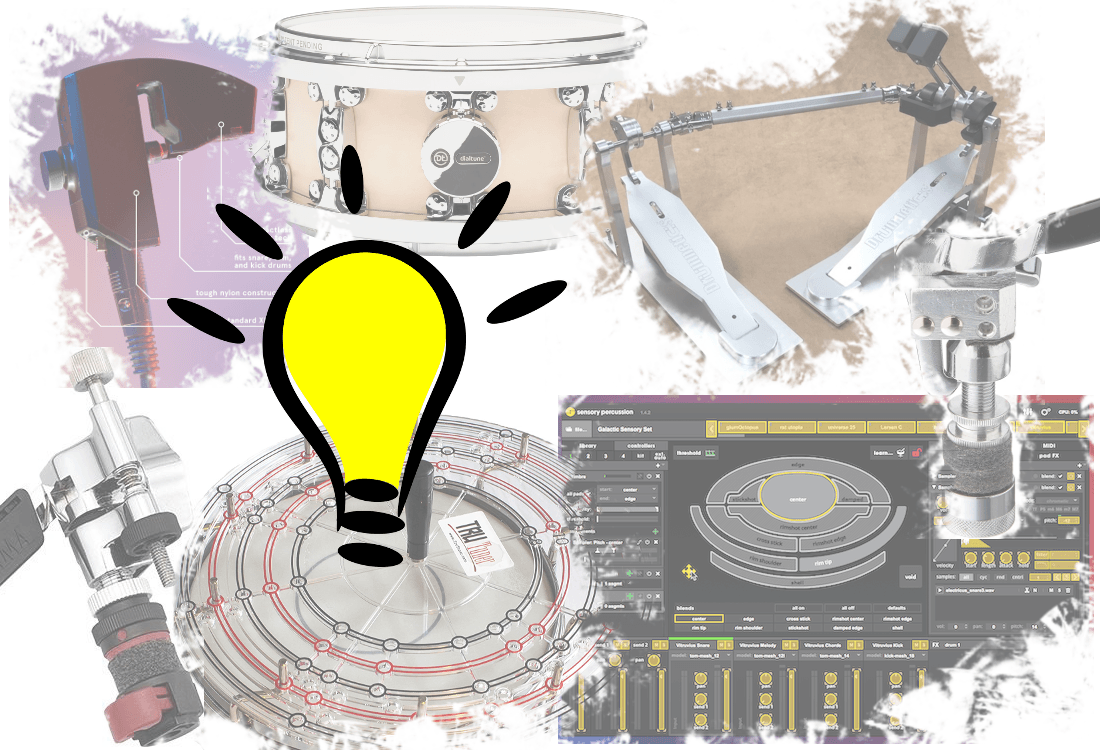
Here we are with part 2 of the coolest drum gadgets you will probably buy on impulse in the next few minutes! It's one of them moments where you scream, "Take my money!". I have found so many new cool gadgets that I had to make a second article! Check 'em out!
Drumnetics Magnetic Kick Pedal
DOUBLE BASS or SINGLE BASS PLAYERS! All drummers that use a bass drum pedal! You have to check this out! The Drumnetics Pedals are bass drum pedals driven by magnets rather than springs! As a disclaimer, I have not bought one of these myself but I would love to get one! This design is truly unique and innovative. This is a new product and a young business and the few people that actually own one right now have nothing but good things to say about the fluidity and movement. Luckily the construction is very heavy duty—resembling Trick drum products. You can get single or double pedals in short or longboard styles. I will be getting one soon! Check out the features and adjustment options in this video:
Sunhouse Sensory Percussion
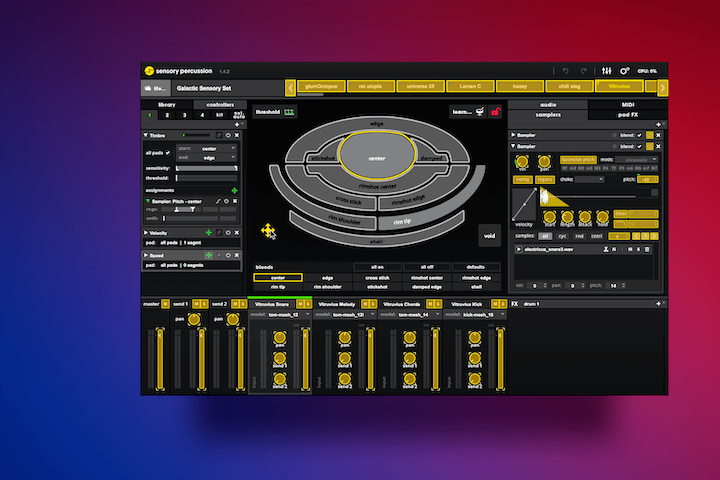
Sunhouse Sensory Percussion Trigger & Software (view item on Amazon) (commissioned links)
Sunhouse Sensory Percussion is so cool! It is the future of electronic drum sound and experimentation. Simply put, these are drum triggers that clamp onto the drum and have a variety of sensors to capture the vibrations of the entire drum. But they are not MIDI drum triggers. They connect via microphone cables (XLR) and can read 10 different zones with high precision dynamics. This is far more sophisticated than basic on/off messages with MIDI.
This is what makes the Sunhouse Sensory Percussion system literally 10 times that of a MIDI trigger setup. They work with regular or mesh drum heads and you can use them with any third party interface and connect them into the Sunhouse Sensory Software on a Mac or PC. You could buy mesh drumheads for any old inexpensive drum set and turn it into a electronic kit or create any hybrid setup you can imagine. This is where you could get artistic and make drums out of unique materials, devoid of sound because the Sunhouse system will turn them into whatever you want. The sound manipulation is far more advanced than anything you can do with MIDI triggers. You have to take some time to really check out this amazing and innovative tool! Watch their demo videos:
Yamaha EAD10

Yamaha EAD10 (view item on Amazon) (commissioned links)
I am so impressed with some of the new products coming out right now! The Yamaha EAD10 is a single mic system for your entire drum kit that clamps your bass drum. With extremely intelligent technology, the EAD10 listens to your entire drum kit and can discern each drum within a 4 foot range of the unit. This unit attaches to a module and gives you a wide variety of mix and effect options. I am amazed at the quality of recording you can get out of a one-mic setup for your entire kit. This is the ultimate option for people on a budget wanting to start making their own drum videos. Watch the demo video put out by Sweetwater where he explains all of the features:
Hi-Hat Quick Release Clutches
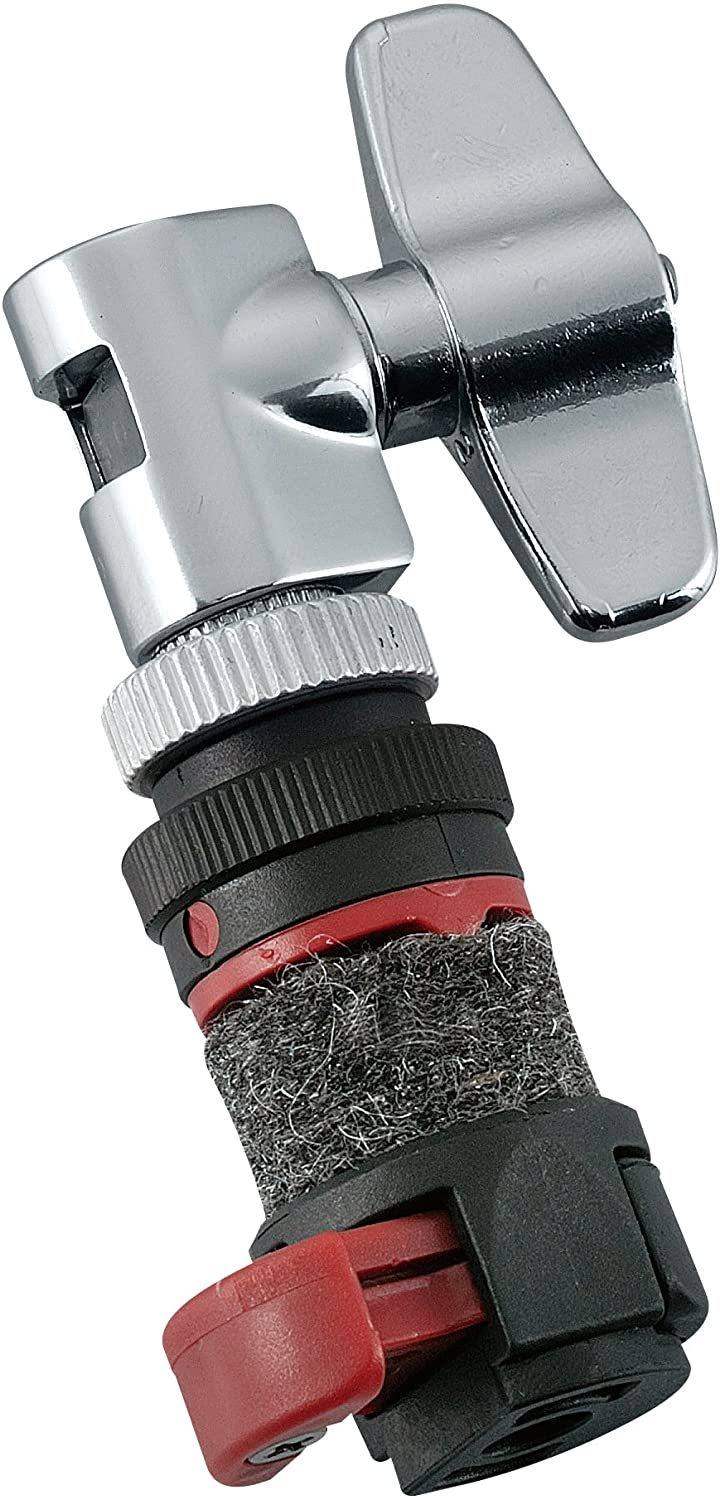
Tama Quickset Hi-Hat Clutch (view item on Amazon) (commissioned links)
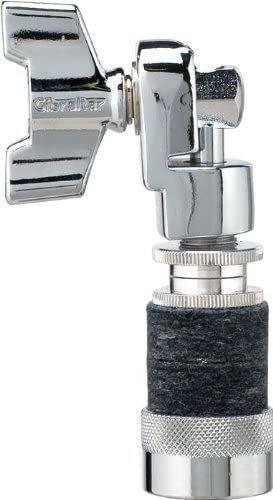
Gibraltar Quick Release Hi-Hat Clutch (view item on Amazon) (commissioned links)
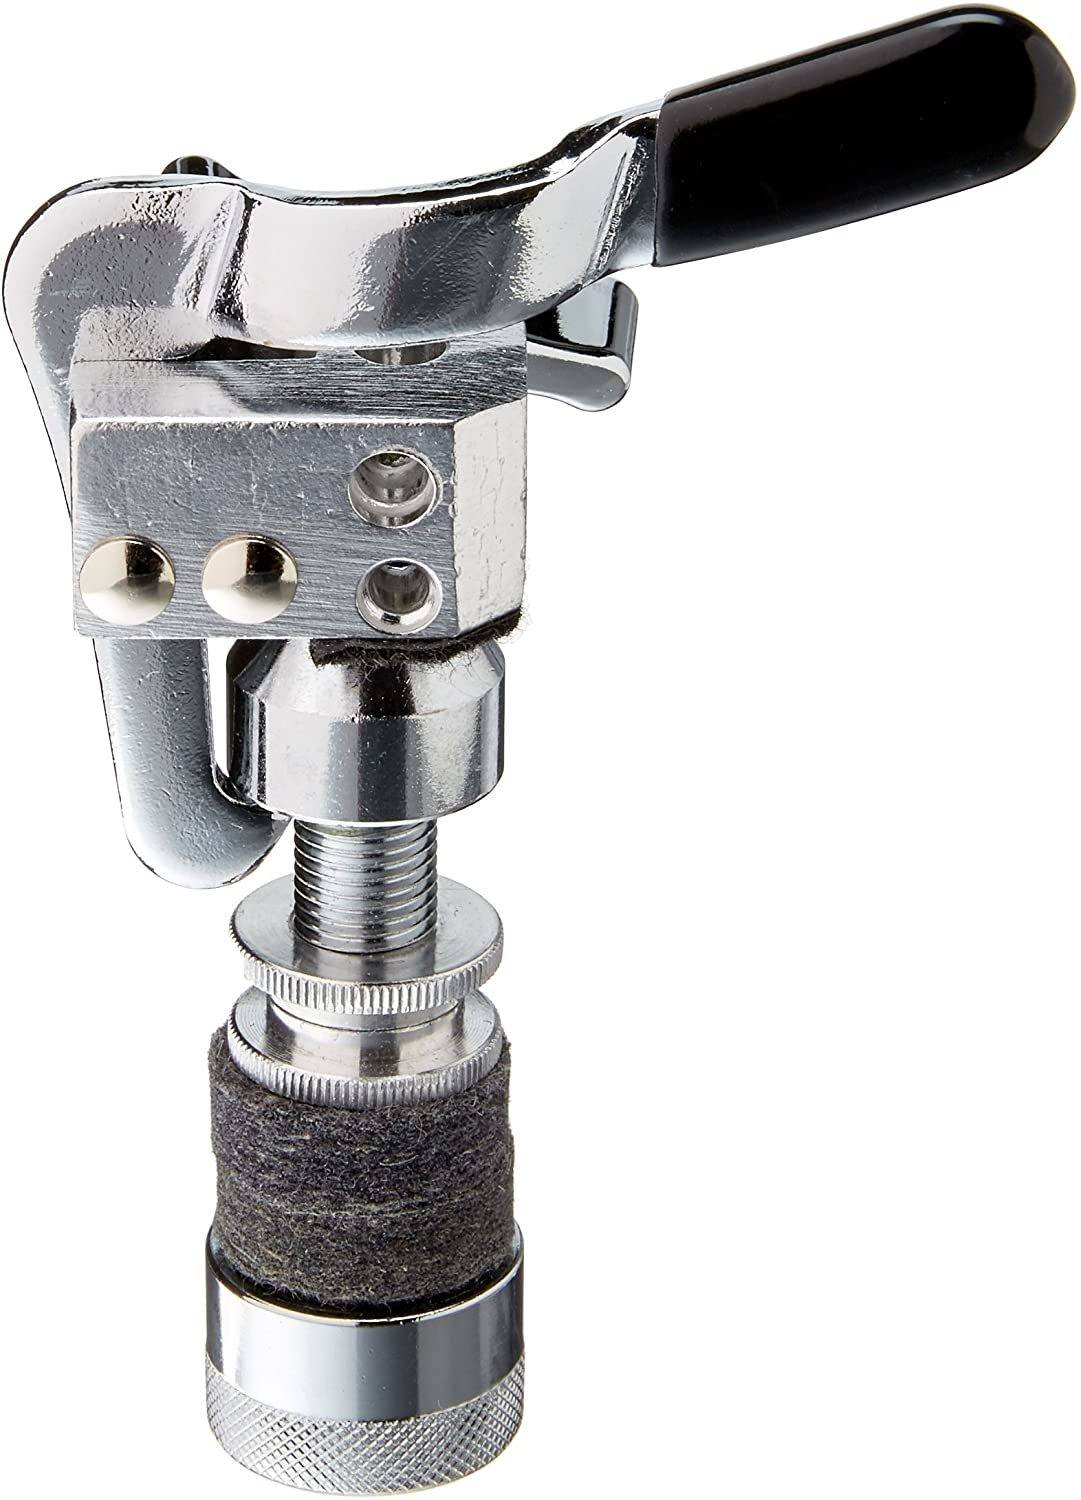
Gibraltar Quick Release Hi-Hat Drop Clutch (view item on Amazon) (commissioned links)
After I fell in love with Trick Drums Cymbal Quick Release, I found myself still spinning threaded nuts on hi-hat clutches. I knew there had to be a product that could solve this issue as well! The Gibraltar Quick Release Hi-Hat Clutch is a super solid, steel constructed product that combines the same idea of the Trick Cymbal Quick Release on a hi-hat clutch. They also make the Gibraltar Quick Release Hi-Hat “DROP” Clutch for double kick players.
With some deeper research, I found that Tama has their own version called the Tama Quickset Hi-Hat Clutch. It is based off of the Tama Quickset Cymbal Mate design. I did not prefer the quickset cymbal mate design with it’s clunky closure and tendency to pop off every so often. However, since the grip clamps to the lip of the customized clutch instead of threads on a cymbal stand, it seems like a solid design.
At this point I would have called the Gibraltar Quick Release Hi-Hat Drop Clutch the winner…but then I found something that I never knew existed. If you read my previous article “The Coolest Drum Gadgets You Didn't Know You Wanted”, I spoke about the seemingly discontinued product, the Tama Cobra Clutch. The Tama Cobra Clutch essentially gives you a drop clutch with the option of tightly closed or sloshy hi-hat cymbals while playing double kick. The hack I created was much cheaper and was achieved by putting a spring on your hi-hat stand. However, the Tama Sizzle Touch Drop Clutch gives you the slosh option WITH the quick release. Honestly I wish Gibraltar had the spring option as well since their quick release construction is better AND they are much more affordable. So with that, I leave the decision up to you!
Snareweight M1 and M80
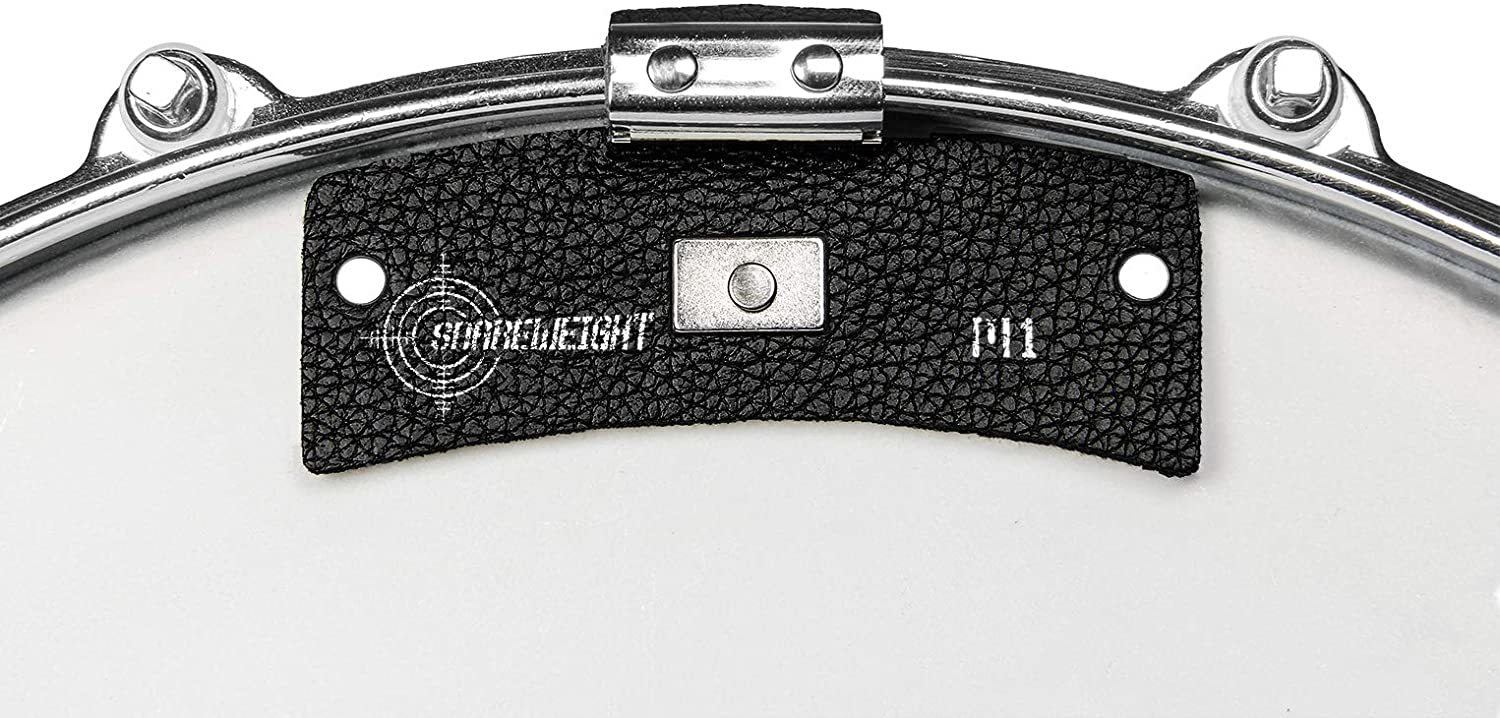
Snareweight M1 (view item on Amazon) (commissioned links)

Snareweight M80 (view item on Amazon) (commissioned links)
Everyone knows about muffling gels and similar products for dampening their snares or toms. This is an alternative that I think is a little more elegant, sturdy, and effective. The Snareweight M1 and M80 are essentially a snare dampener made of a leathery flap that clips on the rim of the drum. You can turn it off by simply pushing back on it until it magnetically sits off the drum. This turned out to be more sturdy than sticking muffling gels on the drum, especially when they have stopped sticking. The M1 is the small version of the M80. With the M80, you can essentially push back the side flaps to make it the same size as the M1 really giving you two products in one. I highly suggest that you experiment with your drum’s tuning to get the sounds you want without muffling but this is definitely a quick adjustment that can be useful in many situations. They come in brown, black, and white colors.
Firefly Ratcheting Drum Key
Ratcheting style drum keys are super useful when changing heads. The Firefly Ratcheting Drum Key takes it a step further because it is silent when you reverse your movement rather than clicking. This can be ideal in gig and studio situations. This is definitely the best ratcheting drum key out there!
Tru Tuner Rapid Drum Head Tuner
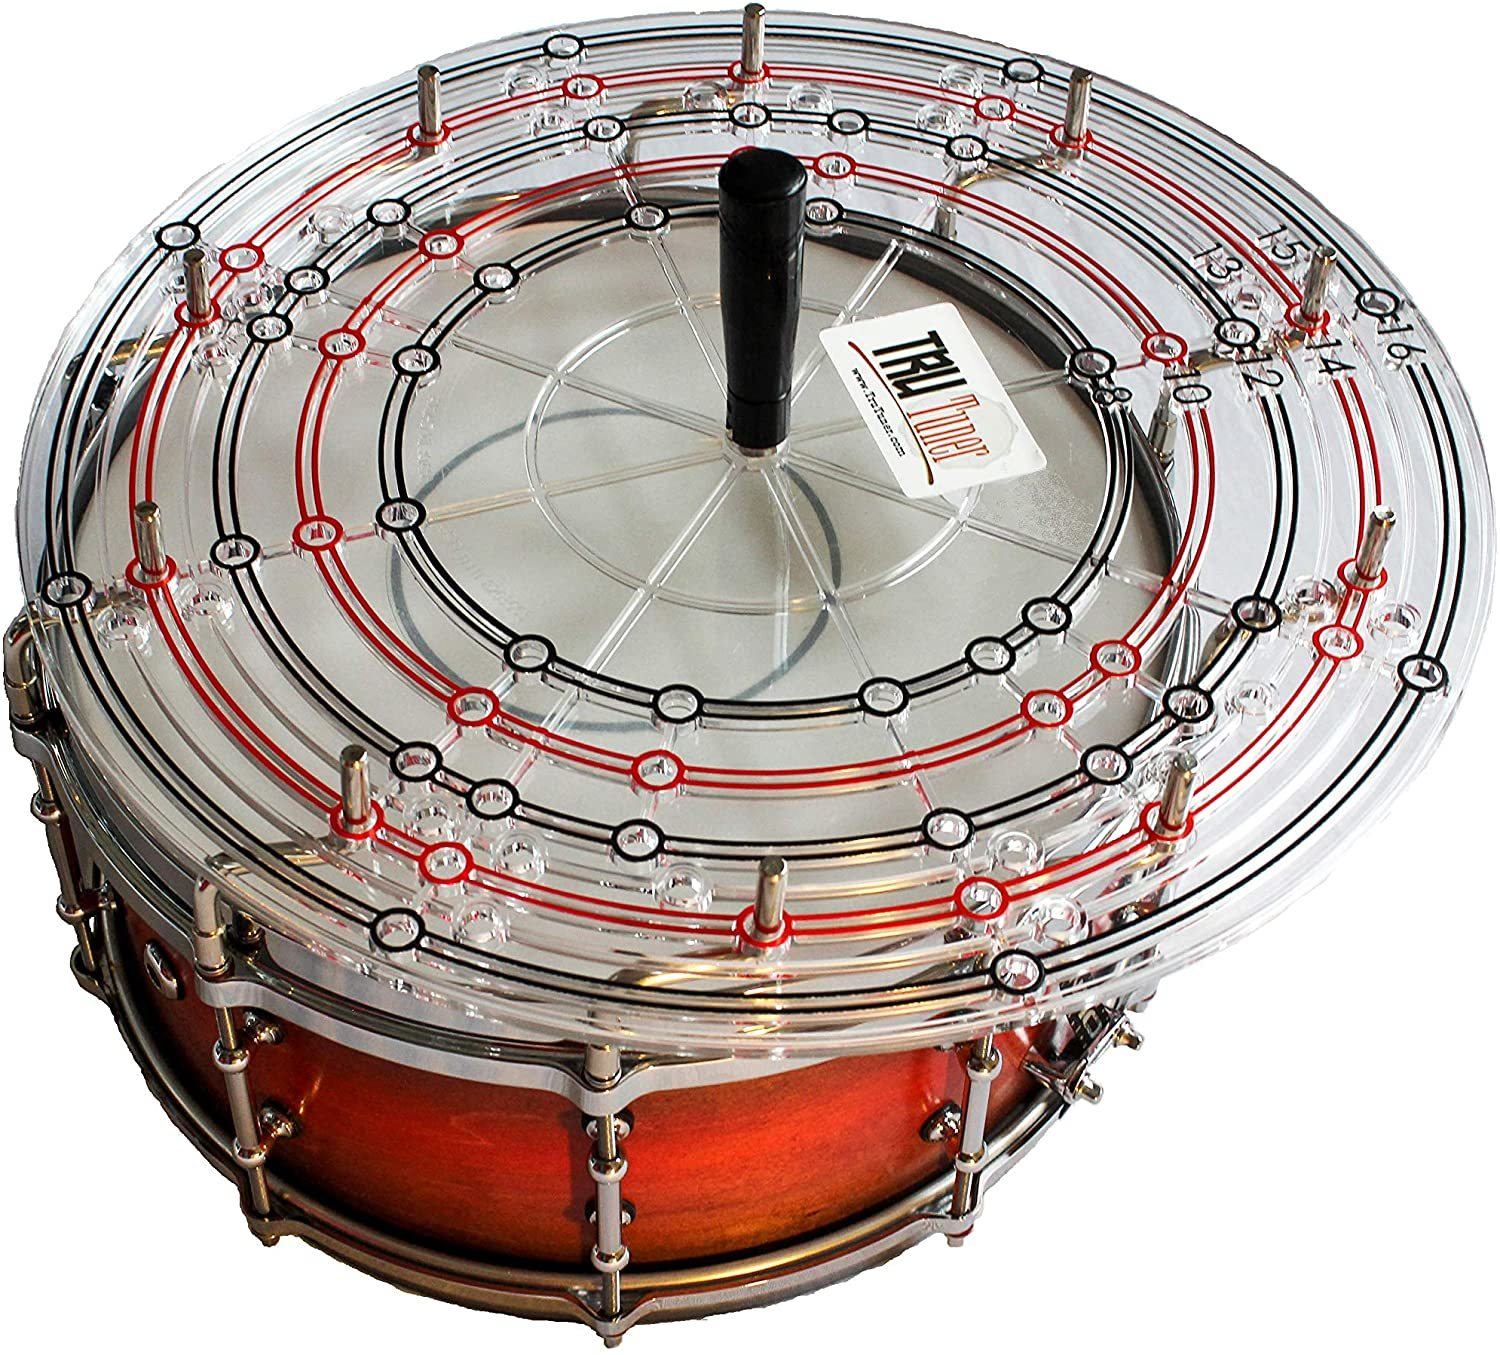
Tru Tuner Rapid Drum Head Tuner (view item on Amazon) (commissioned links)
The Tru Tuner Rapid Drum Head Tuner is a fantastic way to get evenly tuned drums on every lug. You place the included drum keys on all of your lugs and put the “tuning plate” on top of all the drum keys and turn all the lugs at the same time. One setback is that you can’t test the drum sound while the plate is on the keys. But if you have a ballpark of 1 or 2 full turns to get it close, you can be rest assured that every lug is evenly tensioned. You can literally remove and install a new drum head in under 1 minute.
Dialtune Drums
When I first found Dialtune Drums, I immediately saw them as the future of how we tune drums. Tuning drums for so many players at the beginning and intermediate levels can be so overwhelming. It is a time consuming skill to learn which takes away from what you actually want to be doing: practicing and playing! Not to mention all the drummers that are so uninspired by their drum sound because they can’t get their drums to sound good. It is literally the biggest problem for drummers right now!
Dialtune Drums use a pulley system to allow you to evenly tune one head of the drum just by turning one knob located on the side of the drum. There is one knob for the top head and one for the bottom head. The hardware attached to the drums do make them quite a bit heavier than a regular drum. I think the ease of tuning far outweighs the heavier weight (no pun intended).
This is a brand new company that just started offering products to the public at large. As of right now, they only offer 6.5”x14” maple snare drums. As they gain momentum, they will be adding different snare size options, tom options, and eventually full kits. I would keep our eyes peeled for more companies to start building drums like this.
Vic Firth Hingestix

Vic Firth American Custom SD1 Hingestix (view item on Amazon) (commissioned links)
The Vic Firth Hingestix are ideal for teachers and beginners alike. They are basically an removable rod that screws into 1 of 2 pre-made holes on the sticks to help remind you where your fingers and/or fulcrum should be. If you have trouble sliding around your stick, they do help a little bit with grip as well.
Tru Tuner FX Series

Tru Tuner FX Shaker Stick (view item on Amazon) (commissioned links)

Tru Tuner FX Drumhead/Cymbal Mount Tambourine (view item on Amazon) (commissioned links)

Tru Tuner Bass Drum Mounted Shaker (view item on Amazon) (commissioned links)
In addition to their Rapid Drumhead Tuner, Tru Tuner also came out with an FX series of gadgets that are really cool. Essentially, they are small and inexpensive attachments to your drumhead, kick pedal, cymbal, or sticks to add shaker or tambourine sounds while you play. I think all of these have great uses and they are super easy to switch out between songs…or in the middle of songs! There’s a quick release mount attachment for you bass drum beater, a sticky drum muffling gel and a mount to place onto cymbals or drumheads, and a butt-end stick mount. With these mounts you can add a shaker or a mini-tambourine cymbal. My favorite was the sound of the tambourine and muffle gel on the snare drum.
Thank you for reading! I hope the products were helpful in simplifying your drumming life. If you haven't checked out some of my other helpful articles, do so below!
Part 1 of this series:
The Coolest Drum Gadgets You Didn't Know You Wanted
Other articles that may interest you:
Everything You Need to Become an Online Session Drummer - Part 1 – Getting Gear
Definitive Drum Practice Guide from Beginner to Advanced - Part 1 - Scheduling and Gear
Definitive Drum Practice Guide from Beginner to Advanced - Part 2 - Practice Session
**Full Disclosure: I earn a commission if you click any of these links and make a purchase, at no additional cost to you.**

Musicians need to wear many “different hats” these days. A musician’s title used to just be drummer & writer or drummer & producer. Now, it’s drummer/writer/producer/educator/cameraman/video editor/marketing agent…etc. It’s a lot to take on but it doesn’t need to feel overwhelming. We are creative people and these can be fun and artistic in their own way.
“Sometimes you have to learn to like the necessary duties in your business by making them interesting so you can be successful.”
I think every drummer needs a website and drum videos as much as they need a business card. Before you even go to an audition, they want to hear your recordings. But, it’s not just audio they want anymore…they want video too!
There are so many studio tricks available today that studio recordings don’t always show the raw talent. So they want to see you performing your music too. They also want to see your stage presence and look—remember this is a show, not just a listening party.
In this article, I’m going to show you everything you need, in the most cost effective way, to make your own videos. But before we get too far, I want to suggest that you consider getting the monthly plan with Adobe Creative Cloud for a variety of reasons. Most importantly, they work with Mac or PC. In addition, here’s all the programs you might need to make your videos:
If you're going the DIY route, there are so many other tools Adobe offers that you will need as a musician or band. They would include:
With all that said, you do have some more inexpensive options for all of this. However, they will:
Recording Video
Smartphone Cameras
Do you have a smartphone? If so, you probably have a very high quality video recorder. I have used my iPhone 10 for most of my videos and it records in 4K (UHD). However, I only edit and upload in 720 pixels or 1080 pixels (still HD). My computer can really bog down when I edit a video in 4K. It’s also not necessary for drumming videos. 1080p is an ideal resolution. Check to see if your phone can record in at least 720p.
Sometimes phone video recording apps don’t record at a constant frame rate so you need to get a better video recording app. Recording at 30 fps (frames per second) is the best for YouTube. I found that if you pay even a little bit of money for a recording app, you’ll be way better off in the long run.
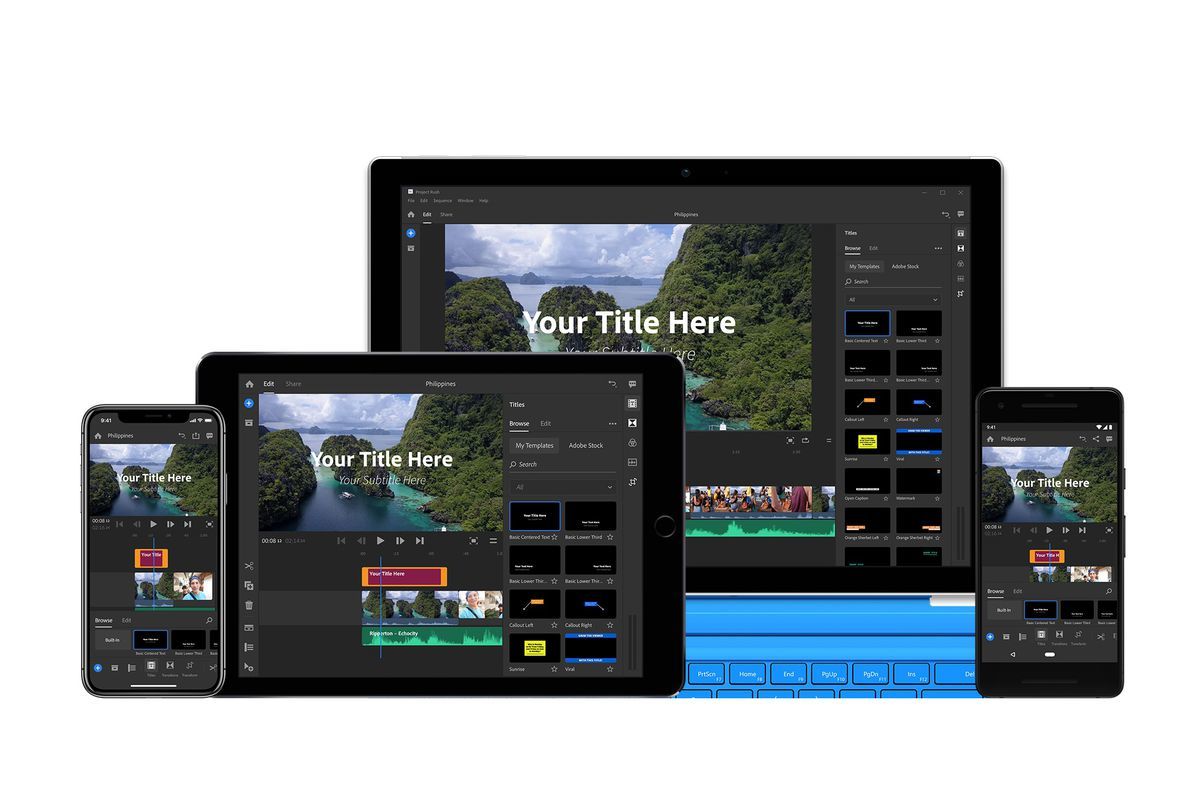
Adobe Rush (Mac, iOS or PC, Android) (commissioned links)
I’m on my Adobe soapbox so I will suggest Adobe Premiere Rush. This program will integrate as a phone app for recording and a computer program for editing as well. You can pay $10 a month for just Adobe Premiere Rush, or $21 a month for Rush and Premier Pro which will give you a bit more editing power and a few extra programs as well. Again, best option out there for Mac, iOS, PC, or Android.
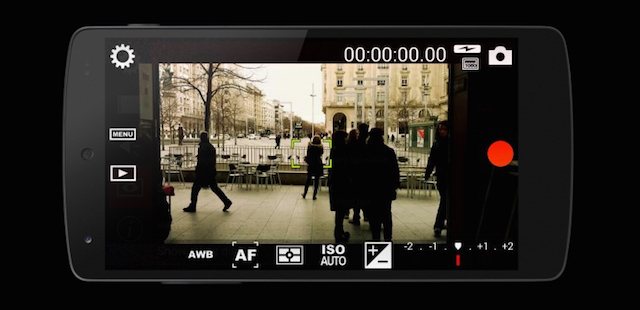
Cinema FV-5 (Android) (commissioned links)
For iOS, I have used ProMovie Recorder. There’s a free version but you really need to pay $3 to remove the watermark. It’s totally worth $3 though. For Android, I found Cinema FV-5 to be similar in quality and ease of use and it only cost $5. These are the easiest, strongest, and most affordable apps that allow you to adjust the fps to record your drumming videos.
Smartphone Stand
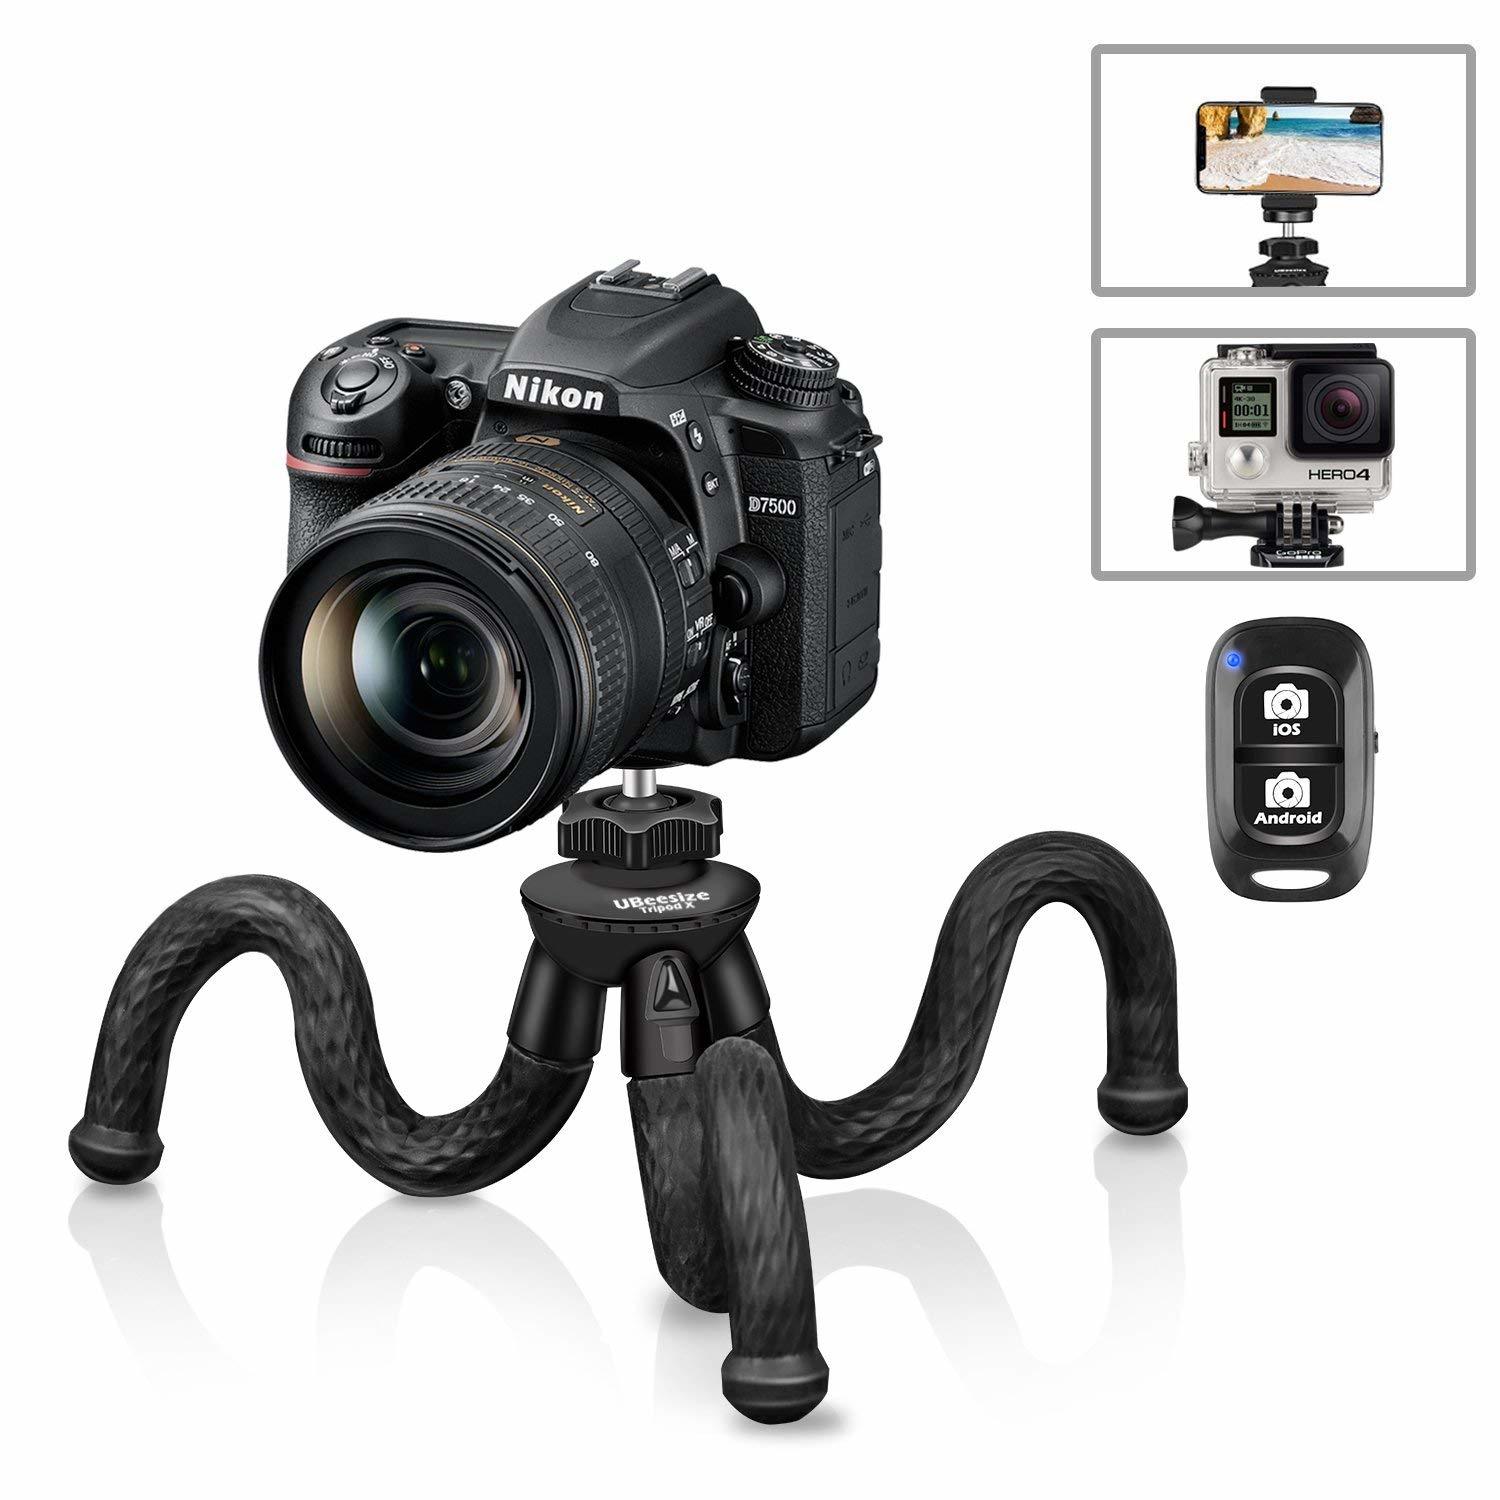
UBeesize Flexible 12 Inch Mini Tripod Stand (commissioned links)
This UBeesize Mini Tripod Stand works great to hold my phone when recording. It can latch onto almost anything and comes with tons of attachments including a bluetooth controller to start your app to record. It’s everything you need and very affordable.
Cameras
If you don’t have a smartphone or you would prefer to use a different camera or add a second shot angle, there are many options for you. I have mainly listed cameras that record in HD 1080p since the 4K models are considerably more expensive. I haven't used all of these but I have done extensive in-depth research on these cameras to give you the best options.

Panasonic Full HD Camcorder HC-V770 (commissioned links)
This Panasonic HC-V770 is a full HD (1080p) camcorder that would give you a beautiful high quality video. The coolest feature is the wi-fi smartphone twin video capture with an app. You can use your smartphone or tablet as a real-time remote to control the camcorder from a distance, check your shot while you are sitting at your kit, or use Wi-Fi functions to enable real-time broadcasting for Facebook live, etc. Very high quality camera for the price! It comes in at around $400.
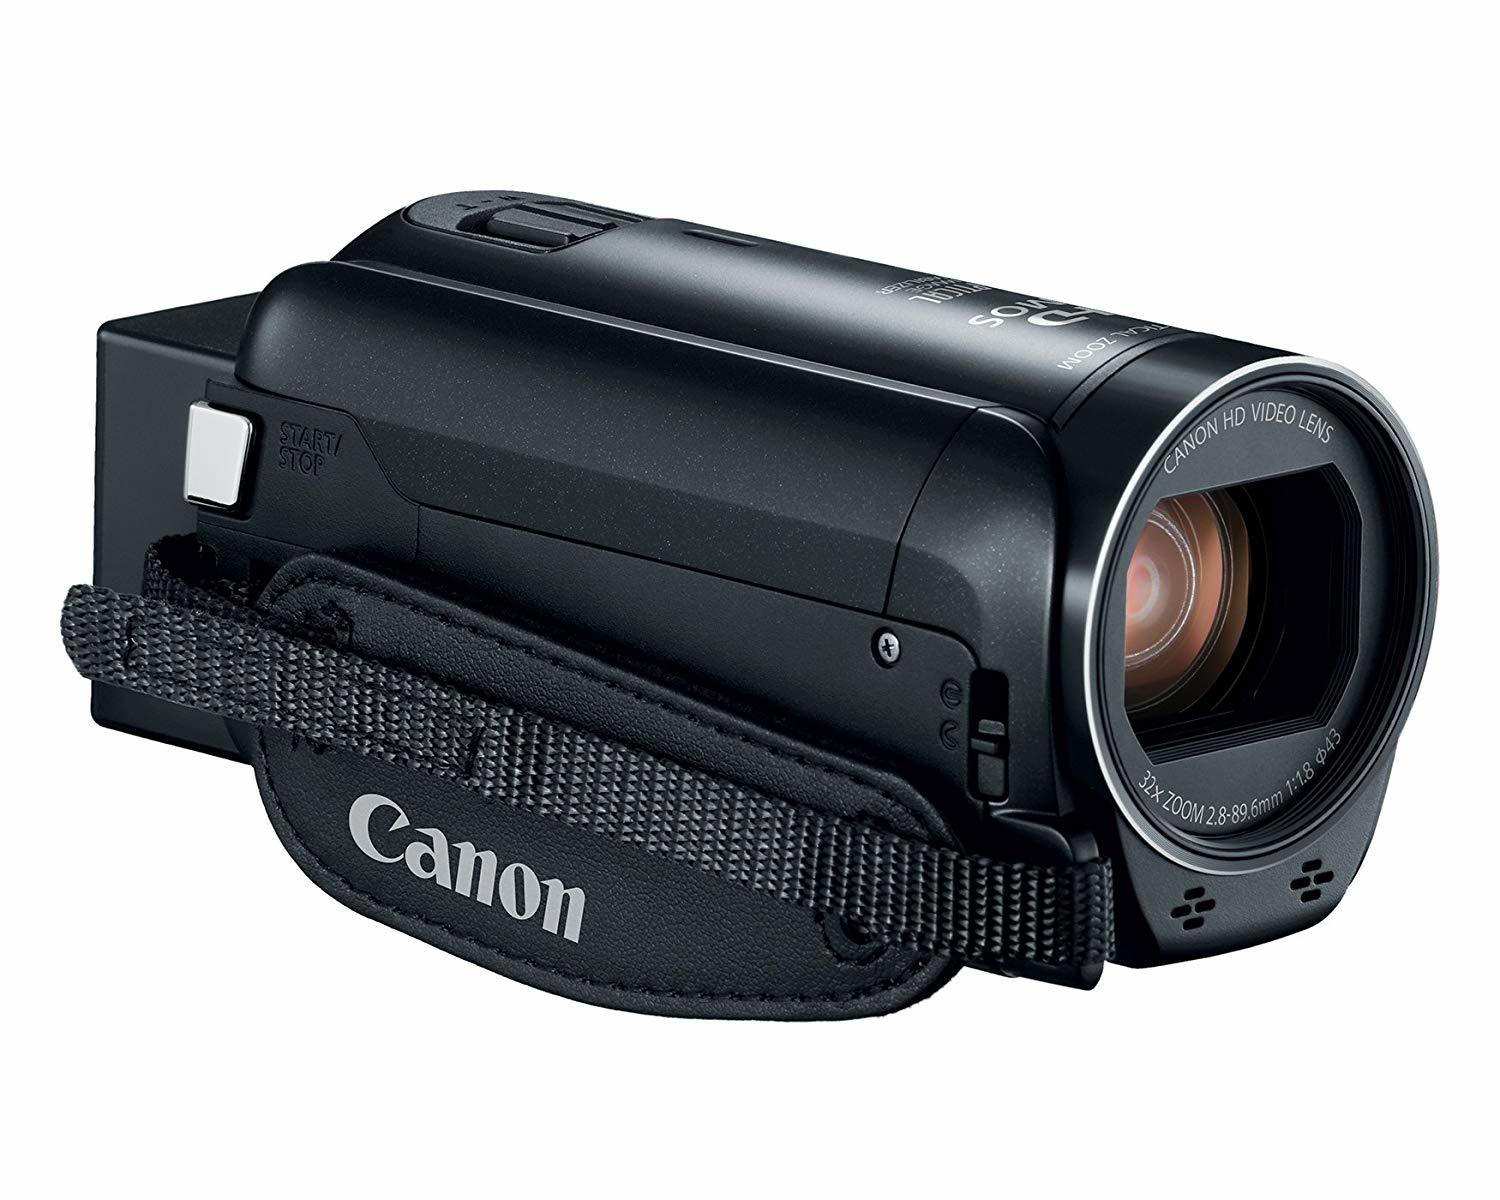
Canon VIXIA HF R800 Camcorder (commissioned links)
This Canon VIXIA HF R800 is much more affordable with everything you need to film high quality 1080p videos. Make sure you check all the packages available on Amazon if you want memory cards, stands, etc. The touch screen also makes focusing and changing settings a lot easier. It will record at 1080p and 30 or 60 fps (30 is what you want for YouTube). There is a 32x optical zoom lense and it also has an external microphone input. This one is priced around $200.
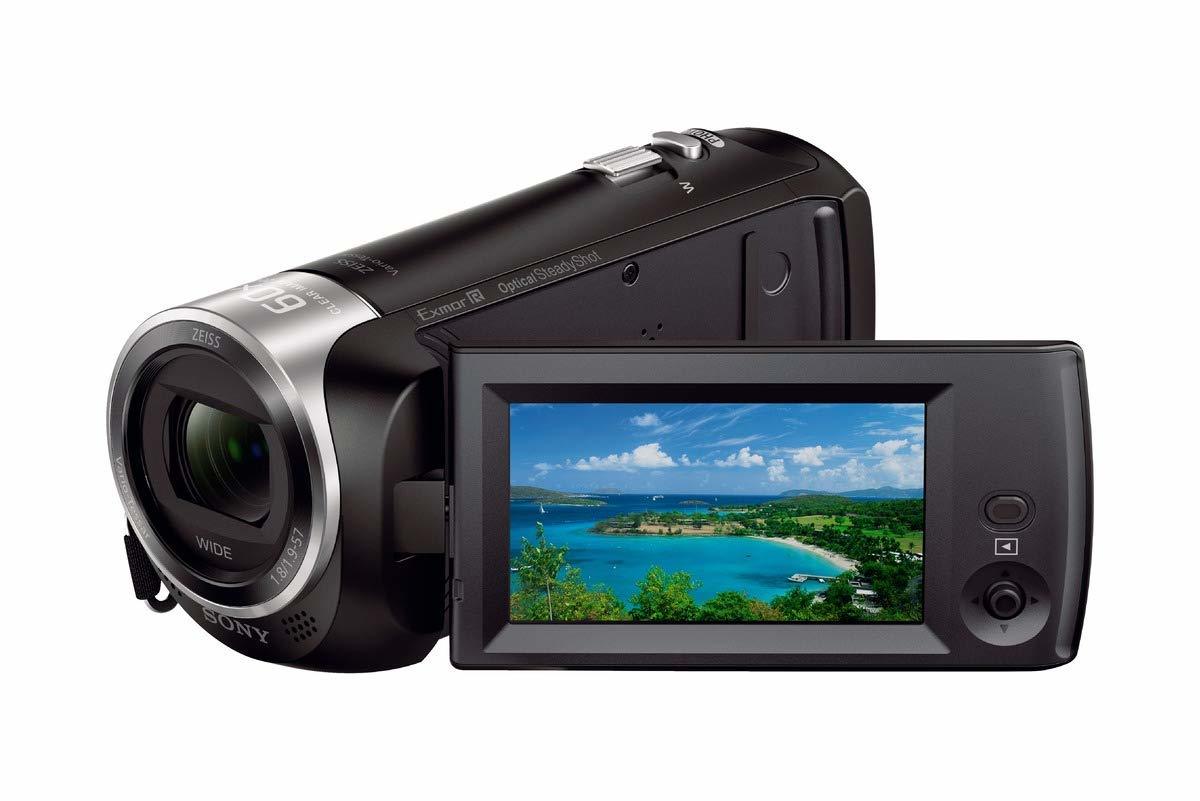
Sony HDRCX405 (commissioned links)
This Sony HDRCX405 is one of the best quality HD cameras I could find at an affordable price. With a trusted brand like Sony, you know this camera is legit. It’s super lightweight and the USB cable is attached so you don’t have to worry about losing it. Zoom capabilities are up to 30x and it records in 1080p and 30 or 60 fps (30 is what you want for YouTube). This one sneaks in at around $180.
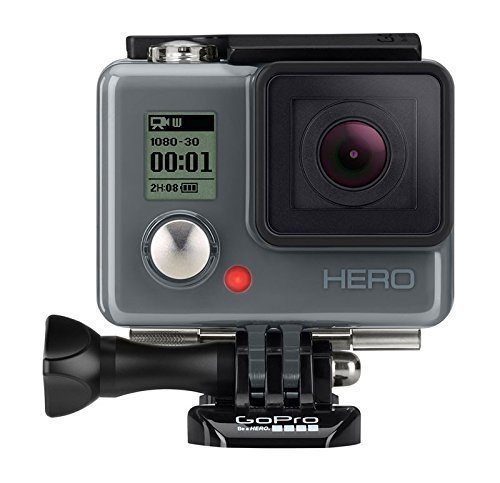
GoPro Hero (commissioned links)
If you're ok with the refurbished GoPros, you can get a camera here for under $100! The waterproof/durability features aren't necessary for recording drumming videos but their cameras are so inexpensive, you really can't go wrong. You can record at 1080p and 30 fps (30 is what you want for YouTube). I would strongly advise AGAINST getting the off-brand knock-off GoPros for cheaper. This is a legit GoPro and is the least expensive 1080p camera you will find anywhere...this is it. If you want a new GoPro, I would suggest looking at these:
Camera Stand

AmazonBasics 60-Inch Lightweight Tripod with Bag (commissioned links)
You will also need a stand for your camera. Many of these cameras offer a tripod add-on to your purchase which is almost always a good deal. Otherwise, this Amazon Basics tripod is a solid and affordable option. I have not found an Amazon Basics product I didn’t like…yet. This will fit most any camera…even a GoPro.
Recording Audio
You need to have a quality audio recording to go with your video if the video recorder doesn’t have a good microphone--which they usually don't. If you would like to bring your audio recordings to a higher level, I would suggest looking at my other article: Everything You Need to Become an Online Session Drummer.
...but if your budget is limited, I have some awesome suggestions:

The Yamaha EAD10 (view item on Amazon) (commissioned links)
The Yamaha EAD10 is a single mic system for your entire drum kit that clamps your bass drum. With extremely intelligent technology, the EAD10 listens to your entire drum kit and can discern each drum within a 4 foot range of the unit. This unit attaches to a module and gives you a wide variety of mix and effect options. I am amazed at the quality of recording you can get out of a one-mic setup for your entire kit. This is the ultimate option for people on a budget wanting to start making their own drum videos.

Zoom H1n Handy Recorder (commissioned links)
The Zoom H1n Recorder is a device with two stereo built in condenser mics. It gives you a stereo image and has other built in compressors and limiters to get you fantastic recording. I fell in love with this thing when our jazz/fusion trio, Catacosm, recorded a few tunes at rehearsal with it. Crystal clear stereo image and tons of space record entire rehearsals or numerous takes on a video.
The H1n will screw into a standard 1/4” screw if you already have a stand. Just don’t forget a stand if you didn’t get one of the Amazon packages that offers one with it. Here's a great package deal with accessories:

Zoom H1n w/ Accessory Pack with microSDHC Card and Cables (commissioned links)
Staging and Costume
Make your backdrop clean and/or enticing. You can either keep it simple to avoid viewer distractions or have an interesting theme of pictures, art, etc. You might want a sign with your name/channel or the name of your band, etc. Also wear some clothes that express you and your taste. If you wear some everyday rags, it won’t look as appealing. Just wear what you would wear on stage for a show.
What do you want to record?
There are a lot of different types of videos you can make so make sure you plan out what it is you want to record. Drum covers or music videos can showcase your playing and gain fans or aid you in getting gigs. Drum covers seem to be overdone these days so if you are going to do one, try to pick an interesting song or give the song a creative angle to set yourself apart from the other videos out there.
Drum lessons and tutorials are very helpful for the drumming community. I think every drummer has a unique voice to share. Share your approach on fills, song structure or unique setups or hacks. The possibilities are endless. Make sure research what is already out there so your not reiterating the same information.
Drum Covers
For drum covers, I found a couple of cool websites where you can get some popular songs without the drums on the recording--sometimes called "drumless songs". Both of these sites charge $3 for an MP3 download of a track. Drumless Version has a large library you can either buy the whole library or single tracks. Karaoke Versie is cool because you can customize what instruments are in the recording. Take a look at both of these sites to see what works for you.
Copyrights on Drum Covers
You can upload drum covers to YouTube because Google automatically analyzes your upload. If it recognizes the song, it will give the monetization royalties to the original song writer if the songwriter approves the cover. I have heard that people have changed the pitch of the song and google can still pick up on it. Sometimes you can change the pitch and squeak by but I would not suggest that you do this. The original songwriters deserve the royalties.
Facebook does not have the same monetization capabilities to redirect royalties. If you upload a drum cover directly to Facebook, you could get flagged or even get your page shut down. However, you can still upload your drum covers to YouTube and share them on Facebook. Here is a link to YouTube’s explanation on their policy:
YouTube Help: Monetizing Eligible Cover Videos
Music Videos
If you are a band or artist looking to make your own music video, then you don’t need to worry about recording audio for the video (assuming you already recorded the track in a studio). So your focus is completely on the visual aspect. Obviously, the DIY approach is effective for lesser known bands. With some creative visuals, you can really make some cool videos with the tools available today. Most of the dazzle will be in the editing and effects which I will go over in the Video Editing Software section.
Tutorials & Lessons
Tutorials and lessons are a great way to give back to the drumming community. If you build up enough followers, you could even put together a paid lesson or tutorial package to download in which could make some easy passive income. If you are doing any sort of tutorial that needs a screen recording from your computer, there’s a couple tools you’ll need to know about.
Screen Recording
Best

Adobe Captivate (Mac & PC) (commissioned links)
First of all, if you go with the Adobe All Apps plan, it will include Adobe Captivate which is a very powerful tool for doing screen recordings. This will record your screen while giving you options for recording separating out the audio as well. Obviously the best choice but you need to pay monthly for this package.
Not Too Expensive But Worth It
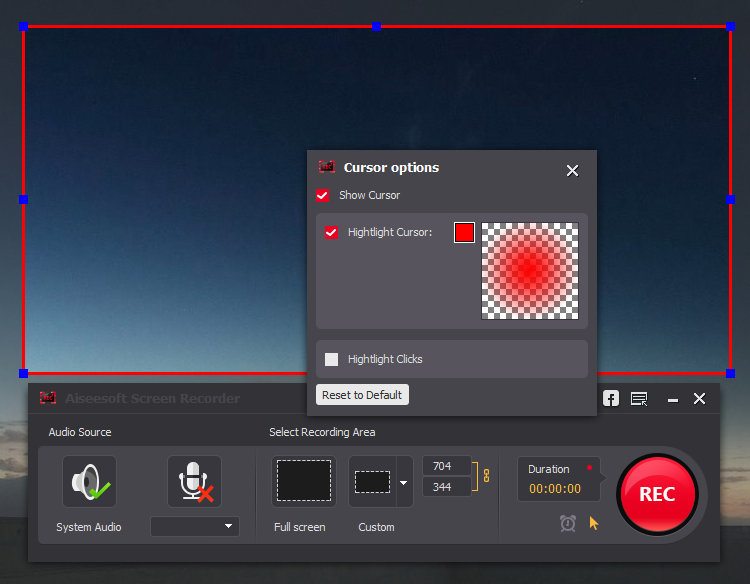
Aiseesoft Screen Recorder (Mac & PC) (commissioned links)
For a second choice, I have to suggest Aiseesoft Screen Recorder because it can capture audio and video at the same time AND it works on Mac or PC. It does cost a little money (like $40) but it’s worth it in the end if you’re doing a lot of tutorials. There's even a 30% discount code provided here! All of the other screen recording alternatives can get a bit complicated because they require a separate program to capture the computer's audio.
Free
If you're looking for something free, I still have you covered. Quicktime has a simple video screen capture feature and even gives you the option to have a flash on your mouse whenever you click it so the viewer doesn’t miss your clicks. It comes already installed on Macs and works for PC too with a download—yes even Windows 10. The best part is, it’s free.
To do a screen recording on Quicktime, just go up to File > Screen Recording and the record window will come up. The little down arrow next to the record button will allow you to pick the source of the microphone it will record. If the viewer doesn’t need to hear your computer audio for this video, you can just talk into your microphone while you record and it will record the audio with the video. The only downside is that Quicktime won’t record the computer’s audio while recording without another program (see next section).
Soundflower & iShowU Studio (Mac)
For Macs, you need Soundflower. It’s another free program which allows you to record the audio directly from your sound card while your recording your screen capture. Then, you can also talk into your microphone and record it with your computer audio at the same time.
I have used Soundflower for a long time and it has always worked well for me but it is a discontinued open source program. iShowU Studio is the new version of Soundflower but I never have used it. You can get information about both programs and how to set them up here since they can be a little tricky:
For PC, the best free option (optional donation) out there is called Voicemeeter Banana. There’s a bit of a learning curve with this program, but if free is what your looking for then this is it! It supports up to 5 channels of audio and has multi-channel EQ so there are plenty of features.
Video Editing Software
After you film all of this beautiful footage, you're going to need to edit it so it looks nice with text titles, fades, effects, etc. Here are some of the best and most affordable options.
Best
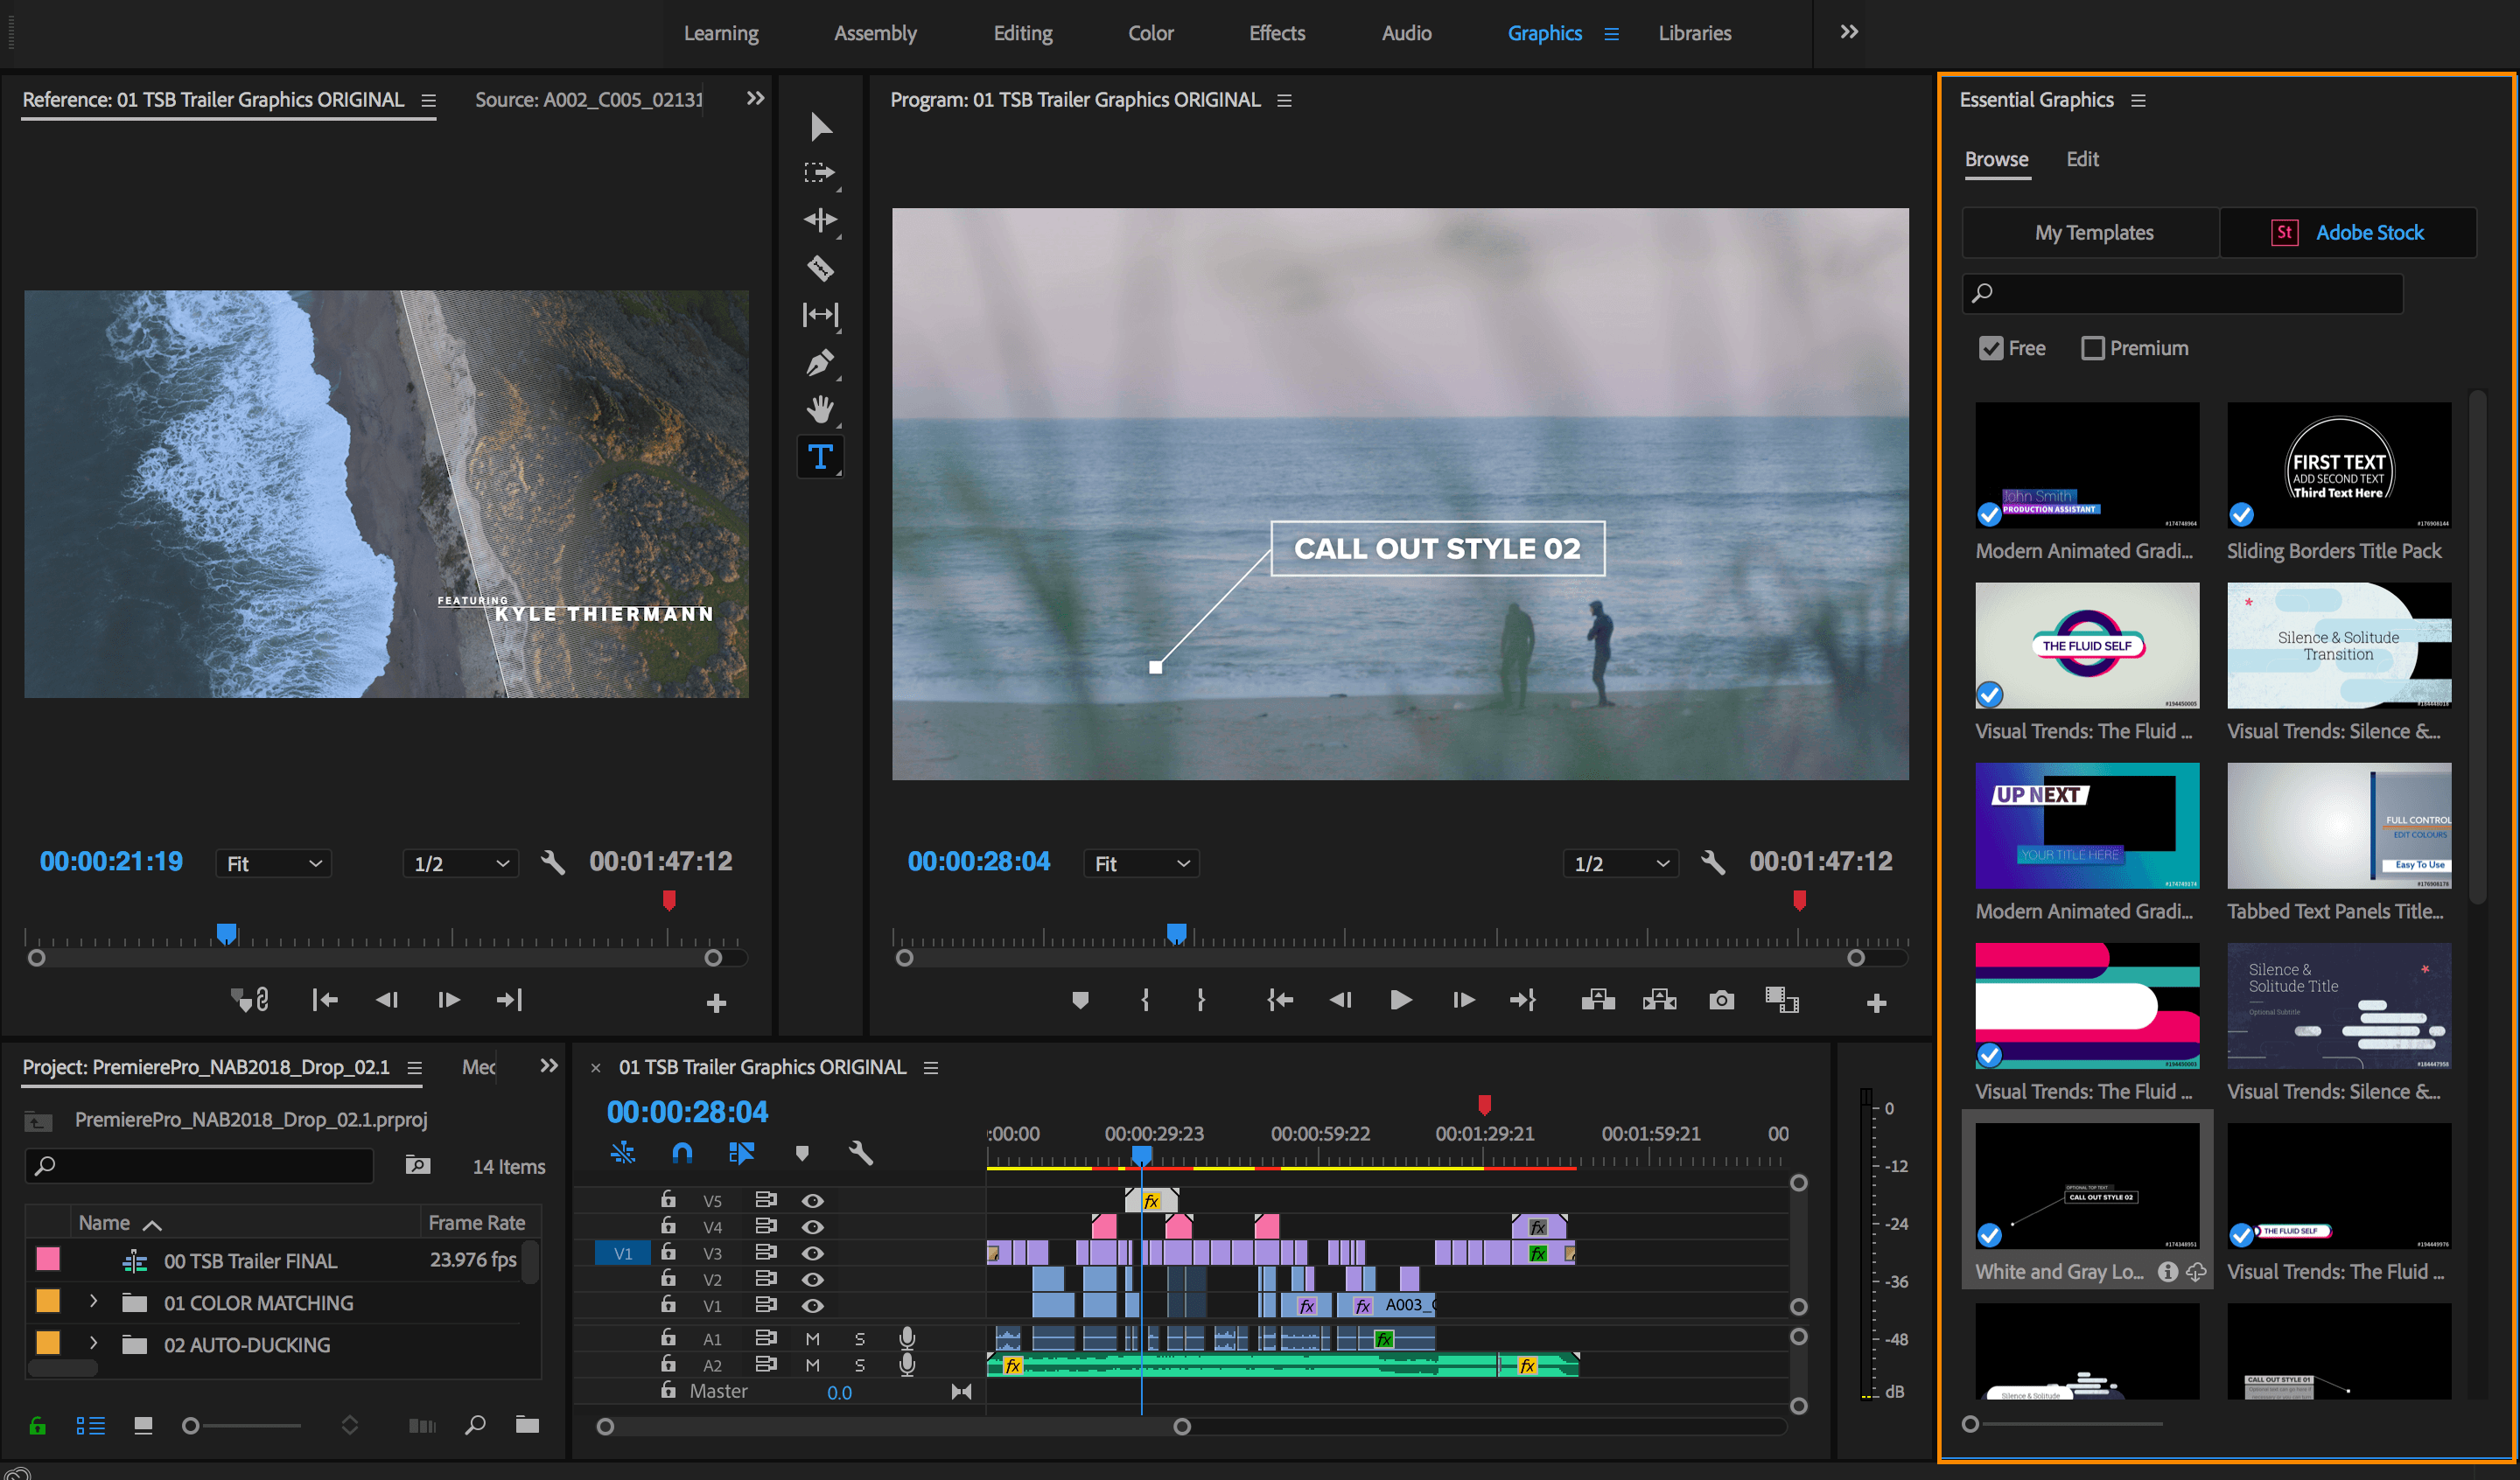
Adobe Premier Pro (Mac & PC) (commissioned links)
Adobe Premier Pro is an easy to use powerful video editing tool. I’ve already held the torch for Adobe up through this entire article so there’s no need to stop now! You can customize the user interface to make it simple and enhance your workflow and there are tons of useful filters you can use on your videos. If you bundle multiple programs in Adobe's plan, you will have a fully integrated set of programs to work with and find tons of other uses for them. A key integration is that you can edit files from Adobe Premiere Rush in Adobe Premier Pro--so the transfer from smartphone to editor is seamless (this is huge).
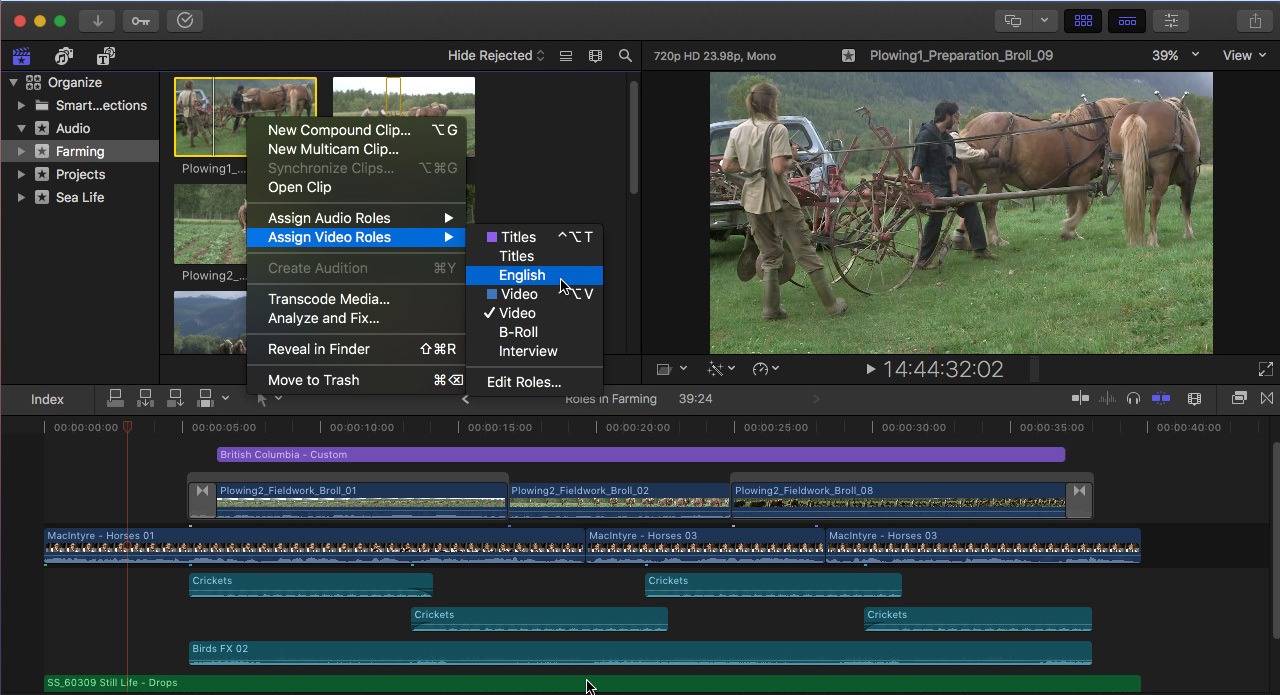
Final Cut Pro (Mac) (commissioned links)
For a mac, everyone knows that Final Cut Pro is a top notch video editing tool. The only problem is that it’s expensive. I couldn’t keep it off the list for those that love Mac products (which I do). It has extensive file format support so you shouldn't have trouble importing your videos regardless of the source. One of the things that makes Final Cut Pro unique is what they call the "trackless timeline" which can help you organize all of your media in your project. This is the standard for Macs---super user friendly and powerful. However, PC users have to look elsewhere.
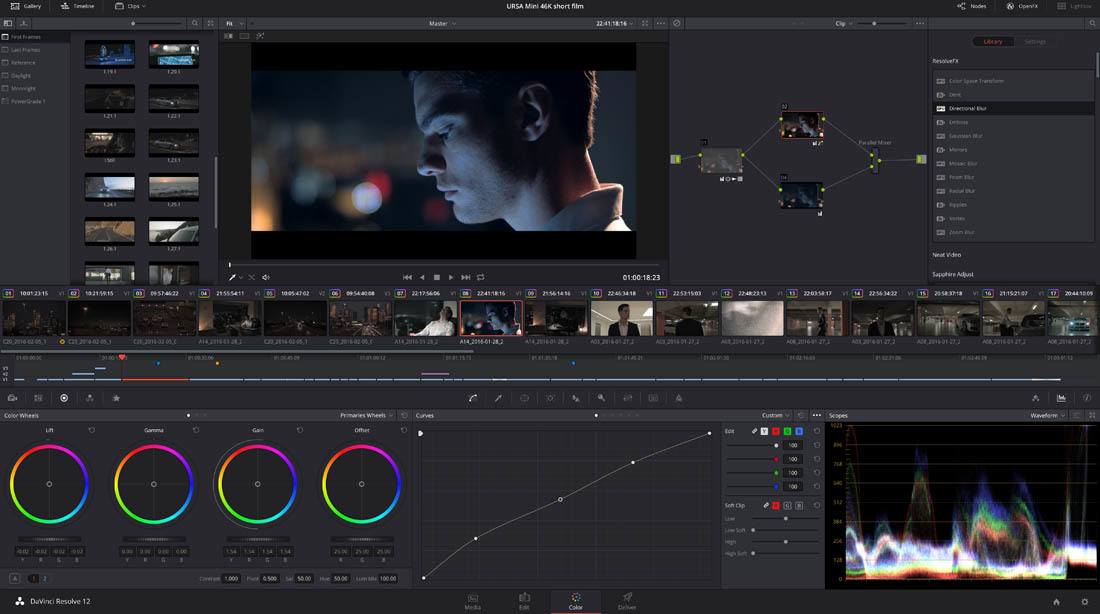
DaVinci Resolve Studio (Mac & PC) (commissioned links)
Now this one I consider the underdog that deserves a lot of credit. Expect top notch features comparable to Final Cut and Adobe Premier and compatibility with both Macs and PCs. This program used to be mainly a color correction specialist for video but recent updates have given it a lot of power and functionality. The audio mastering is a useful feature for our intentions to polish up your audio before you upload them. "DaVinci Resolve Studio" is their full version upgrade from "DaVinci Resolve" which is free (see below).
Not Too Expensive But Worth It

Adobe Premiere Elements (Mac & PC) (commissioned links)
So this is Adobe’s option to get away from monthly payments. For around $100, ‘Elements” doesn’t have all the features that Adobe Premier Pro has but it is more than adequate for editing drum videos. Again, Adobe is the best in the business.
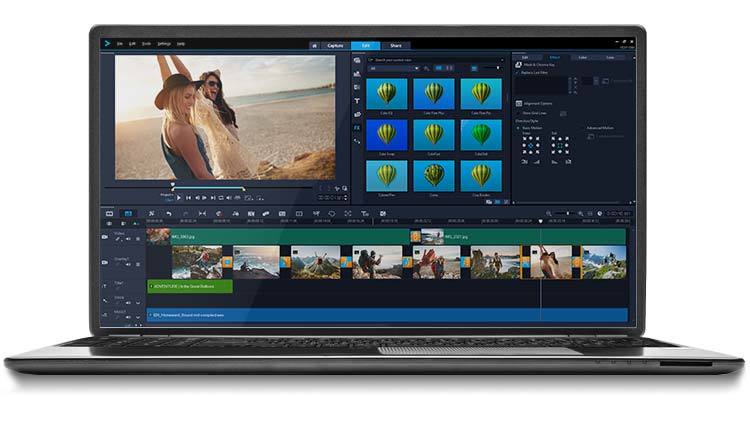
Corel Video Studio Ultimate (PC) (commissioned links)

Corel Video Studio Ultimate (2018) (PC) (commissioned links)
Corel Video Studio is an easy to use video editing program and it provides a little more features than some of its competitors. Still a powerful tool but not quite like the “Best” options above. I have been in love with Corel's products for a long time. I used to use Paint Shop Pro before Adobe took over graphic/video world. The thing with this editor is, you can pickup the newest version or an older version on Amazon for a discounted price.
Free
Ahhh yes, free is good. DaVinci Resolve is the freeware "beta" version of DaVinci Resolve Studio. It's great not having to cough up the cash right away and use it for free until you are ready for more features. This is by far my favorite choice for a free video editing software AND it works on a Mac or PC. So snag this up before they start charging for it! And of course, when you are ready, upgrade to the “Studio” version and you’ll be using a program that is as powerful as just about anything out there.
Everyone with a Mac knows iMovie. For a free video editor, it is very powerful. This program comes preinstalled on Mac computers. The problem I have with this program came when they updated it a while back and completely changed the functionality. At that point, it became unusable for me. However, I still know a lot of people that use it and love it…and it’s free.
I think I should mention a little something about Lightworks. It is yet another free video editing software option. I used it for quite a while but there were 2 quirks that pushed me away. First, it does not work the way most editing software works. There are a lot of tutorials online but everytime I start a new project, I have to relearn what I forgot because it functions in such a unique way. Secondly, the free version only lets you export in 720p. Those two cons were enough for me to look elsewhere.
So, the absolute cheapest way to go would include:
You can really get by spending only about $170. Then, if you want to upgrade from there; ie more camera angles, better sound, more editing power/effects, simpler workflow...you go up from there.
There you have it—everything you need to start making drum videos. If you have any suggestions, questions or just want to show me your videos, then comment below.
Thanks for reading!
**Full Disclosure: I earn a commission if you click any of these links and make a purchase, at no additional cost to you.**
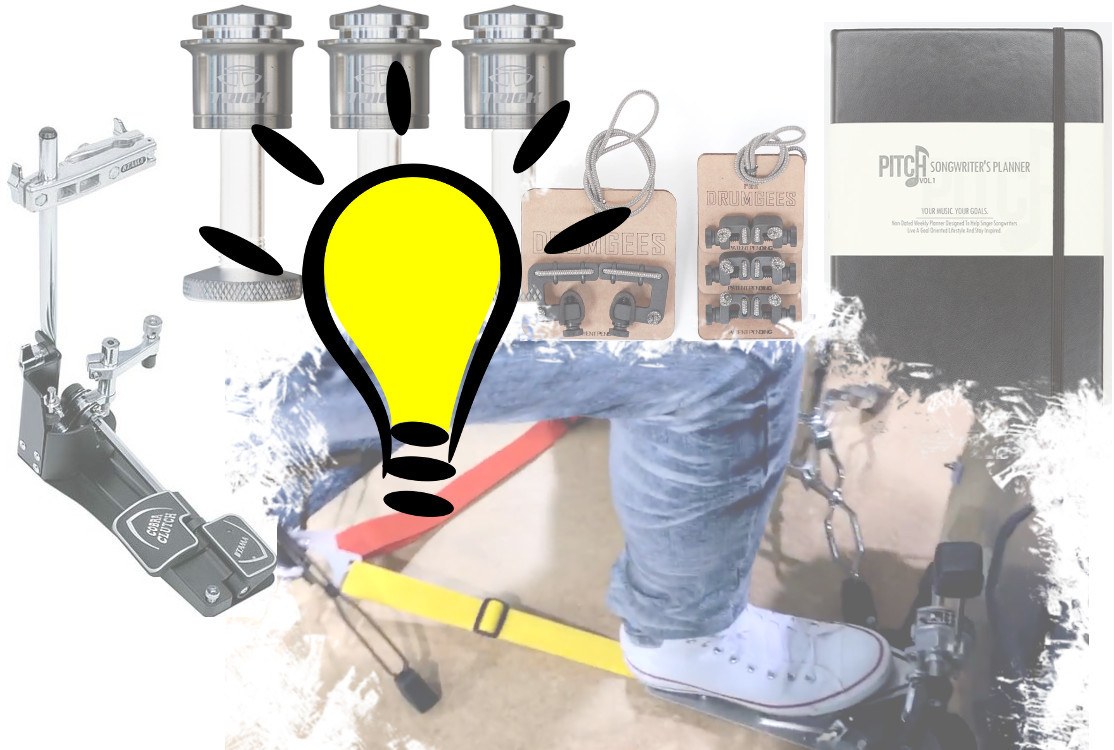
We’ve all seen the “top gifts for drummers” and “essential gear” articles, but I haven’t seen many articles listing the uniquely useful drum gadgets. Some of these you have probably heard about but I’m willing to bet you haven’t heard of all of these. I use almost all of these regularly and I plan to eventually buy all of them. I just couldn’t wait to share all of the cool drum gear that you didn’t know you needed with optional drum hacks!
Tama Cobra Clutch (DISCONTINUED)
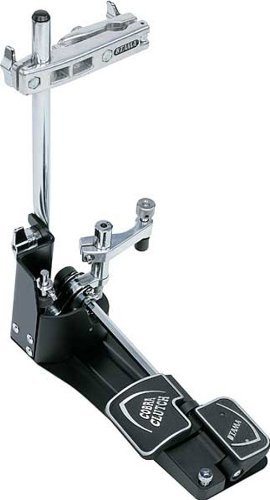
TAMA TAMHH905XP Cobra Clutch (view item on Amazon.com) (commissioned links)
The Tama Cobra Clutch is a product that has solved a problem for double bass drummers ever since Louie Bellson brought them to the bandstand. When you move your foot from your hi-hat to your second bass drum pedal, you relinquish the control of the hi-hat foot pedal and how much you want the cymbals open or closed. This clutch allows you to set your hi-hat at any level of openness with the push of a pedal. You can have your hi-hats tightly closed or slightly open for a sloshy sound while you play double bass.
Regular hi-hat clutch users, such as myself, have long desired having an option for the amount of slosh when playing double bass. Most drummers remedy this by setting their hi-hat to slightly open and never touching it. This is at the sacrifice of not having the option for a hi-hat wide open nor a loud 'chick' sound when using the hi-hat with your foot. At a hefty price tag, you can solve these problems with the Tama Cobra Clutch. This pedal sits to the side of your hi-hat pedal to easily set and unset.
Drum Hack
I think their needs to be a more affordable product to achieve the slosh sound when playing double bass. Long before this even came out, I came up with my own drum hack that literally costs around a dollar. Simply buy a strong spring that can fit around your hi-hat shaft. Most hi-hat stands have a 1/4" shaft so you would need a 3/8" spring like this one: 3/8" by 3/4" spring. Cut it to length and place it in between the two cymbals. This will hold the top cymbal up slightly when your regular hi-hat clutch is dis-engaged for a slosh and still allow for your pedal to work when the clutch is engaged.
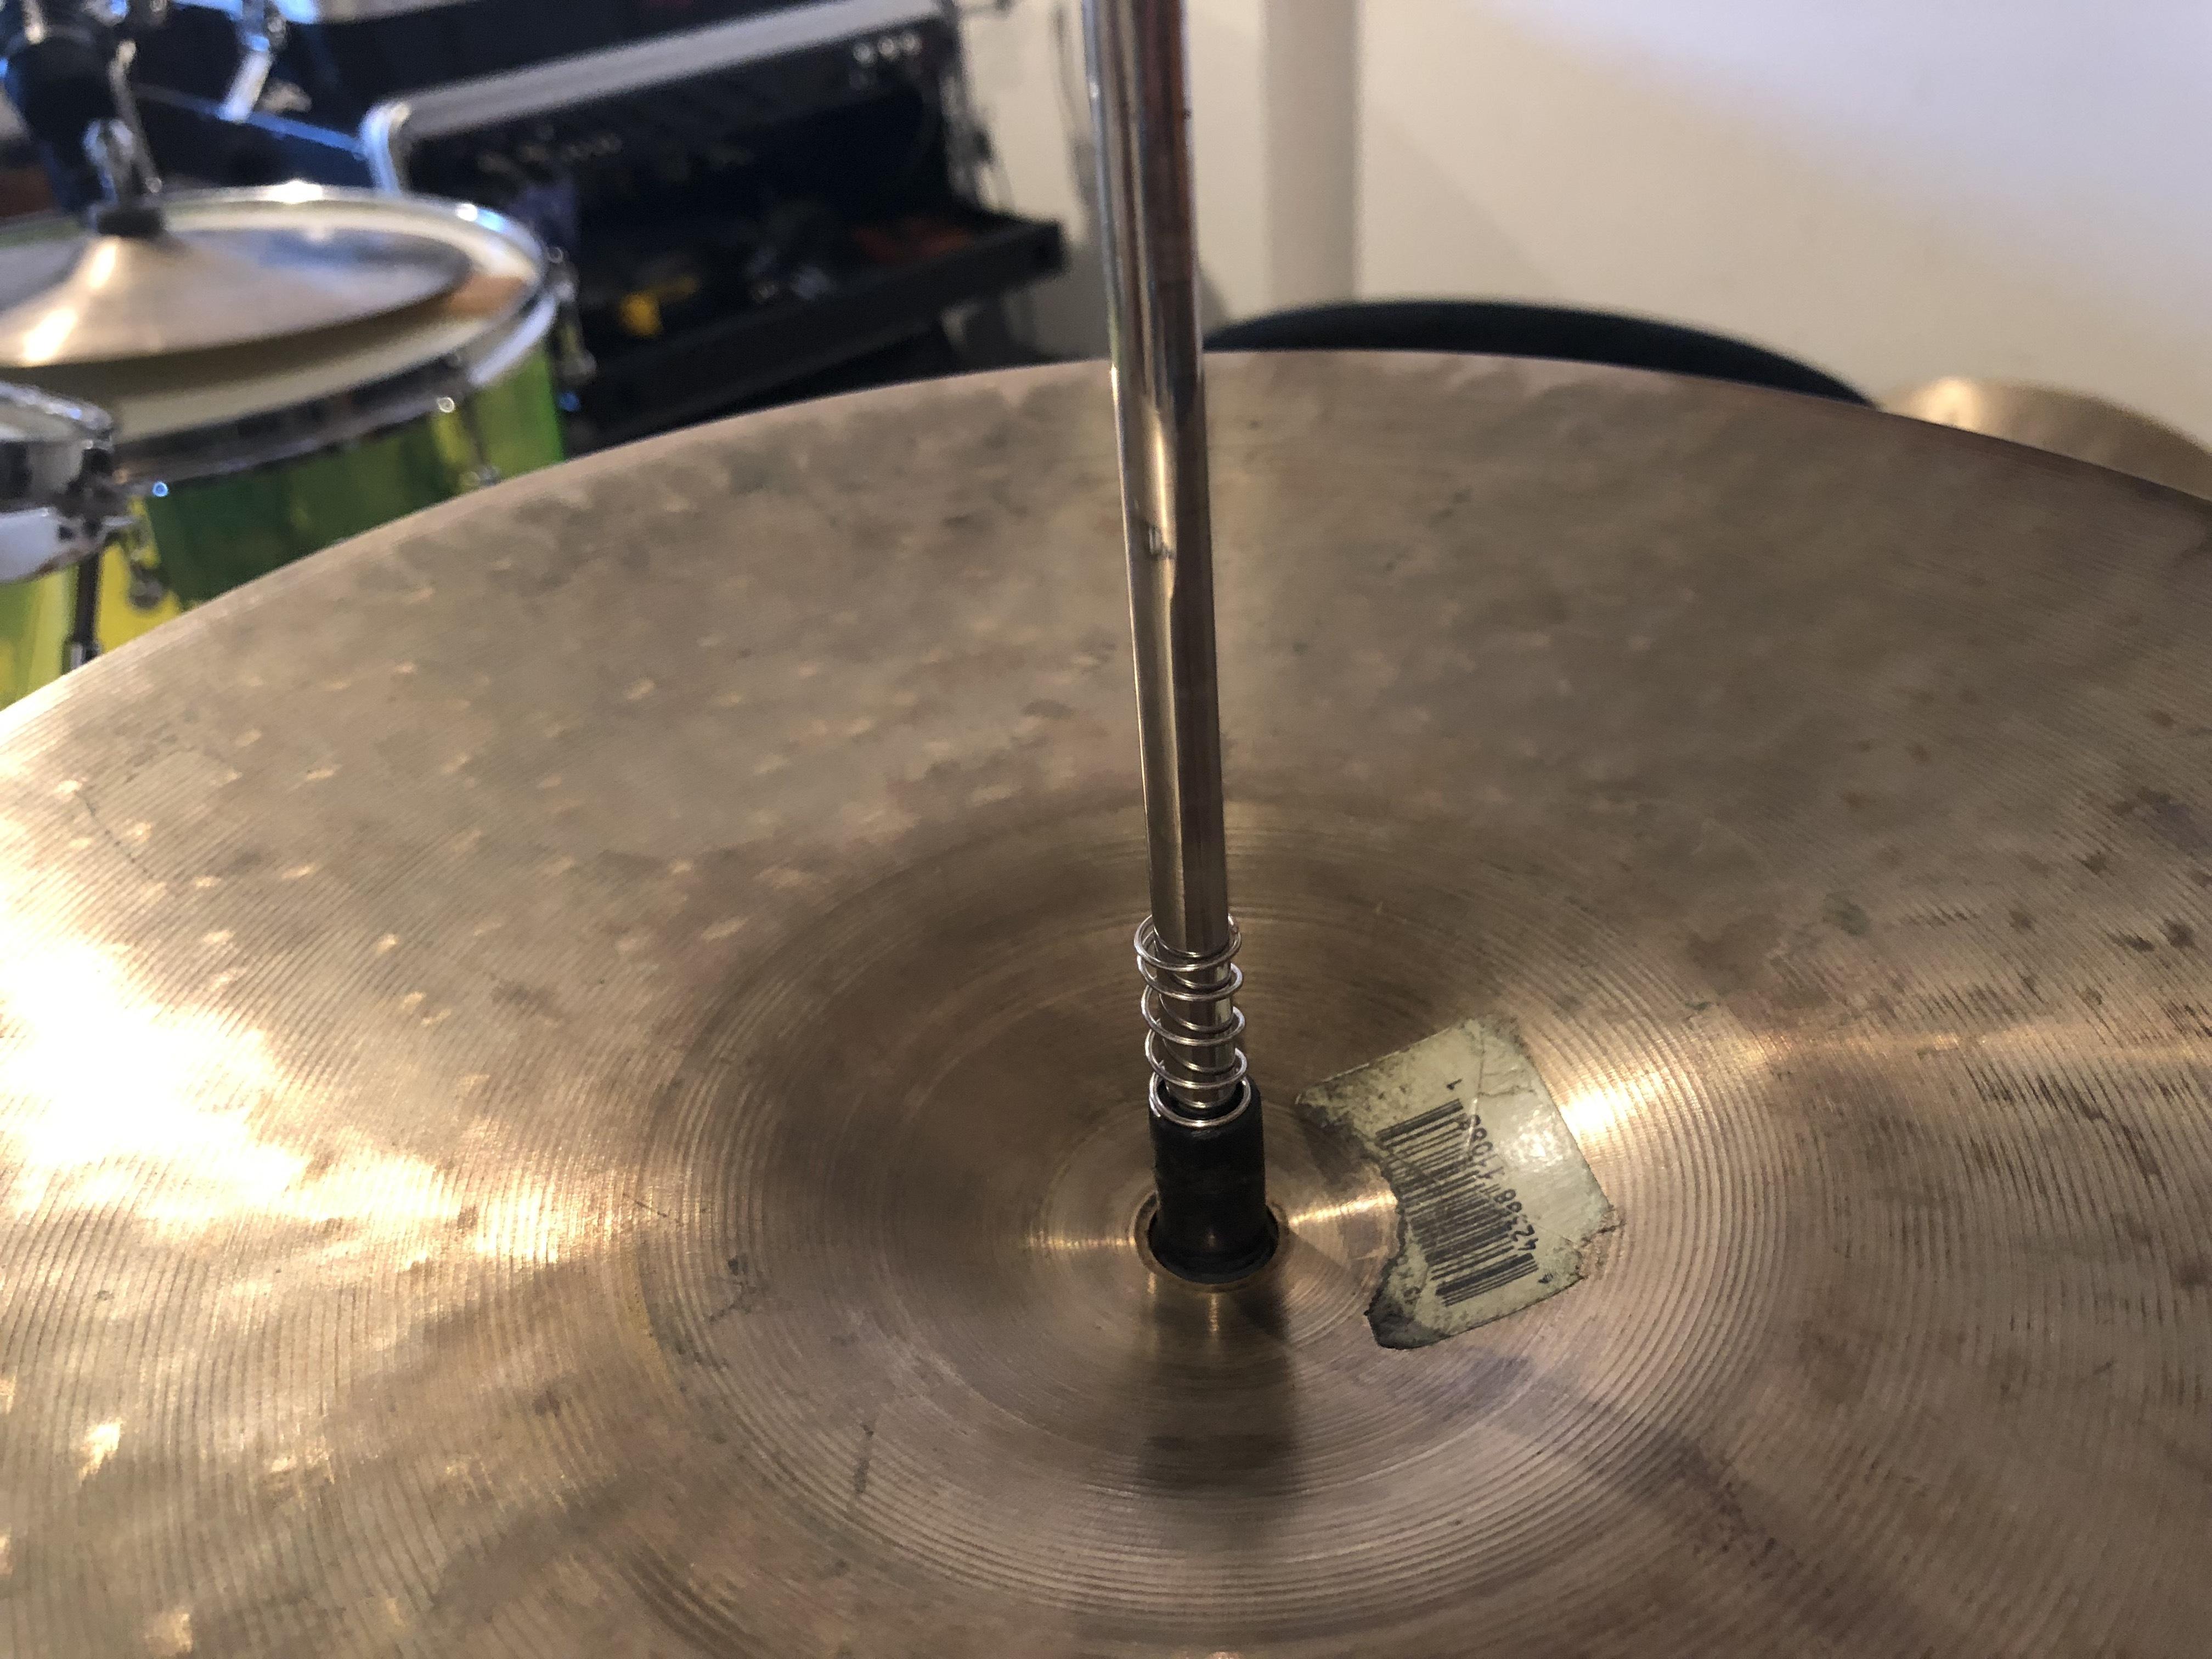
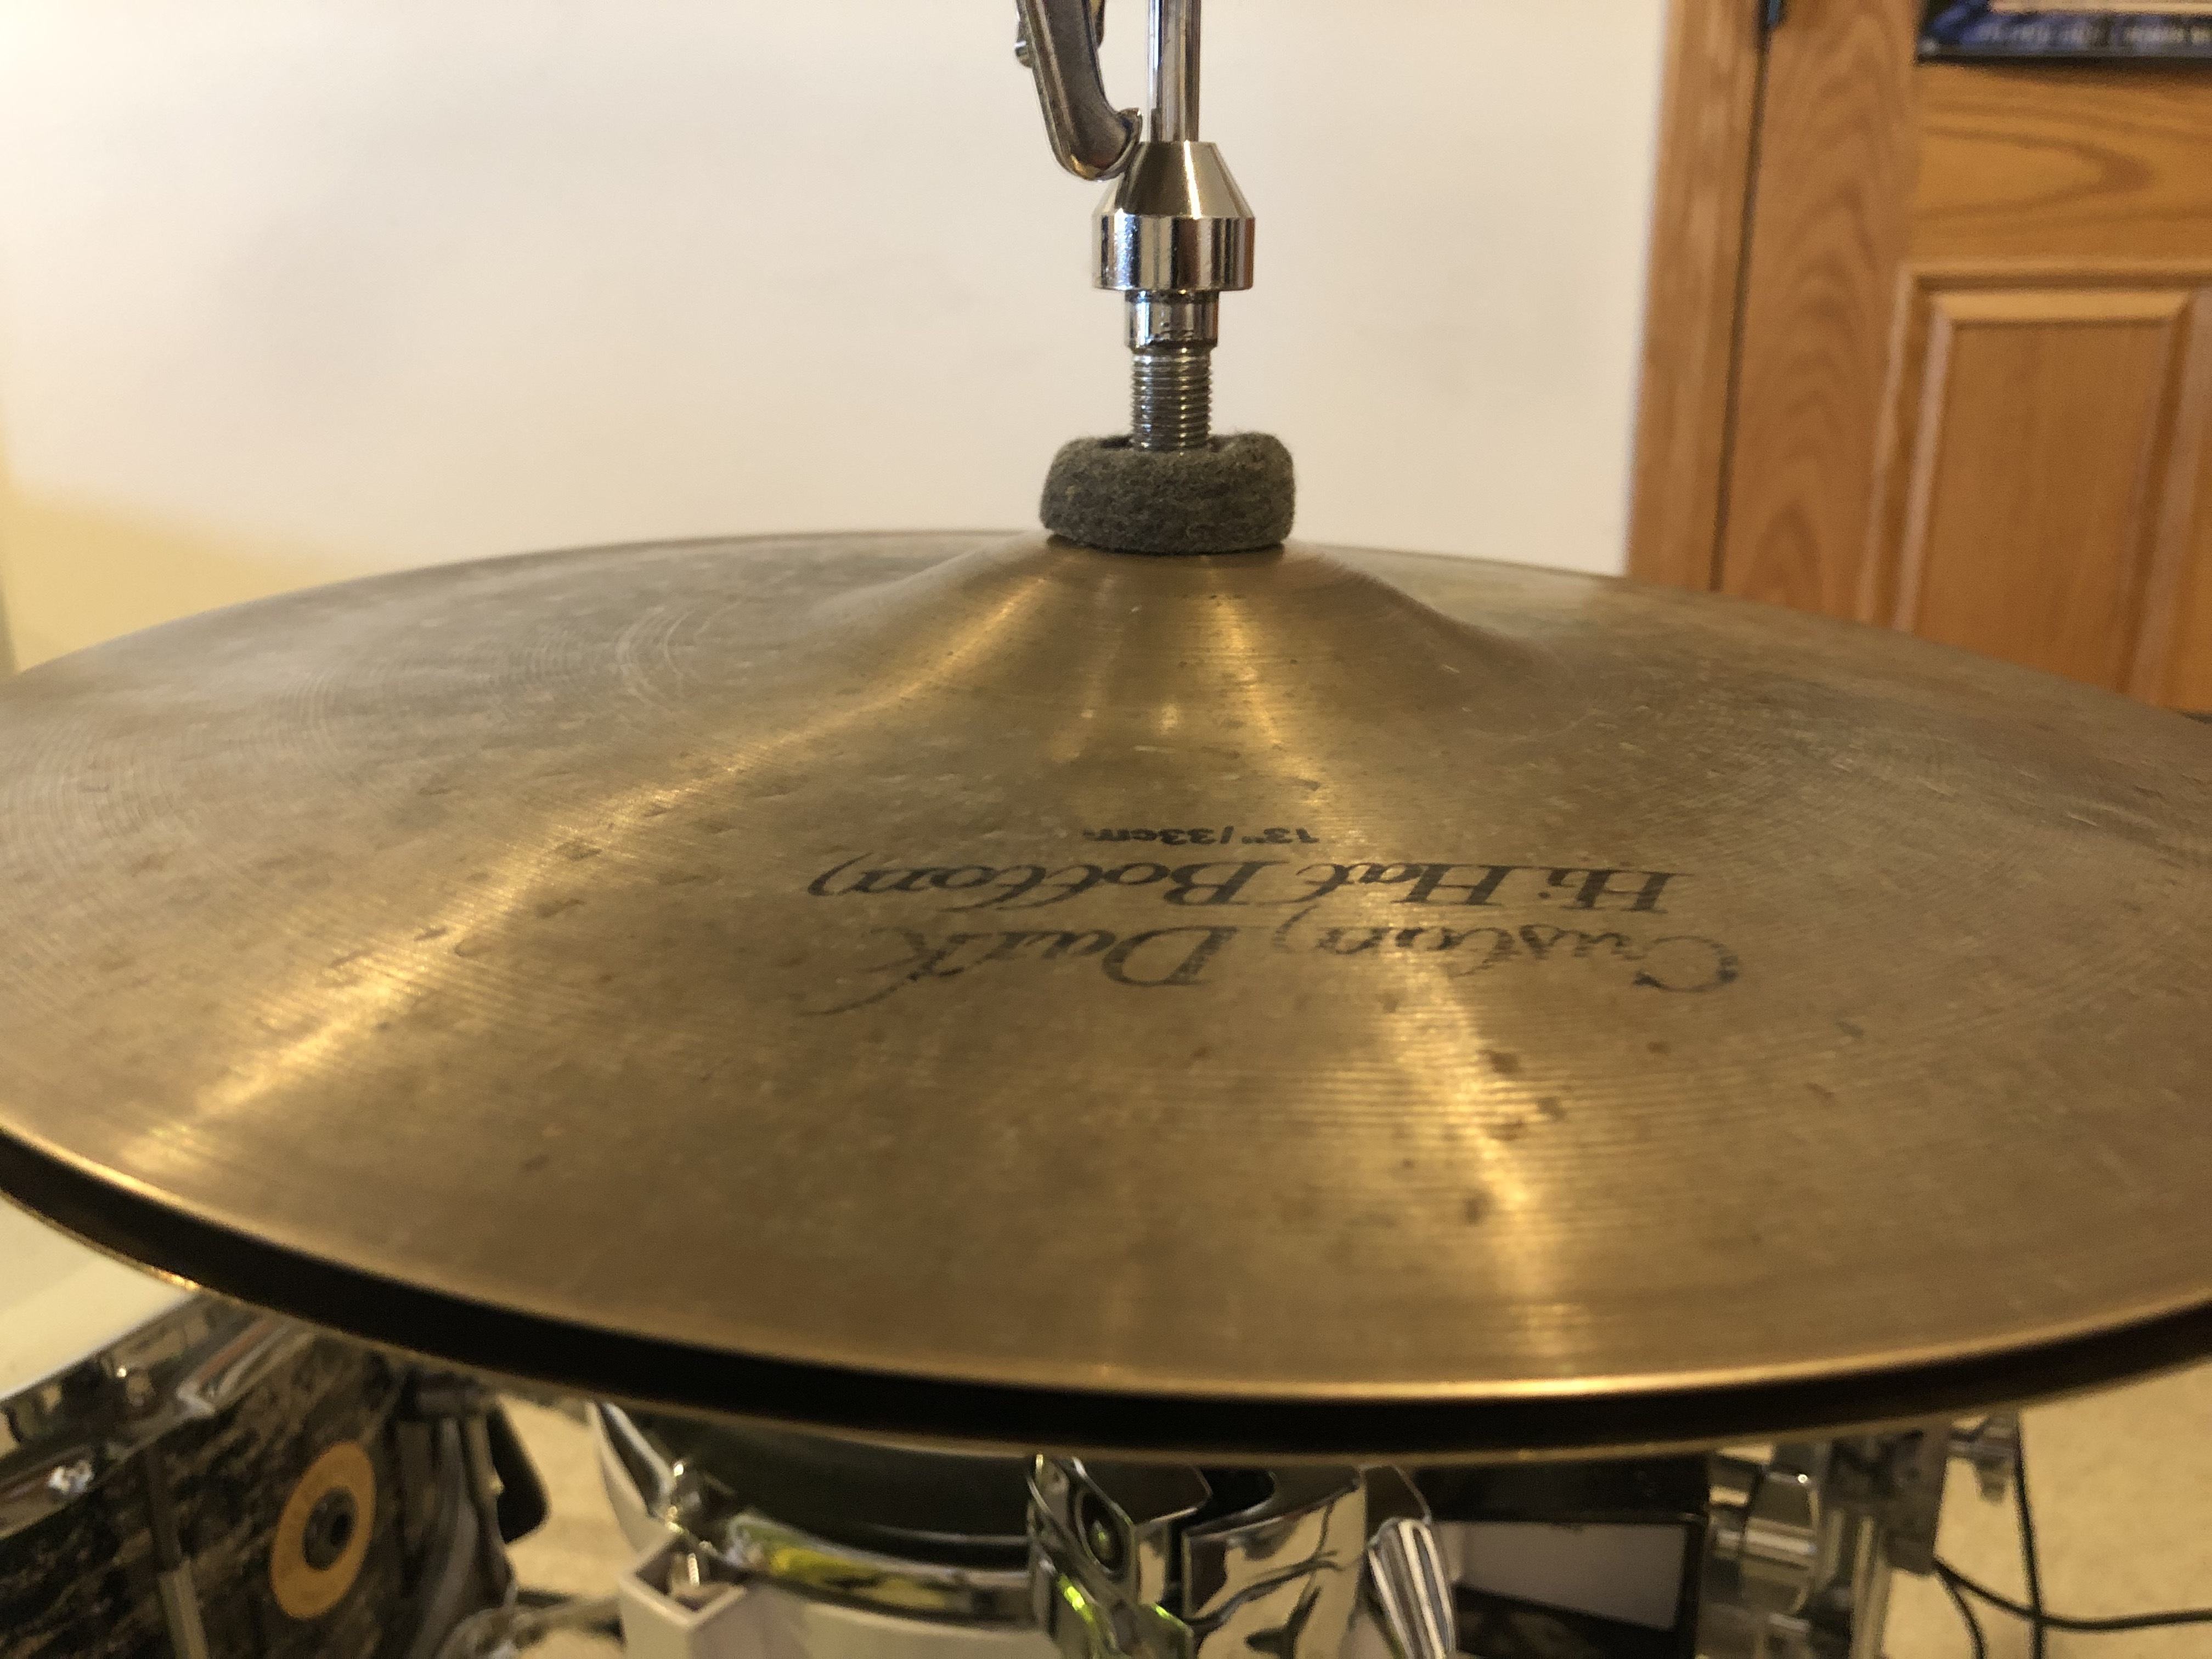
However, this only gives you the option for slosh when playing double bass. Gavin Harrison likes to have the option for slosh or tight as he explains in this official Tama video:
Meinl Cymbal Tuners

Meinl Cymbals MCT Tuners (view item on Amazon.com) (commissioned links)
A lot of people talk about the Meinl tuners in articles like this so you have probably heard of them. There are mixed reviews on these and I think there's a couple things that need to be said about them. First of all, they don't just make you cymbal quieter. They transform your cymbal into a different but more quiet cymbal depending on where you place the magnets. I like the sounds I can get out of these, but it does depend on the cymbal you are using. I would urge your local drum shop to keep a set of these in the cymbal room so you can test them on different cymbals.
So, yes, these do make your cymbals more quiet at the expense of sometimes wanted overtones. If you want quiet cymbals, you really need to learn to play them more quiet with finesse. This is an important skill to work on especially when you're in the studio. If you are playing your cymbals too loud, it will bleed into the other microphones requiring you to gate or use other production techniques. It can also completely take over your overhead mics forcing you to turn down the overheads at the expense of losing bulk and essential overall room sound. Keep that in mind if you buy this product.
Drum Hack
There are some cheaper options to achieve this but they may not work as well as the Meinl tuners. I used to put duct tape on the underside of the cymbal but it left a nasty residue. Then I heard about these super strong neodymium rare earth magnets online for a fraction of the cost. You just need to put some sort of adhesive felt on them so they don't scratch your cymbal. I have not tried this but have heard that they work just as well. Comment below if you have tried this!

Nexlevl Super Strong Mini Fridge Magnets 1/4" x 1/16" (view item on Amazon.com) (commissioned links)
Gibraltar Shock Mount Cymbal Adapter

Gibraltar SC-GMCMA Shock Mount Cymbal Adaptor (view item on Amazon.com) (commissioned links)
I usually have more cymbal stands sitting around rather than mic stands. This is perfect for that. It mounts to most cymbal stands. This product is intended for use on a cymbal stand when you have a cymbal mounted as well, that is why it also has shock absorption. It also absorbs the shock when you mount the stand on a rack.
I have wrapped tape onto cymbal stands so I could mount mic clips on them but this only works for a while until they fall off, damaging your microphone. I was definitely happy to find this product! I see the reviews aren't very good but that's because the rubber piece, which absorbs the shock, breaks...just be careful!
Drumgees
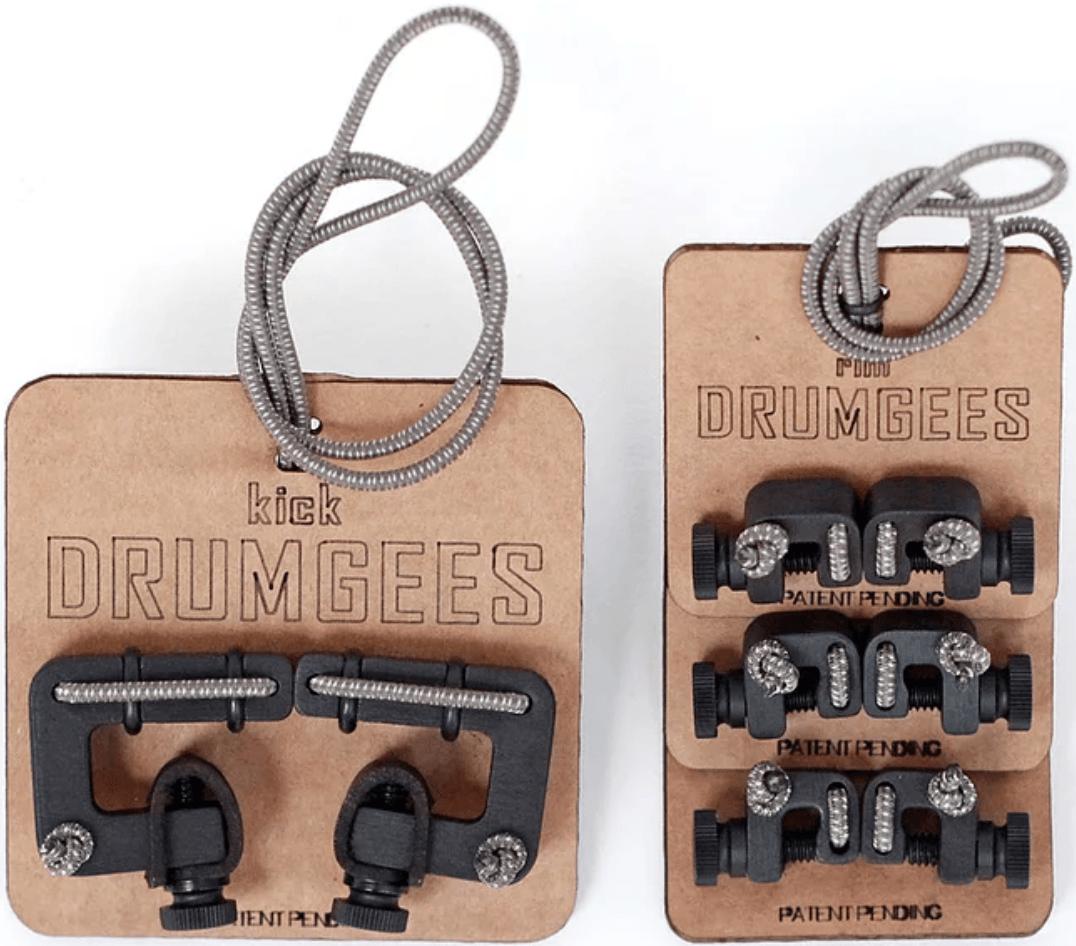
Drumgees (view item on Drumgees homepage) (commissioned links)
This product allows you to "bungee" any sound source to a drum. If you have ever experimented with putting pans, towels, or anything else on your drums, these hold them in place. They also have clips that can quickly and easily secure them into place. This is right up my alley, I just wish they weren't so spendy!
Drum Hack
I hate to suggest this option because I like to support small businesses but there are some decent options that are WAY cheaper. Just buy a mini bungee cord with a plastic hook (to prevent scratching). I found these elastic buckle cords on Amazon and the hook works well with a drum rim. You can untie the bungee and put a second hook on it. They won't work as well as the Drumgees though...especially with their the ease of use when playing live.
Drumlites
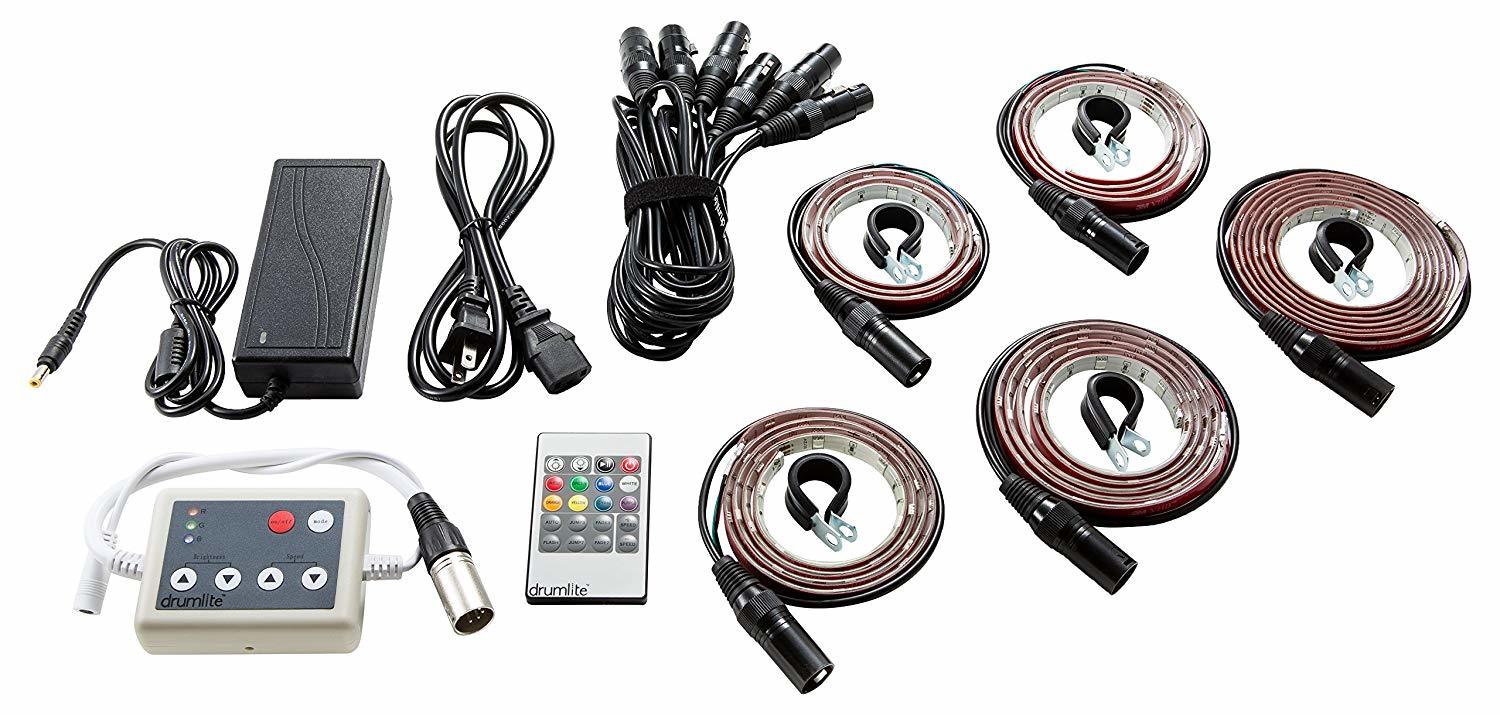
DrumLite Electronic Drum Accessory DL2N (view item on Amazon.com) (commissioned links)
These Drumlites are amazing! I have an acrylic "see-through" drum set but these also work great with wooden kits. The remote control allows you to pick a bunch of different presets and colors. I chose to buy the Global DMX Controller so I could have the lights react to my music. This is definitely the way to go because with DMX control, you can do anything.
I will mention that the Global DMX Controller only allows you to show the same color on all the Drumlites you have (hence the name global). However, the Independent Controller with DMX Function allows you the ultimate control to do anything...at a really hefty price tag!
They also sell Drumlites that are triggered by sound, but they are not interchangeable or upgradable to the DMX controlled lights. I easily found a way to trigger the DMX controlled lights by sound with my setup in Ableton Live. But, in order to use it on each drum separately, I would have to buy the independent controller. That's where the triggered Drumlites are much more affordable. I still chose the Global DMX Controller for now with hopes to eventually upgrade to the independent controller.
My drum transcription video of "Moon" by Little People shows the first time I programmed my Drumlites in sync with the music. Check it out here: Moon by Little People - Drum Transcription by Robin Rapsys
Here are a couple official videos from Drumlite with Coop3rDrumm3r explaining their setup and uses. The second video shows their "triggered" version which cannot be interchangeable with the DMX controller. Like I said, with a little setup, you can easily do this with Ableton and a DMX controller. I will be releasing some videos on how I do this soon.
Trick Drums Cymbal Quick Release
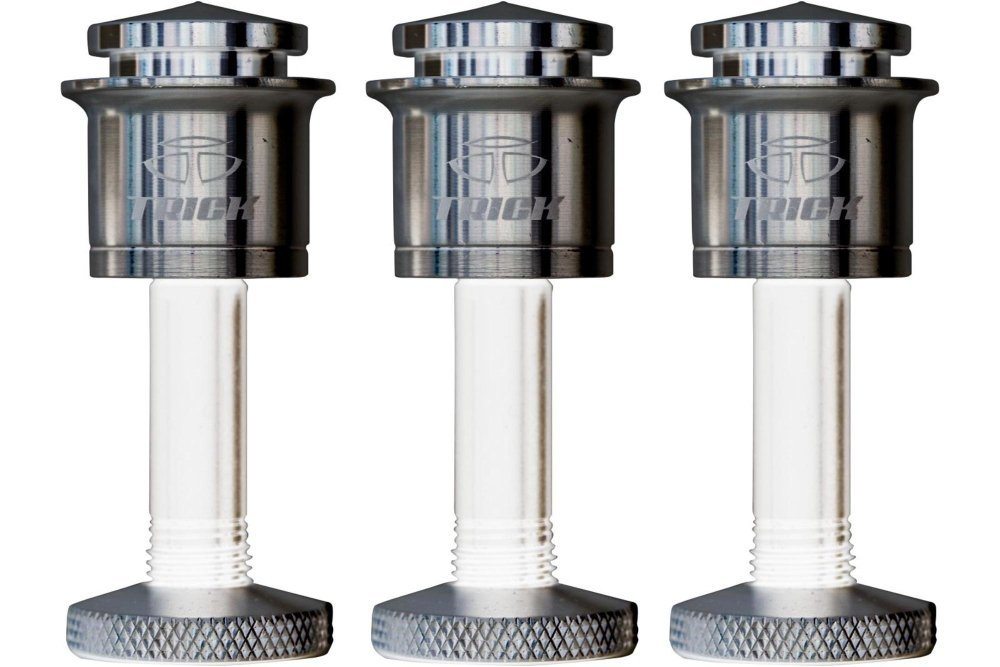
Trick Cymbal Quick Release 3-pack (view item on Amazon.com) (commissioned links)
The Trick Drums Cymbal Quick Release is by far the best of its type. There's a reason they're so expensive! They screw onto almost any cymbal stand, include felt washers, adjust for tightness, and of course...quick release when you pull on the top. And trust me, they do not "accidentally" pop off.
I have to be honest, the Tama Quick-set Cymbal Mates do not work very well; they fall off numerous times on a gig. The Vater Slick Nut works pretty well but you do have to adjust them with an allen wrench every so often and they can also mess up the threads on your stand. I spent $60 on three of the Trick Quick Releases and I am set forever...no more problems! Amazon also offers the Trick Cymbal Quick Release as a 2-pack or a 1-pack.
The KickStrap - Bass Drum Creep Solution
This is the best solution for bass drum creep I have found. It's basically a strap that hooks to your bass drum pedal or hi-hat foot pedal and then to the center pipe of your drum throne. There's another product out there called "KickLock" which is similar to this product. However with KickLock, the strap hooks to one of the throne legs so I would have a concern of accidentally lifting my throne leg while I'm playing and disconnecting the KickLock. It also wouldn't work with raised bass drums because the strap attaches to the lugs of your bass drum causing the strap to sit up off of the ground and trip you up when you move or stand during play.
The people at Kickstrap are very nice and have great customer service. That kind of thing goes a long way and I like to support businesses that care about their customers! When you order, they will help make sure you are getting the correct KickStrap that will fit your pedal. I had a great experience overall with Benson's Music and the KickStrap.

Meinl Cymbal Bacon
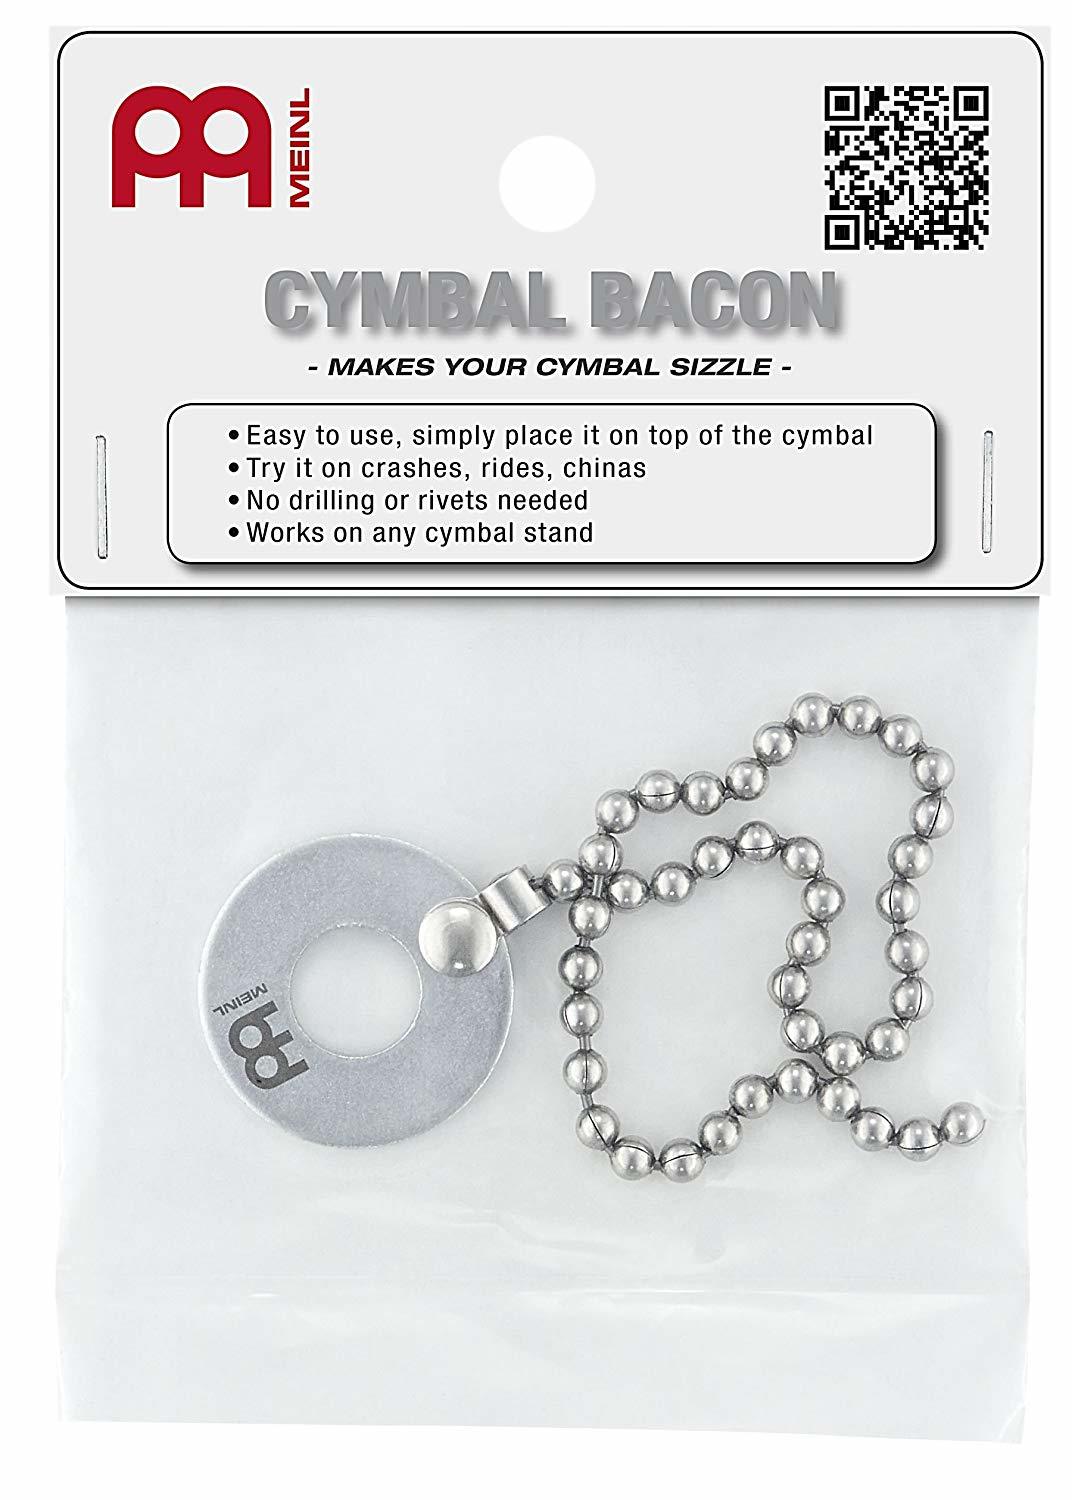
Meinl Cymbal Bacon (view item on Amazon.com) (commissioned links)
The Meinl Cymbal Bacon is a pretty well known product to create a sizzle effect on your ride or crash cymbal. I found this one to work the best because it's not so bulky and the built-in washer fits right on top of your felt washer. I didn't like the Pro-Mark Sizzlers because they were too bulky. The built-in felt and plastic piece didn't fit on some cymbal stands too.
Drum Hack
Of course, you can always take a necklace and drape it over you cymbal stand. Sometimes you need a piece of tape or something to secure it to the cymbal stand. I found that the "dog tag" style necklaces create the best sound which is the same material as the Cymbal Bacon. However, most necklaces will cost more than the Cymbal Bacon and require an extra step to secure it. But, if you have an extra necklace lying around, it could be a quick solution.
Zildjian Anti-Vibe Sticks
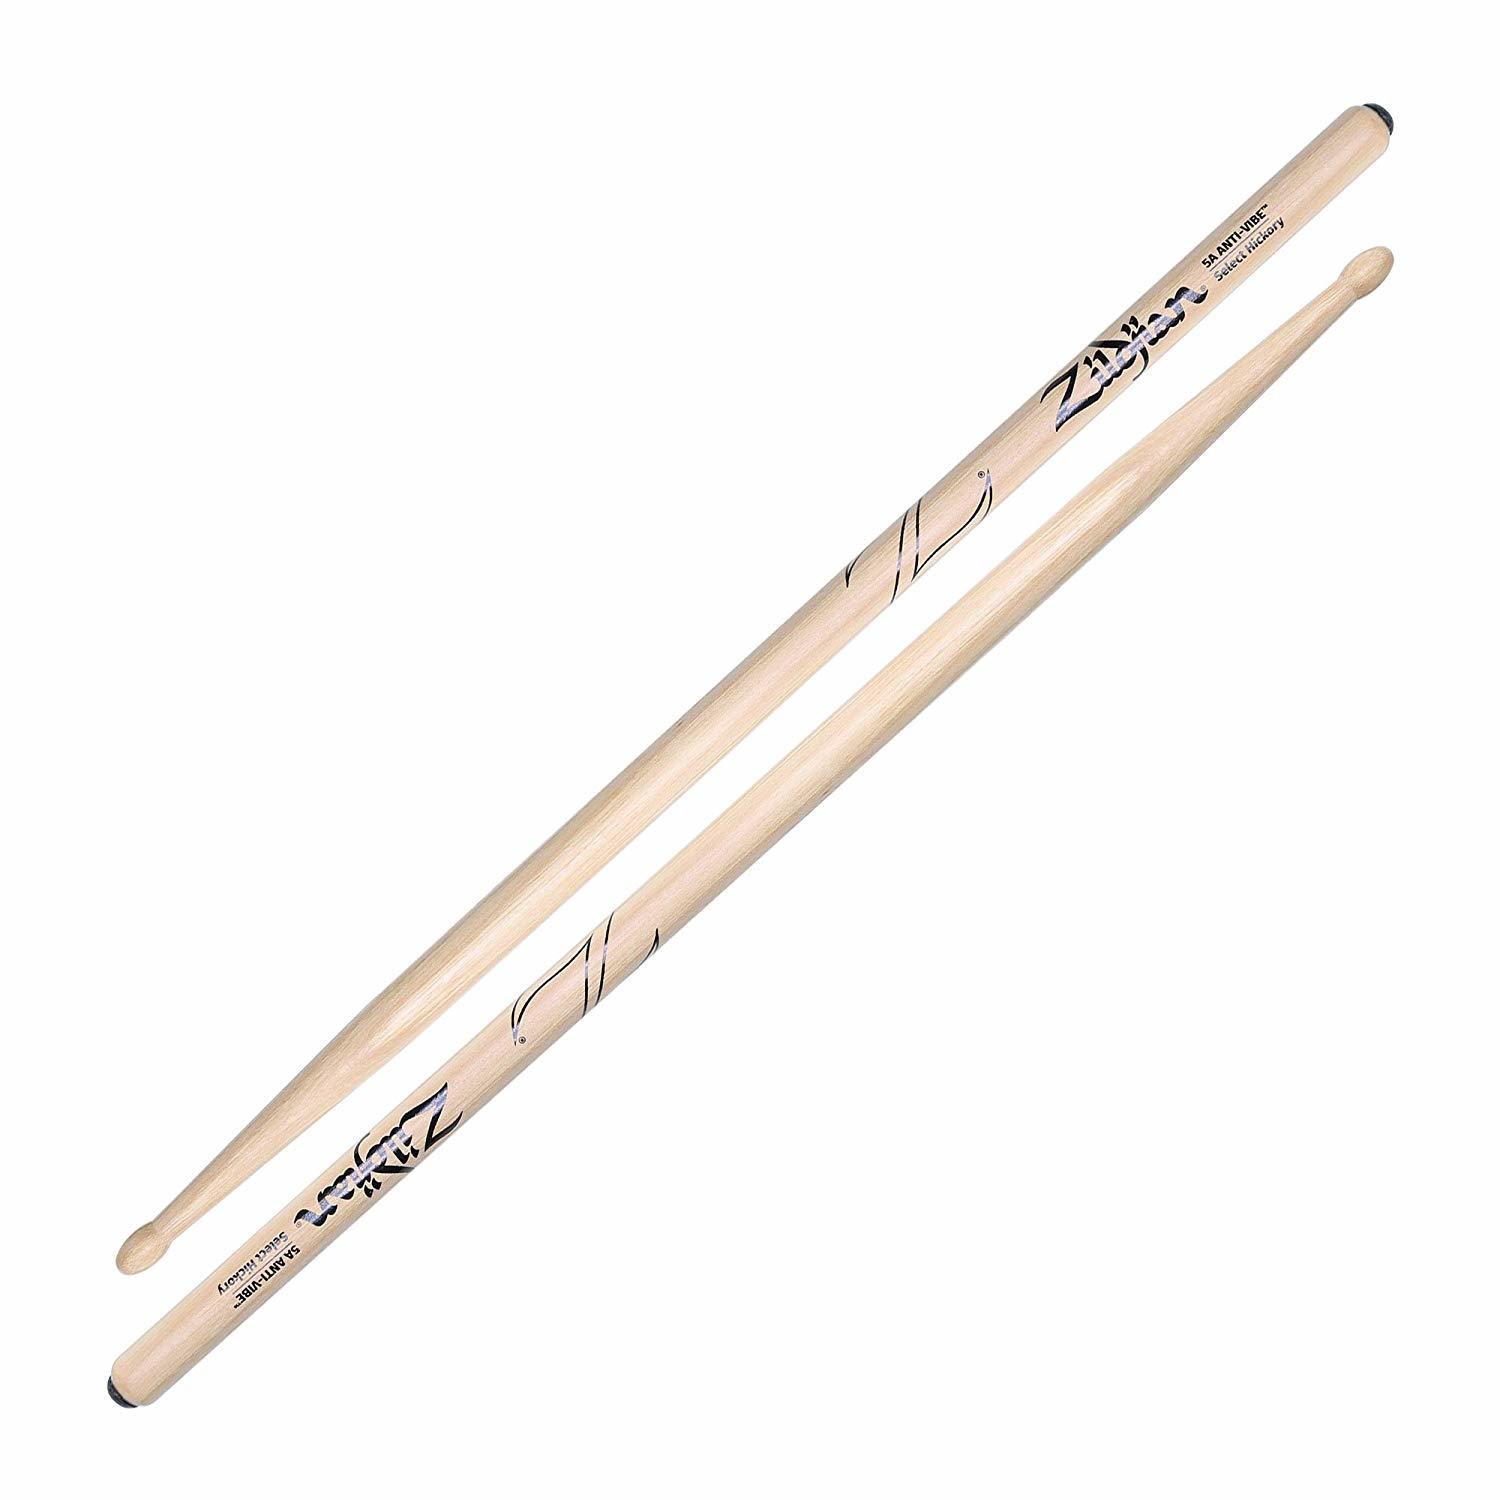
Zildjian 5A Wood Tip Anti-Vibe Sticks (view item on Amazon.com) (commissioned links)
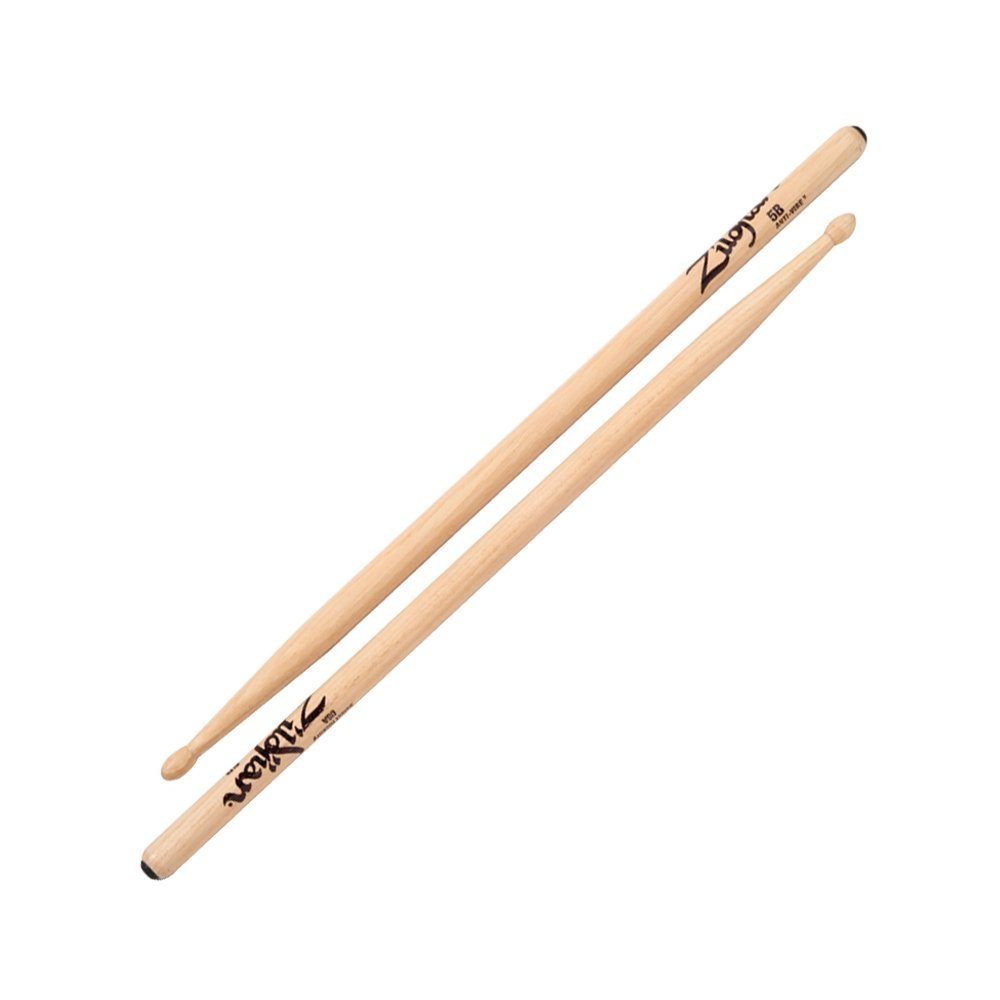
Zildjian 5B Anti-Vibe Sticks - Nylon or Wood Tip, Colored Dips, Birch, Natural, Maple (view item on Amazon.com) (commissioned links)
Have you seen the Zildjian Anti-Vibe Sticks before? They've been around for a while, but they've come a long way. They now offer them with colored dip grips, birch, natural, or maple and nylon or wood tips. There is a little nub on the back end that drastically reduces vibrations from coming down the stick which can cause wear on your wrists, elbows, and shoulders. They feel really nice but the rebound is very different and they take some getting used to. If you have any sort of pain in your hands, wrist, or arms, these sticks can help with that. I think the vibration reducing sticks will become more common in drumming. Anything to prolong the ability to play drums is a good thing!
Pearl Drum Key (Multi-Tool)
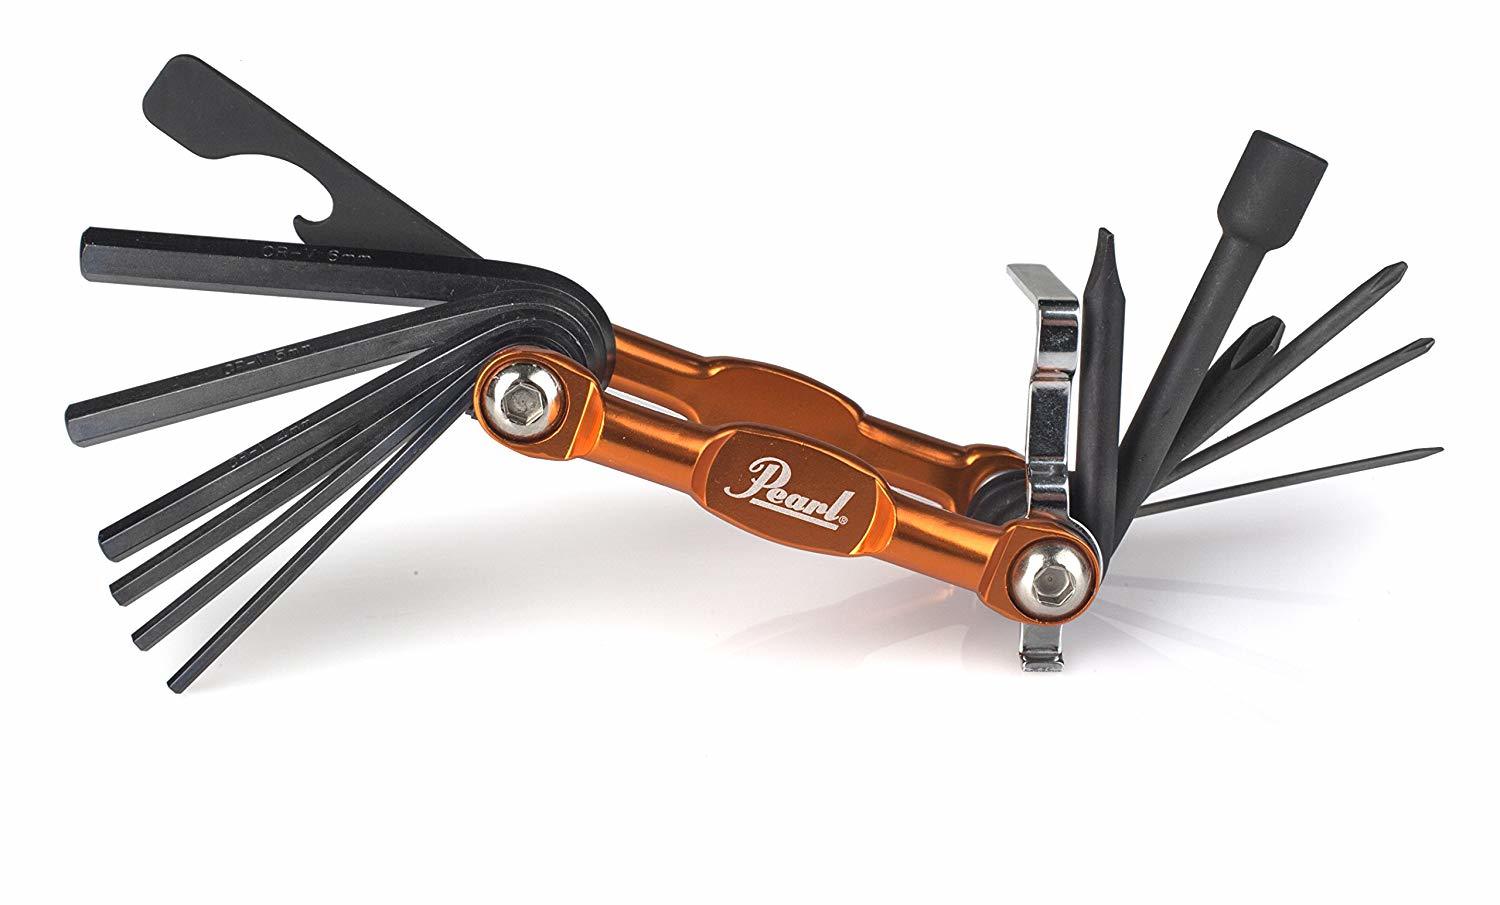
Pearl PTT13 Drum Key (view item on Amazon.com) (commissioned links)
I used to keep a little ziplock bag in my stick bag with allen wrenches, screwdrivers, drum keys, etc. This Pearl Drum Key Multi-Tool alleviates all of that. Vic Firth, Tama, and Zildjian all make a similar version of a multi-tool but Pearl's design is better. It has more allen wrench sizes, more screwdriver sizes, and longer shafts. CruzTOOLs also makes a very similar product that is great, but Pearl 'one-upped' them by adding a bottle opener and a couple more screwdriver sizes. I prefer using this to tune my drums as well because the grip is better than any standard drum key. Definitely the best drum multi-tool on the market.
Tama Tension Locks

Tama Tension Locks (view item on Amazon.com) (commissioned links)
Tama Tension Locks lock your tension rods in place so your drums don't go out of tune while you're playing. There are a bunch of other products out there for this issue but these are the best ones. Why? Well, some of the other products out there wrap around the tension rods underneath the drum hoop which make tuning and changing heads a complete headache. The products that snap onto the top of the rods (Gibraltar Lug Locks, Pearl Tension Keeper, Tuner Fish Lug Locks) are easier but Tama Tension Locks are the only product that allow you to tune the drum while they are installed.
They just push onto the top of your troublesome tension rods and the O-ring allows you to tune the drum while they are on. These are probably one of the more expensive products of this kind but that is because they are the best! You don't need to put these on every rod of every drum either. Only install these on the lugs that seem to fall out of tune due to rim shots.
Evans Torque Key
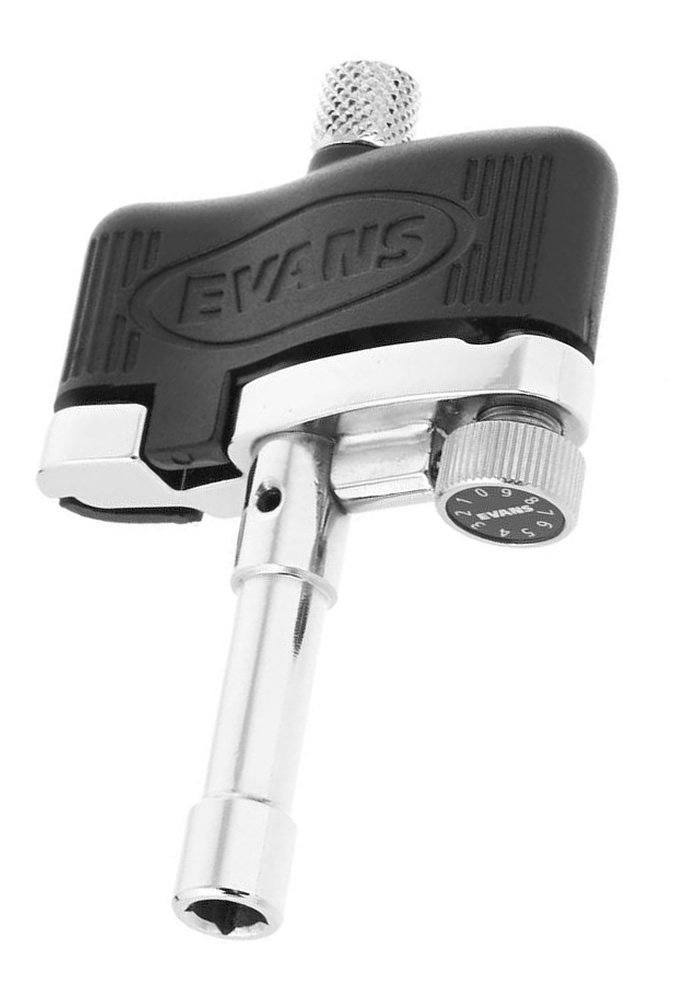
Evans Torque Key (view item on Amazon.com) (commissioned links)
I am a big proponent of tuning your drums by ear. Recognizing pitches and overtones is an important skill for any musician in general. That is why the Evans Torque Key is the best aid in getting your drums close to "in tune" followed by fine tuning by ear. The DrumDial and Tunebot are so much more expensive of a product when you are only using them to get close.
To use the Torque Key, just turn the bottom dial to a desired tension and turn the key on the tension rod until it clicks. After tuning that same tension on every rod, the drum should be very close to in tune. Record your "tension number" when you find the best tuning for each drum.
I will mention that the Torque key only works well with higher quality drums and tension rods free of rust. Lower quality drums will tend to have inequalities in their tension rods that can lead to uneven torque.
Thank you for reading! I hope the products and/or hacks were helpful in simplifying your drumming life. If you haven't checked out some of my other helpful articles, do so below!
Part 2 of this series:
The Coolest Drum Gadgets you Didn't Know You Wanted - Part 2
Other articles that may interest you:
Everything You Need to Become an Online Session Drummer - Part 1 – Getting Gear
Definitive Drum Practice Guide from Beginner to Advanced - Part 1 - Scheduling and Gear
Definitive Drum Practice Guide from Beginner to Advanced - Part 2 - Practice Session
**Full Disclosure: I earn a commission if you click any of these links and make a purchase, at no additional cost to you.**