Rapsys13
Author Archives: Rapsys13

New Single from Copper Core – Distant Travels Official Playthrough

The newest single from Copper Core since debut album release (self-titled) available on all streaming sites.

About Copper Core:
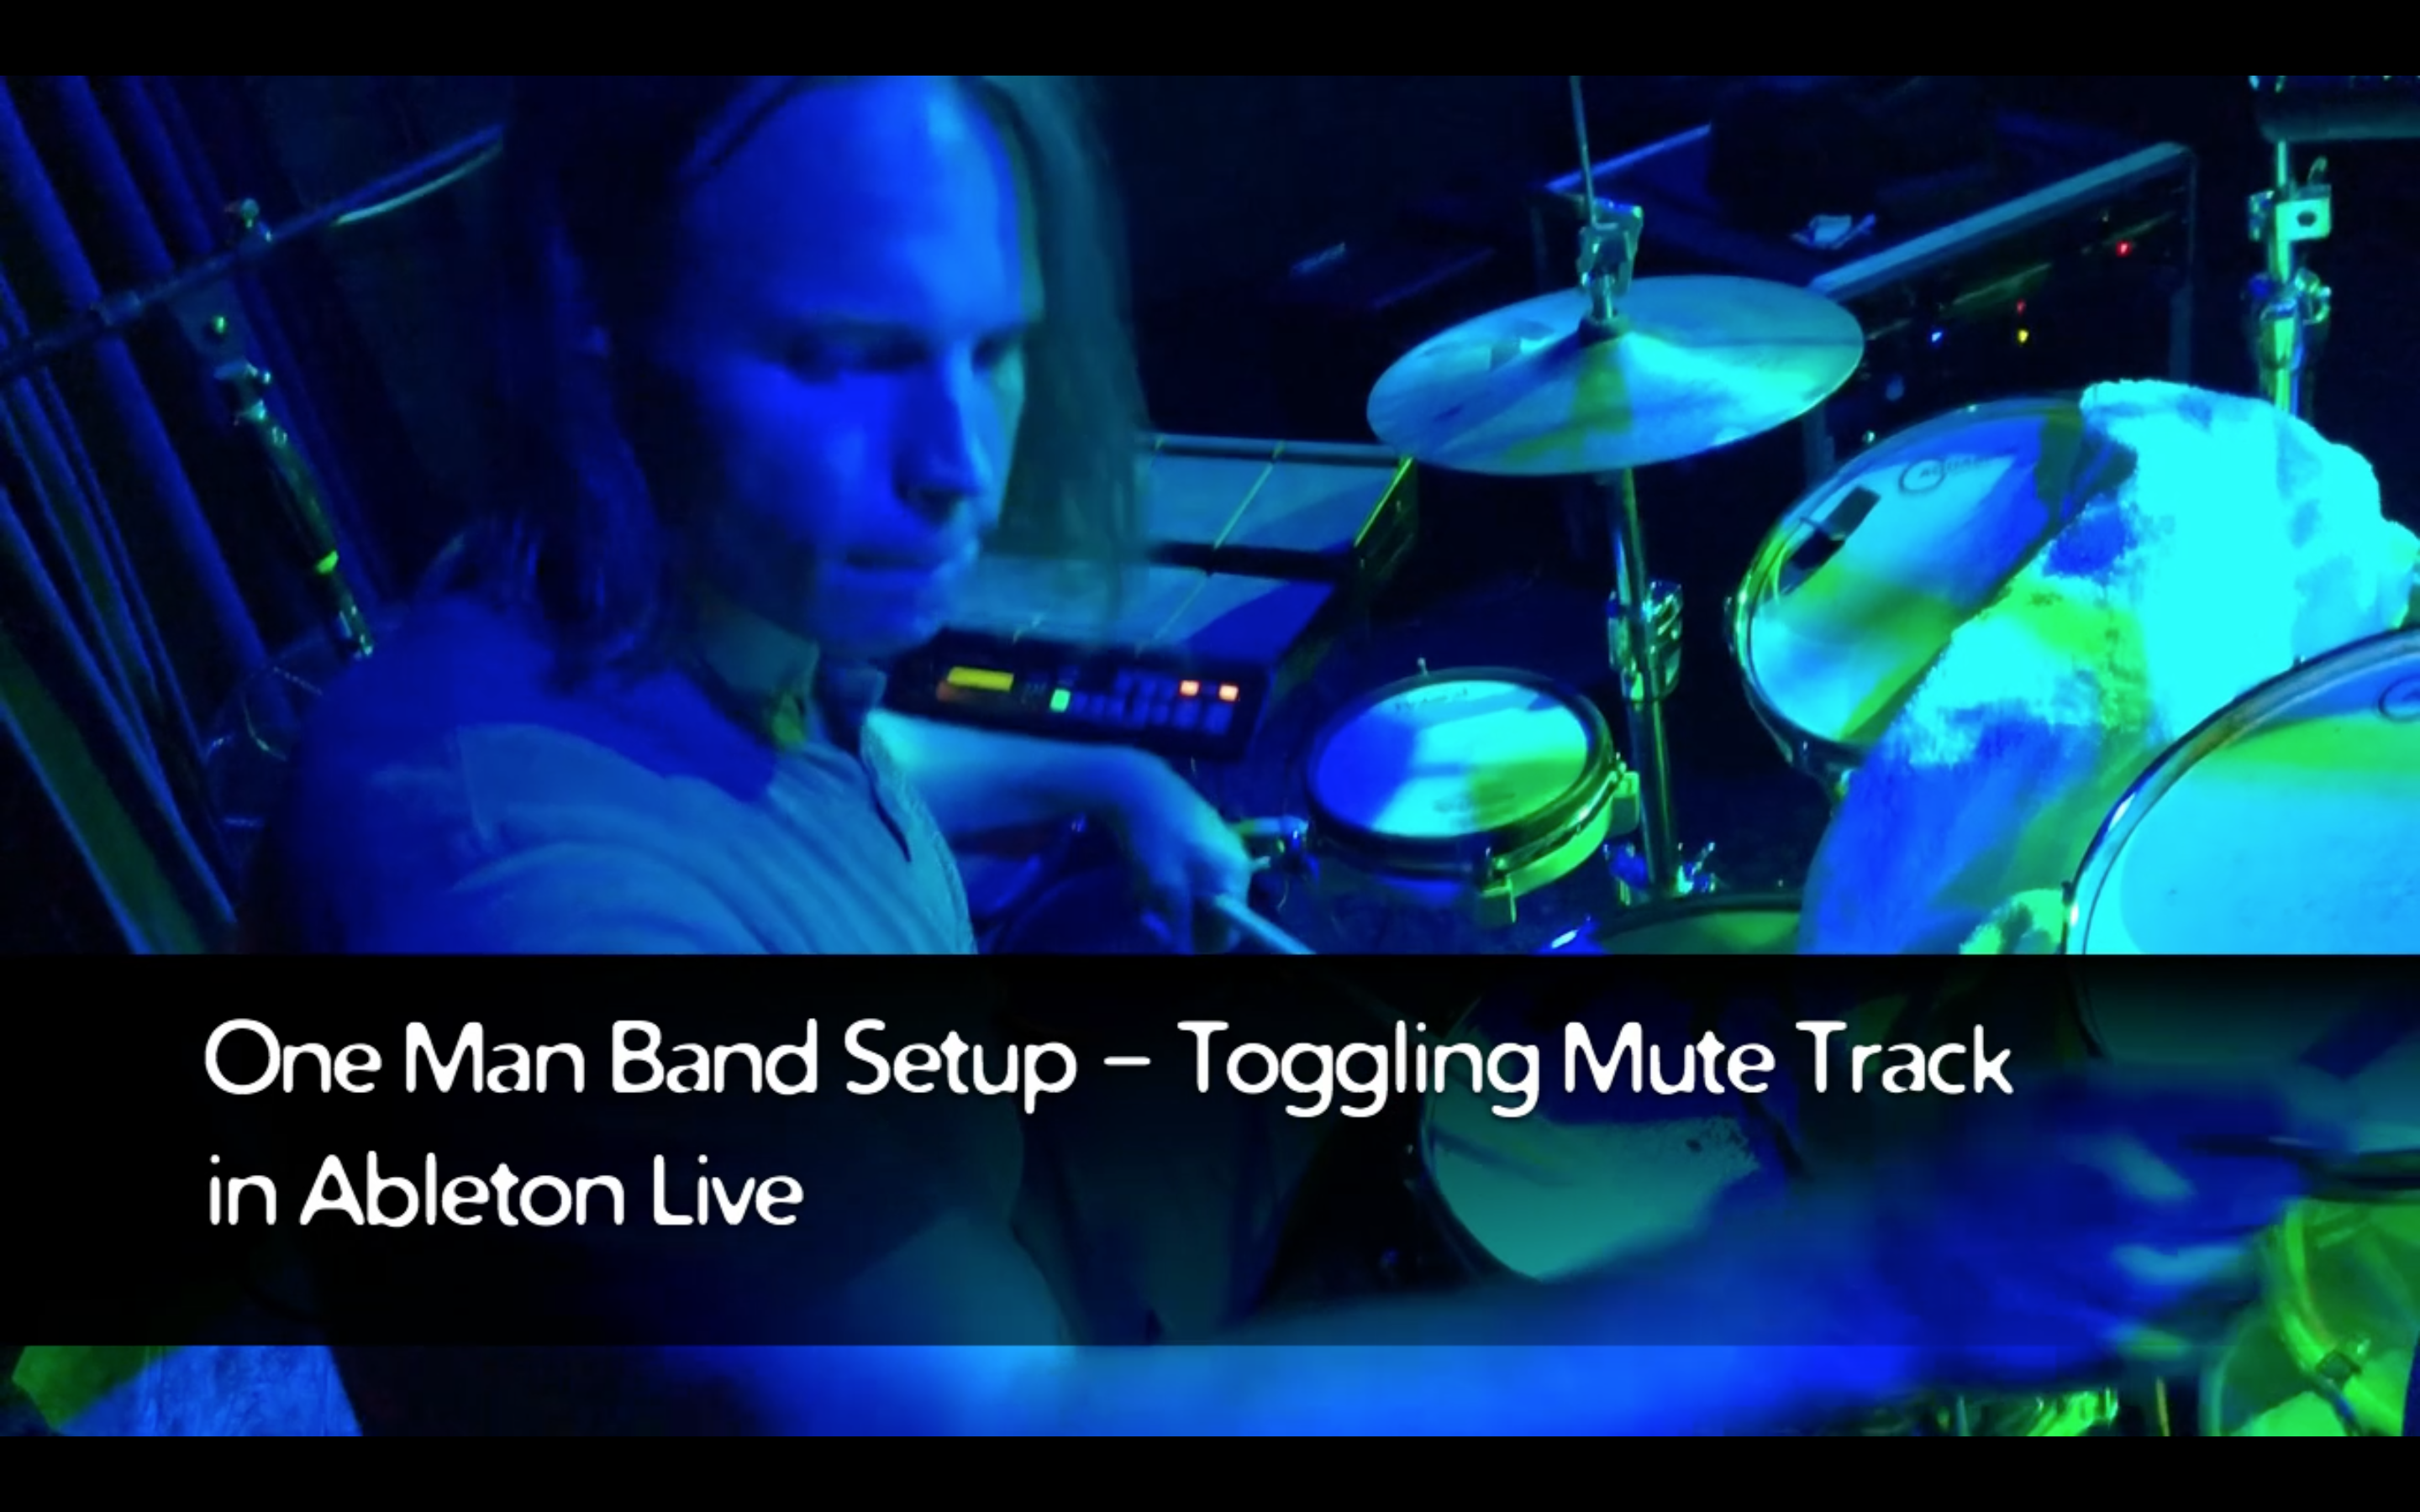
Copper Core is a solo electronic act executed by the American drummer and percussionist, Robin Rapsys. The music can be described as instrumental improv electronic music. It is performed by triggering an eclectic mix of original clips, loops and effects while improvising live drums and percussion. This allows for an uniquely expressive and organic live experience. Acts like RJD2, Shigeto and DJ Shadow all have similarities with Copper Core's sound.

The Coolest Drum Gadgets You Didn’t Know You Wanted – Part 2

Here we are with part 2 of the coolest drum gadgets you will probably buy on impulse in the next few minutes! It's one of them moments where you scream, "Take my money!". I have found so many new cool gadgets that I had to make a second article! Check 'em out!

Drumnetics Magnetic Kick Pedal

DOUBLE BASS or SINGLE BASS PLAYERS! All drummers that use a bass drum pedal! You have to check this out! The Drumnetics Pedals are bass drum pedals driven by magnets rather than springs! As a disclaimer, I have not bought one of these myself but I would love to get one! This design is truly unique and innovative. This is a new product and a young business and the few people that actually own one right now have nothing but good things to say about the fluidity and movement. Luckily the construction is very heavy duty—resembling Trick drum products. You can get single or double pedals in short or longboard styles. I will be getting one soon! Check out the features and adjustment options in this video:

Sunhouse Sensory Percussion

Sunhouse Sensory Percussion Trigger & Software (view item on Amazon) (commissioned links)

Sunhouse Sensory Percussion is so cool! It is the future of electronic drum sound and experimentation. Simply put, these are drum triggers that clamp onto the drum and have a variety of sensors to capture the vibrations of the entire drum. But they are not MIDI drum triggers. They connect via microphone cables (XLR) and can read 10 different zones with high precision dynamics. This is far more sophisticated than basic on/off messages with MIDI. 

This is what makes the Sunhouse Sensory Percussion system literally 10 times that of a MIDI trigger setup. They work with regular or mesh drum heads and you can use them with any third party interface and connect them into the Sunhouse Sensory Software on a Mac or PC. You could buy mesh drumheads for any old inexpensive drum set and turn it into a electronic kit or create any hybrid setup you can imagine. This is where you could get artistic and make drums out of unique materials, devoid of sound because the Sunhouse system will turn them into whatever you want. The sound manipulation is far more advanced than anything you can do with MIDI triggers. You have to take some time to really check out this amazing and innovative tool! Watch their demo videos:

Yamaha EAD10

Yamaha EAD10 (view item on Amazon) (commissioned links)

I am so impressed with some of the new products coming out right now! The Yamaha EAD10 is a single mic system for your entire drum kit that clamps your bass drum. With extremely intelligent technology, the EAD10 listens to your entire drum kit and can discern each drum within a 4 foot range of the unit. This unit attaches to a module and gives you a wide variety of mix and effect options. I am amazed at the quality of recording you can get out of a one-mic setup for your entire kit. This is the ultimate option for people on a budget wanting to start making their own drum videos. Watch the demo video put out by Sweetwater where he explains all of the features:

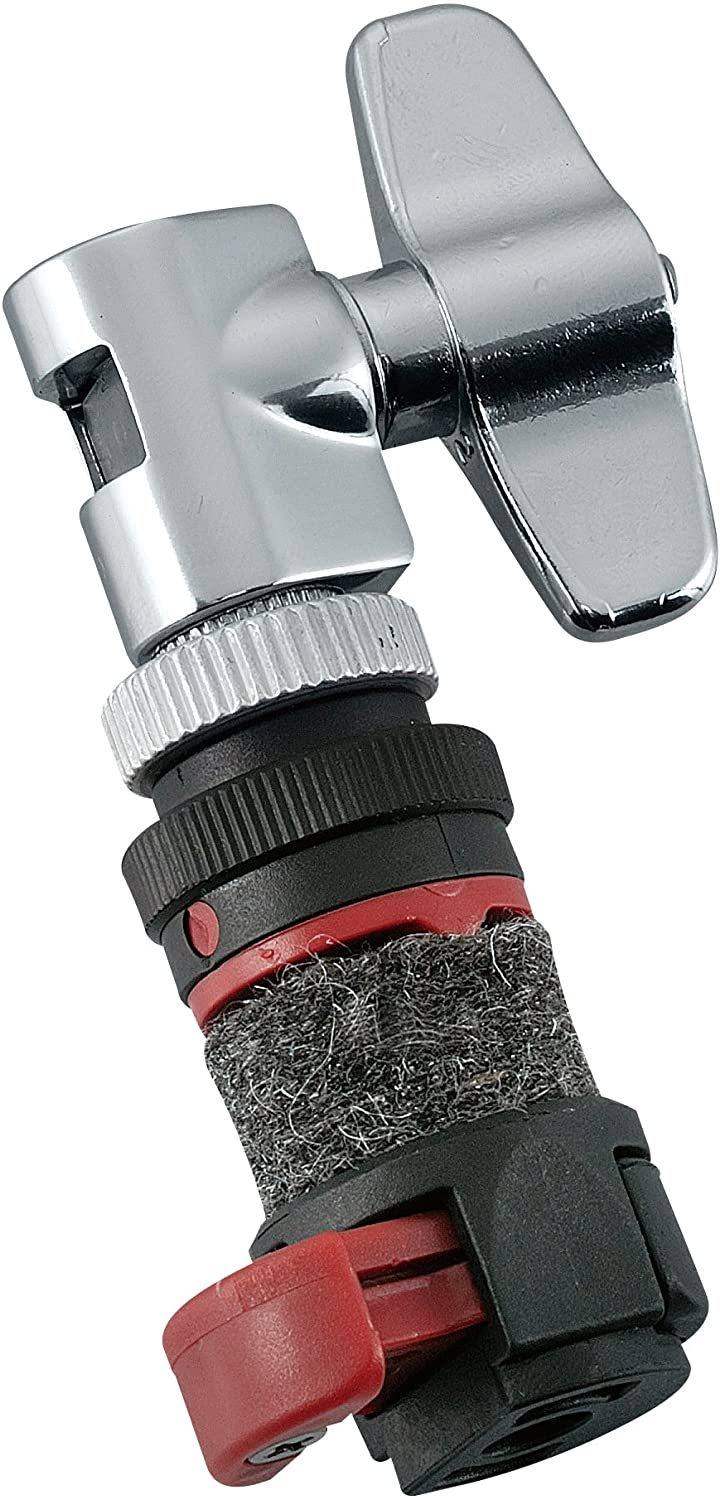
Hi-Hat Quick Release Clutches

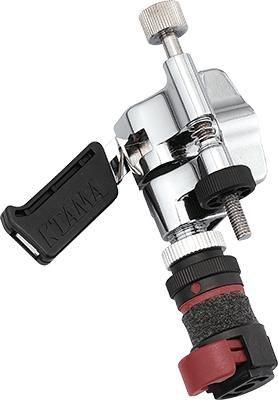
Tama Quickset Hi-Hat Clutch (view item on Amazon) (commissioned links)

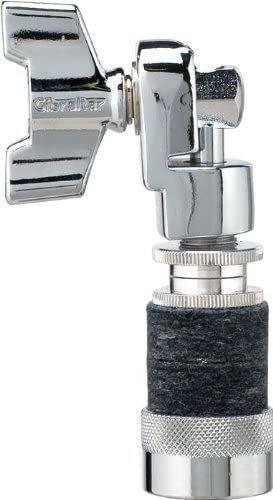
Gibraltar Quick Release Hi-Hat Clutch (view item on Amazon) (commissioned links)

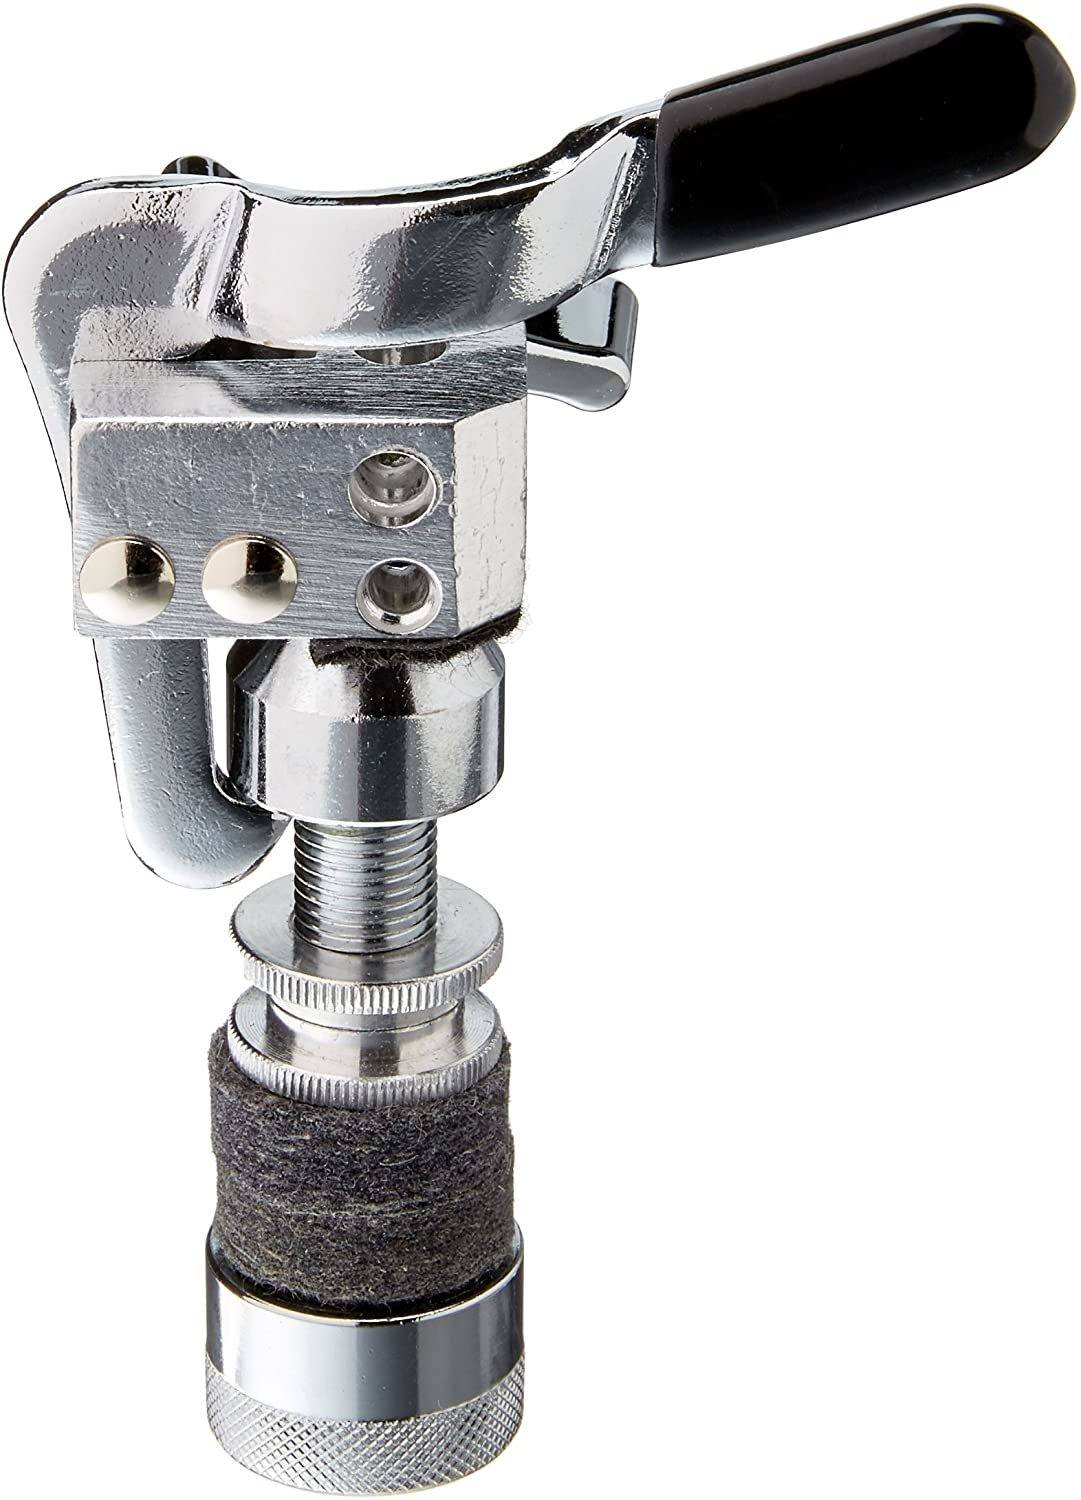
Gibraltar Quick Release Hi-Hat Drop Clutch (view item on Amazon) (commissioned links)

After I fell in love with Trick Drums Cymbal Quick Release, I found myself still spinning threaded nuts on hi-hat clutches. I knew there had to be a product that could solve this issue as well! The Gibraltar Quick Release Hi-Hat Clutch is a super solid, steel constructed product that combines the same idea of the Trick Cymbal Quick Release on a hi-hat clutch. They also make the Gibraltar Quick Release Hi-Hat “DROP” Clutch for double kick players.

With some deeper research, I found that Tama has their own version called the Tama Quickset Hi-Hat Clutch. It is based off of the Tama Quickset Cymbal Mate design. I did not prefer the quickset cymbal mate design with it’s clunky closure and tendency to pop off every so often. However, since the grip clamps to the lip of the customized clutch instead of threads on a cymbal stand, it seems like a solid design.

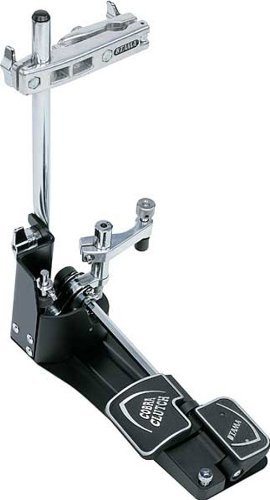
At this point I would have called the Gibraltar Quick Release Hi-Hat Drop Clutch the winner…but then I found something that I never knew existed. If you read my previous article “The Coolest Drum Gadgets You Didn't Know You Wanted”, I spoke about the seemingly discontinued product, the Tama Cobra Clutch. The Tama Cobra Clutch essentially gives you a drop clutch with the option of tightly closed or sloshy hi-hat cymbals while playing double kick. The hack I created was much cheaper and was achieved by putting a spring on your hi-hat stand. However, the Tama Sizzle Touch Drop Clutch gives you the slosh option WITH the quick release. Honestly I wish Gibraltar had the spring option as well since their quick release construction is better AND they are much more affordable. So with that, I leave the decision up to you!

Snareweight M1 and M80

Snareweight M1 (view item on Amazon) (commissioned links)

Snareweight M80 (view item on Amazon) (commissioned links)

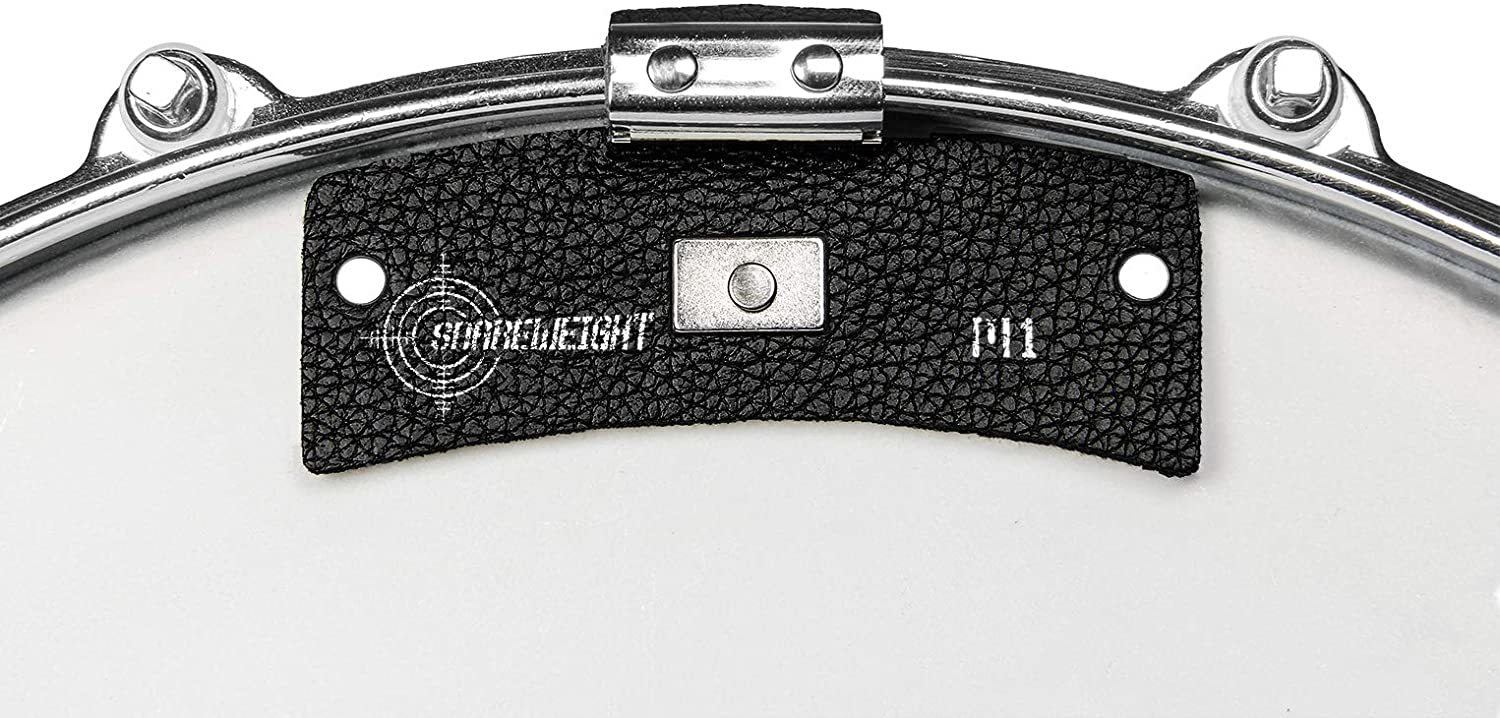
Everyone knows about muffling gels and similar products for dampening their snares or toms. This is an alternative that I think is a little more elegant, sturdy, and effective. The Snareweight M1 and M80 are essentially a snare dampener made of a leathery flap that clips on the rim of the drum. You can turn it off by simply pushing back on it until it magnetically sits off the drum. This turned out to be more sturdy than sticking muffling gels on the drum, especially when they have stopped sticking. The M1 is the small version of the M80. With the M80, you can essentially push back the side flaps to make it the same size as the M1 really giving you two products in one. I highly suggest that you experiment with your drum’s tuning to get the sounds you want without muffling but this is definitely a quick adjustment that can be useful in many situations. They come in brown, black, and white colors.

Firefly Ratcheting Drum Key

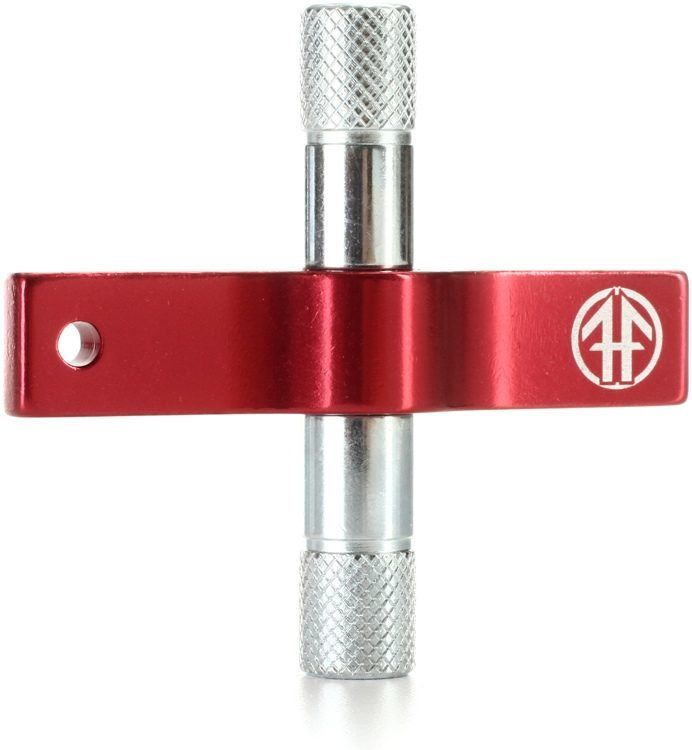
Ratcheting style drum keys are super useful when changing heads. The Firefly Ratcheting Drum Key takes it a step further because it is silent when you reverse your movement rather than clicking. This can be ideal in gig and studio situations. This is definitely the best ratcheting drum key out there!

Tru Tuner Rapid Drum Head Tuner

Tru Tuner Rapid Drum Head Tuner (view item on Amazon) (commissioned links)

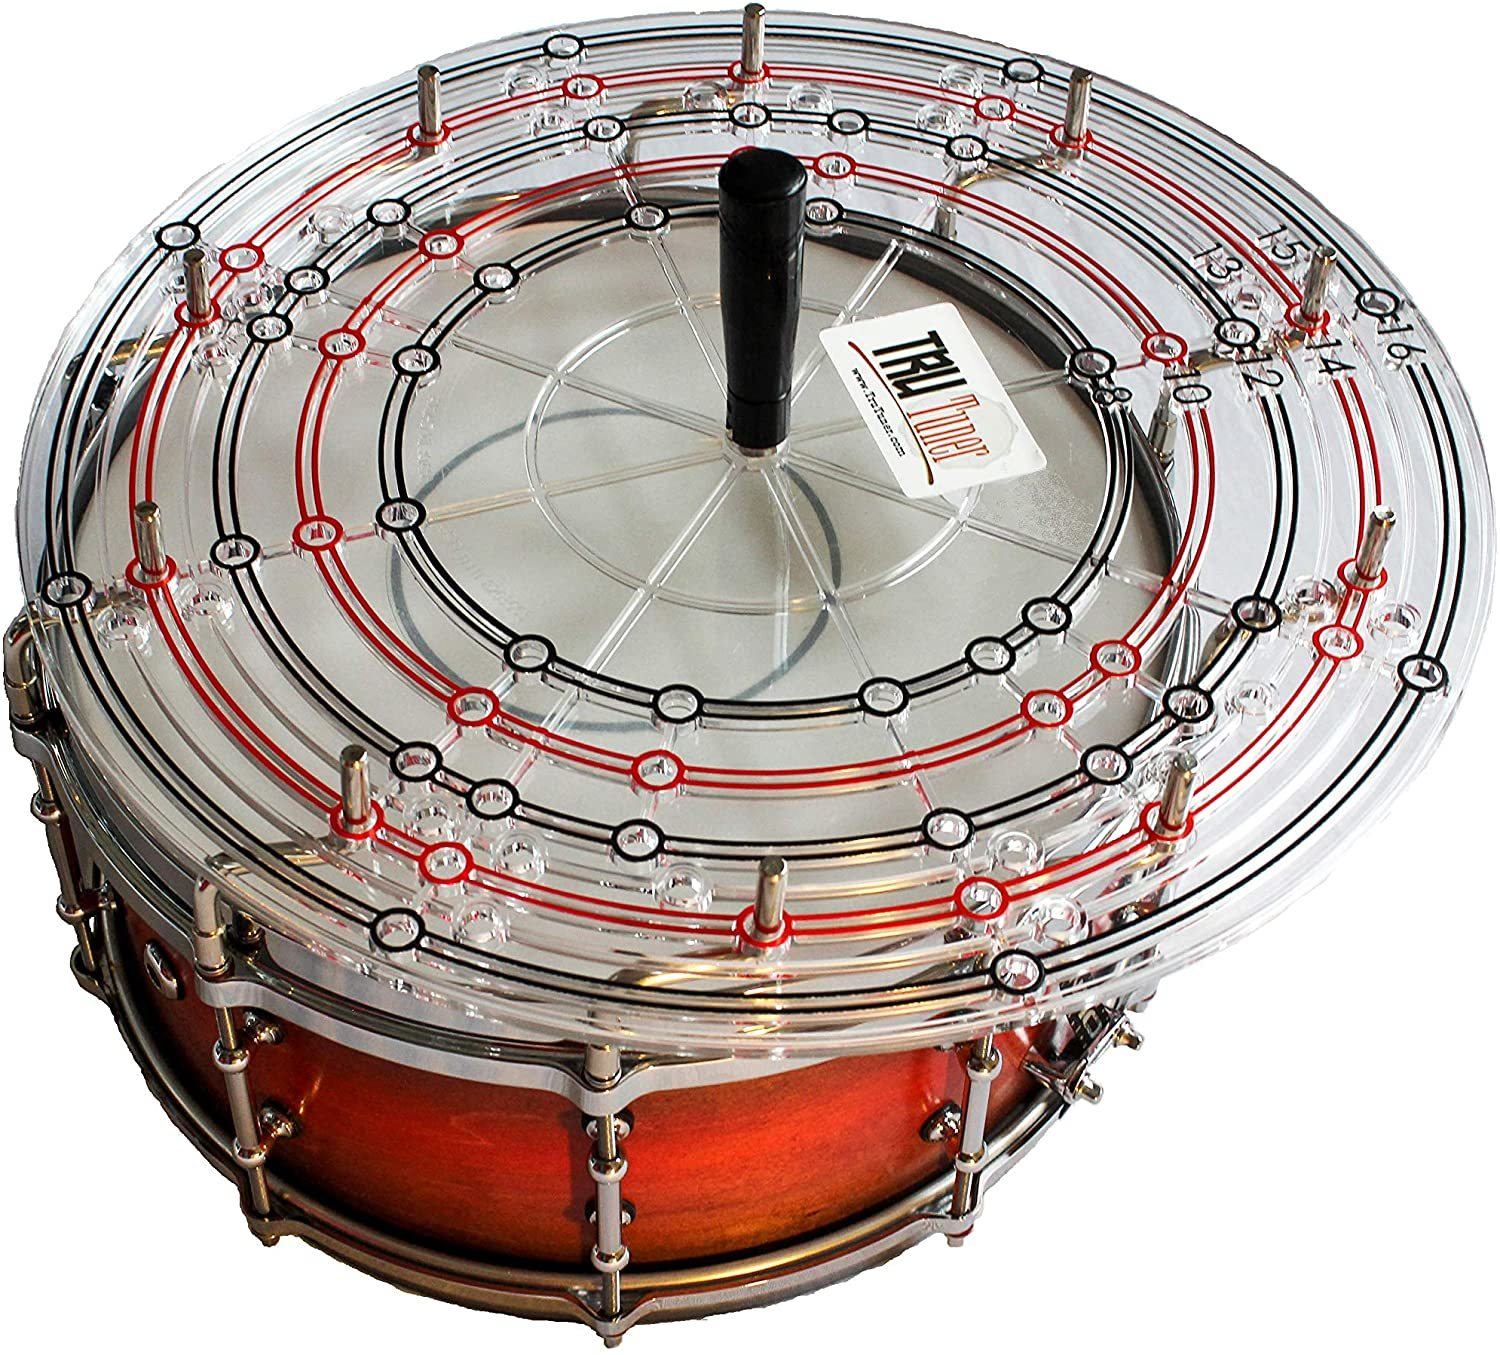
The Tru Tuner Rapid Drum Head Tuner is a fantastic way to get evenly tuned drums on every lug. You place the included drum keys on all of your lugs and put the “tuning plate” on top of all the drum keys and turn all the lugs at the same time. One setback is that you can’t test the drum sound while the plate is on the keys. But if you have a ballpark of 1 or 2 full turns to get it close, you can be rest assured that every lug is evenly tensioned. You can literally remove and install a new drum head in under 1 minute.

Dialtune Drums

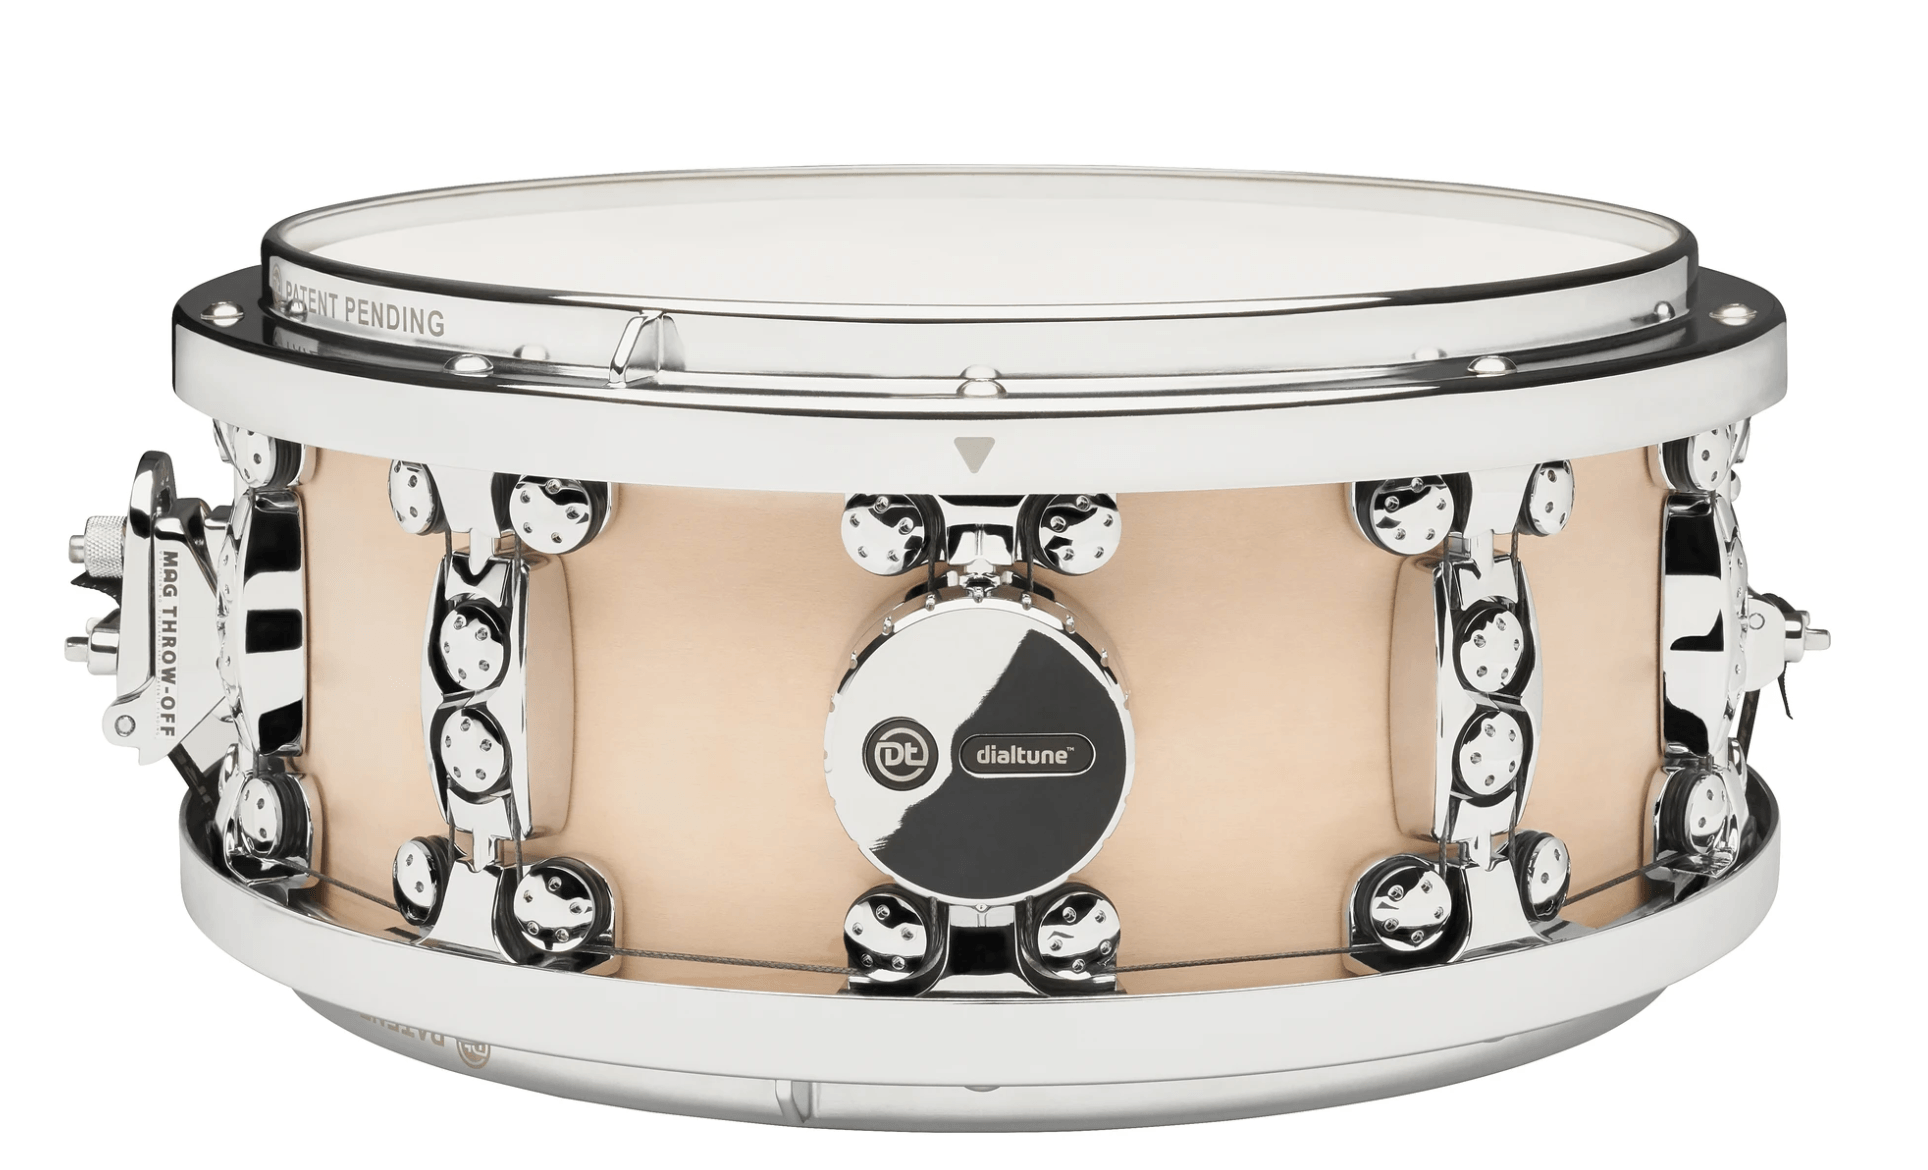
When I first found Dialtune Drums, I immediately saw them as the future of how we tune drums. Tuning drums for so many players at the beginning and intermediate levels can be so overwhelming. It is a time consuming skill to learn which takes away from what you actually want to be doing: practicing and playing! Not to mention all the drummers that are so uninspired by their drum sound because they can’t get their drums to sound good. It is literally the biggest problem for drummers right now! 

Dialtune Drums use a pulley system to allow you to evenly tune one head of the drum just by turning one knob located on the side of the drum. There is one knob for the top head and one for the bottom head. The hardware attached to the drums do make them quite a bit heavier than a regular drum. I think the ease of tuning far outweighs the heavier weight (no pun intended).

This is a brand new company that just started offering products to the public at large. As of right now, they only offer 6.5”x14” maple snare drums. As they gain momentum, they will be adding different snare size options, tom options, and eventually full kits. I would keep our eyes peeled for more companies to start building drums like this.

Vic Firth Hingestix

Vic Firth American Custom SD1 Hingestix (view item on Amazon) (commissioned links)

The Vic Firth Hingestix are ideal for teachers and beginners alike. They are basically an removable rod that screws into 1 of 2 pre-made holes on the sticks to help remind you where your fingers and/or fulcrum should be. If you have trouble sliding around your stick, they do help a little bit with grip as well.

Tru Tuner FX Series

Tru Tuner FX Shaker Stick (view item on Amazon) (commissioned links)

Tru Tuner FX Drumhead/Cymbal Mount Tambourine (view item on Amazon) (commissioned links)

Tru Tuner Bass Drum Mounted Shaker (view item on Amazon) (commissioned links)

In addition to their Rapid Drumhead Tuner, Tru Tuner also came out with an FX series of gadgets that are really cool. Essentially, they are small and inexpensive attachments to your drumhead, kick pedal, cymbal, or sticks to add shaker or tambourine sounds while you play. I think all of these have great uses and they are super easy to switch out between songs…or in the middle of songs! There’s a quick release mount attachment for you bass drum beater, a sticky drum muffling gel and a mount to place onto cymbals or drumheads, and a butt-end stick mount. With these mounts you can add a shaker or a mini-tambourine cymbal. My favorite was the sound of the tambourine and muffle gel on the snare drum.


Thank you for reading! I hope the products were helpful in simplifying your drumming life. If you haven't checked out some of my other helpful articles, do so below!

Part 1 of this series:
The Coolest Drum Gadgets You Didn't Know You Wanted

Other articles that may interest you:
Everything You Need to Become an Online Session Drummer - Part 1 – Getting Gear
Definitive Drum Practice Guide from Beginner to Advanced - Part 1 - Scheduling and Gear
Definitive Drum Practice Guide from Beginner to Advanced - Part 2 - Practice Session

**Full Disclosure: I earn a commission if you click any of these links and make a purchase, at no additional cost to you.**

Play Drums Without Bothering Anyone – From Silence to Soundproofing

One of the biggest problems we face as drummers is finding a space to practice without bothering anyone. We’re loud and we don’t have a volume knob...well sort of.

I’m going to give you every option you have to make practice possible at almost any time of day. Some options are expensive, some are not. Some are a quick fix, some are not. You need to decide what will work for you.

Location, Location, Location

First of all, there are some natural options you should consider when you are selecting which room to practice in. Select a room that is in the basement or partially underground and located as far away from the “irritated party”. The sound will carry a lot more from a land level or upstairs room. If it is the neighbors you are concerned with, choose the side of your house that is further from your neighbors house OR the side where your neighbors garage might be located. Hopefully they don’t hang out in their garage as much and wouldn’t be as bothered as if you were practicing next to their living room. Also, a room with less windows will conceal the sound better too.

Disclaimer

I would like to explain that some of these options might provide an opportunity to practice at the expense of feel, convenience, or normalcy. You have to recognize that and not let it change you playing for the worse.

I mentioned that we, as drummers, don’t have a volume knob. However, we can learn to play with quiet dynamics. It’s actually very important but also difficult...especially when your just starting out. Learning to play everything loud AND quiet will help your playing immensely. Remember that. Some of these options give a volume knob or remove the volume of your drums prohibiting you from practicing dynamics.

Some of these options will change the feel and/or rebound of the drums. If your playing on rubber or mesh pads, the bounce may feel considerably different than real drums. This can help or hinder you.

Being aware of these differences will help you adjust when your back in a full volume situation.

Simple Solutions

I’m going to start with the easiest and/or least expensive options and go on from there.

Acoustic Drum and Cymbal Pads

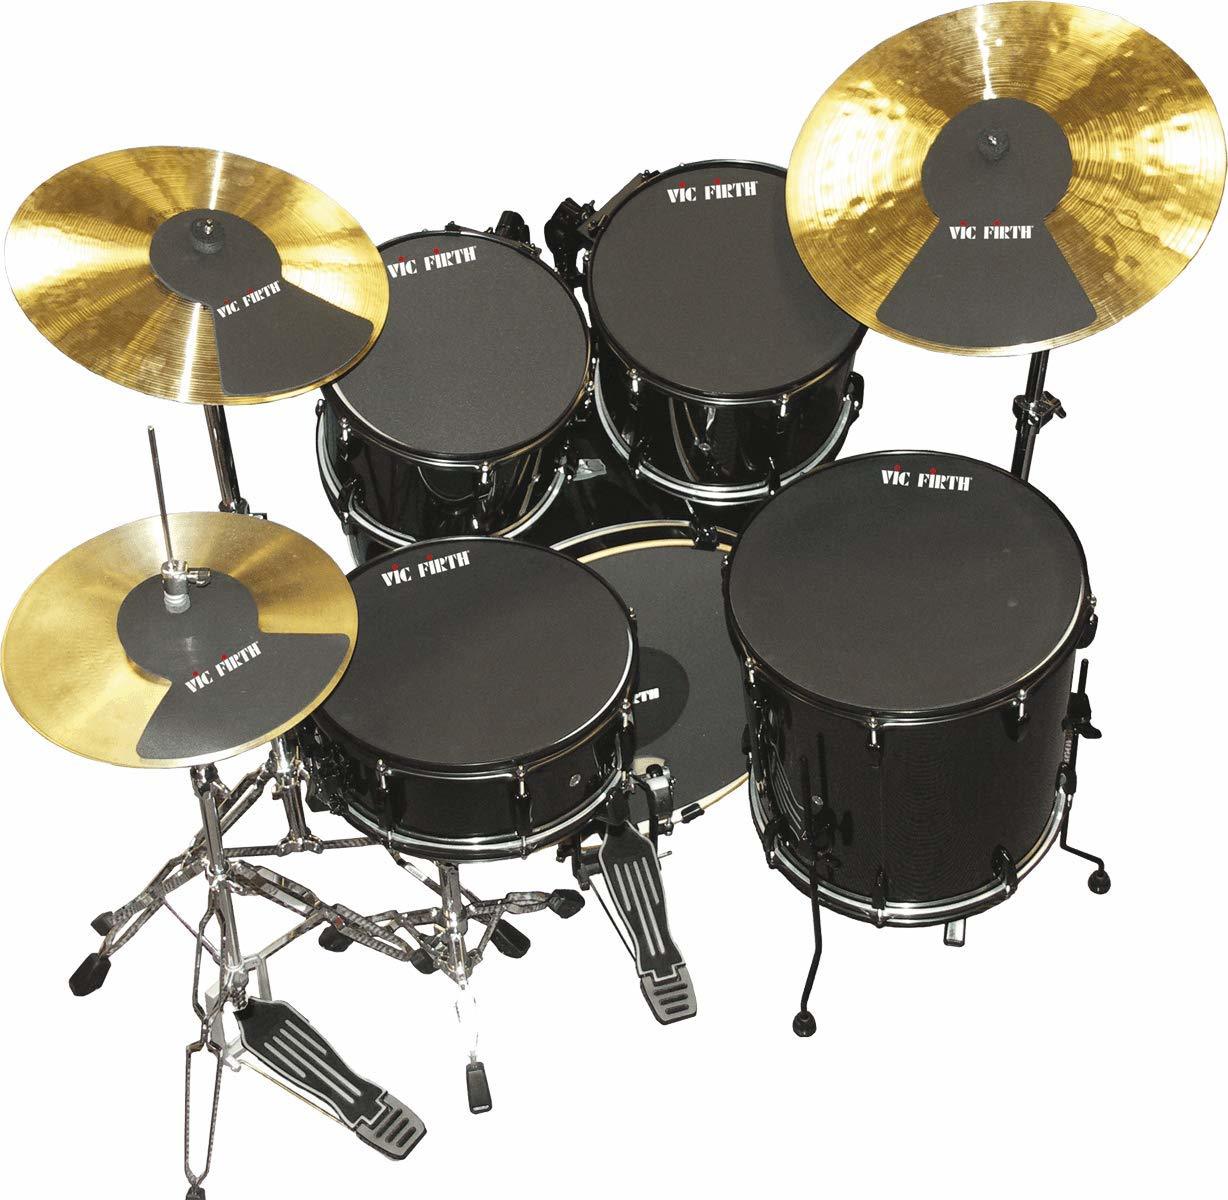
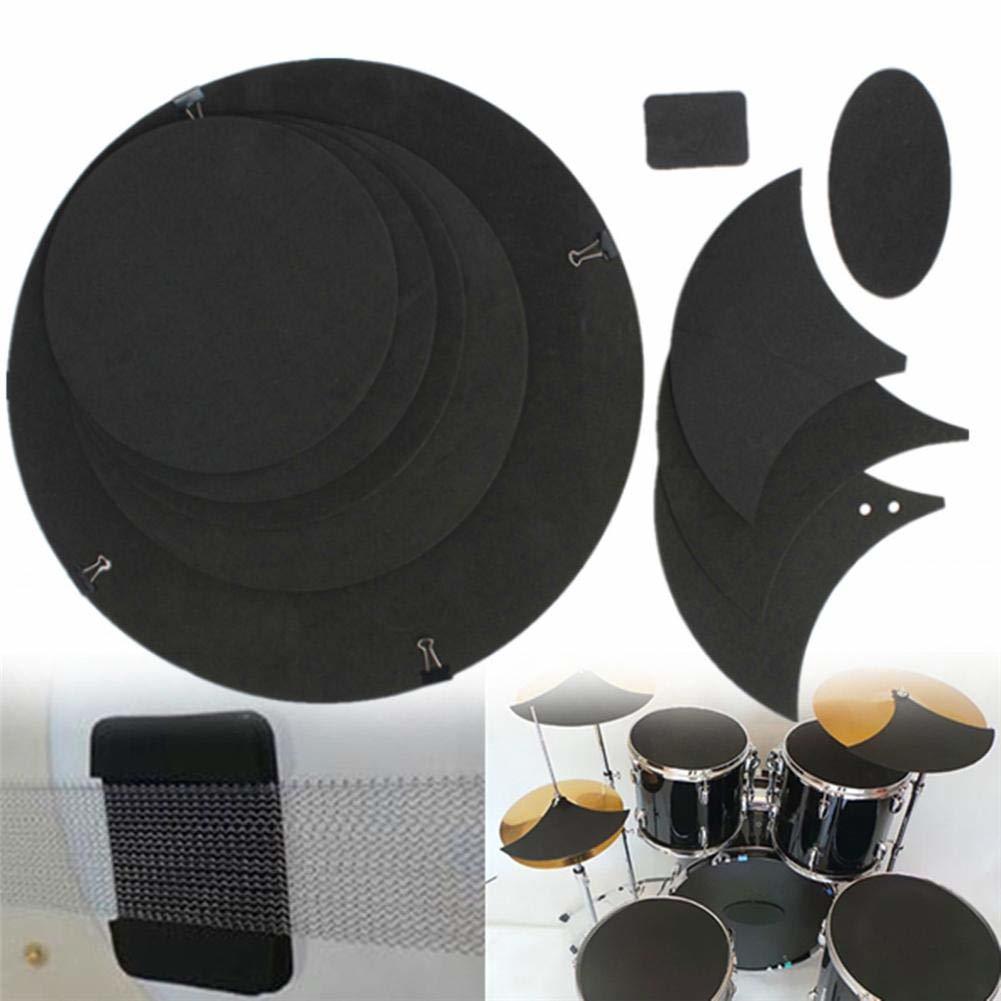
If you don’t have the room for a separate pad kit, you might just want to put pads on your acoustic kit to mute them. These may seem convenient but they can drastically change the rebound of the drum. They make them for any size drum and even cymbals. These are more ideal for working coordination or new beats rather that intricate nuances or feels.

There are two options for drum pad sets. You can get the quality drum pads from Vic Firth or this really inexpensive off-brand.

Vic Firth Drum Mute Prepack (view item on Amazon) (commissioned links)

10Pcs/Set Rubber Foam Bass Snare Drum Mute (view item on Amazon) (commissioned links)

DW Go Anywhere Pad Set with Stand (view item on Amazon) (commissioned links)

This little kit got me through years of practicing while living with roommates. It’s a simple one pole setup with widely adjustable rubber pads and a bass drum pedal attachment at the bottom. There were a few adjustments I did to make this feel as normal as possible. 

There’s no hi-hat pedal so you need to use a double-kick pedal to mock as the hi-hat pedal or just add a hi-hat stand without a cymbal. I also found the rubber bass drum pad was too bouncy so i took it off and wrapped a cloth on it.

You can adjust the pads to almost any angle and height but you do have to be imaginative as to which pad represents which drum. I added a separate pad with a straight stand to sit in as my snare drum between my legs and used the other pads for cymbals and a tom.

Remo Silentstroke

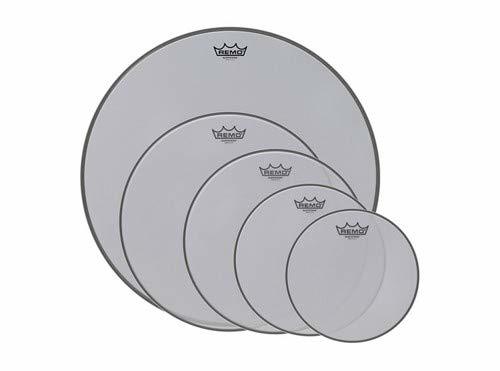
Remo Silentstroke (view item on Amazon) (commissioned links)

These mesh drum heads feel almost like the real thing but they are inconvenient in that they are a drum head so you have to switch out your regular drumheads on the kit with these. If you have an extra practice kit or even a tom and a snare, you can just leave them on those drums for practice.

RTOM Black Hole Mesh Pads

RTOM Black Hole Practice System (view item on Amazom) (commissioned links)

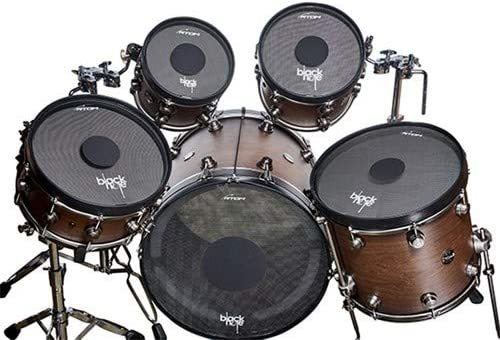
The Black Hole Practice System is a newer product similar to the Remo Silent Strokes but they easily clamp onto the rim of your drum without having to remove your drumhead. They claim to bring down the volume by 80% and boast that the feel is better than any other option. They are a bit more spendy but the simple setup can outweigh the cost! They offer this entire kit or single pads. I have not used these but I have gotten numerous suggestions to add this to this article!

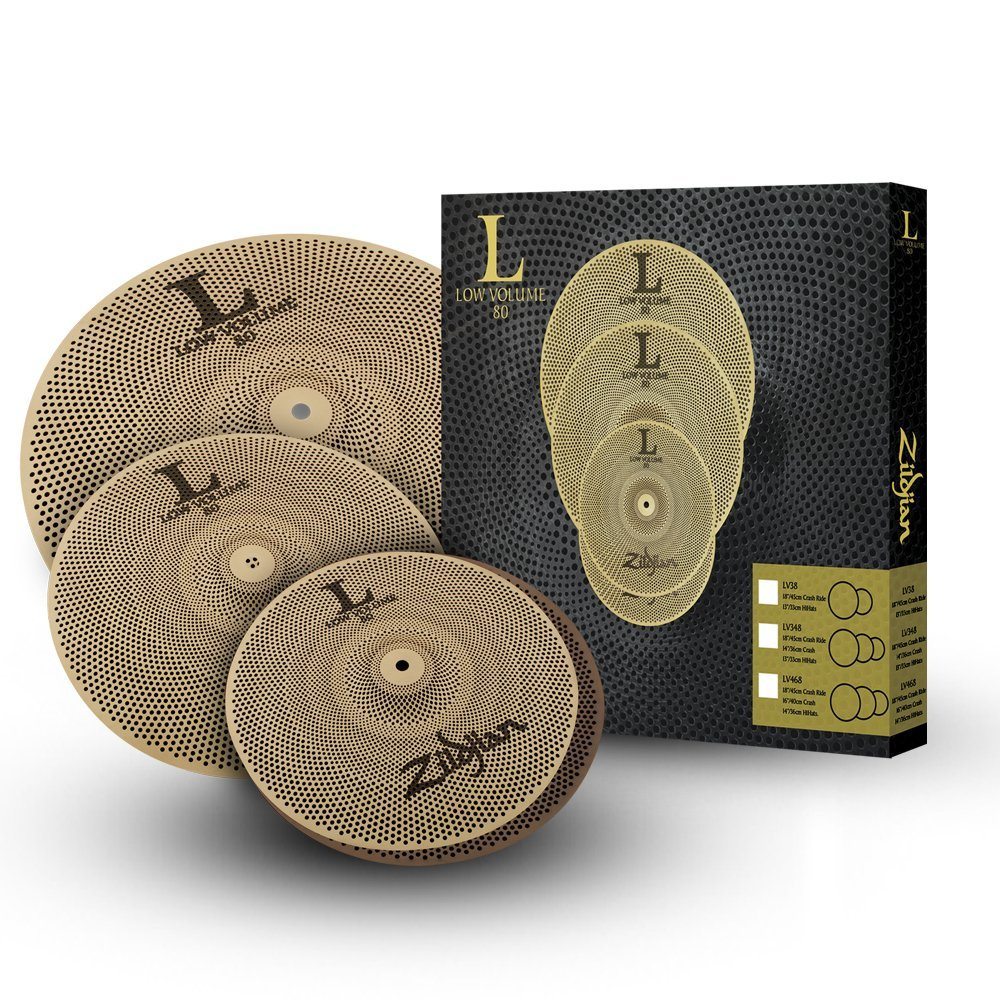
Zildjian Low Volume Cymbals

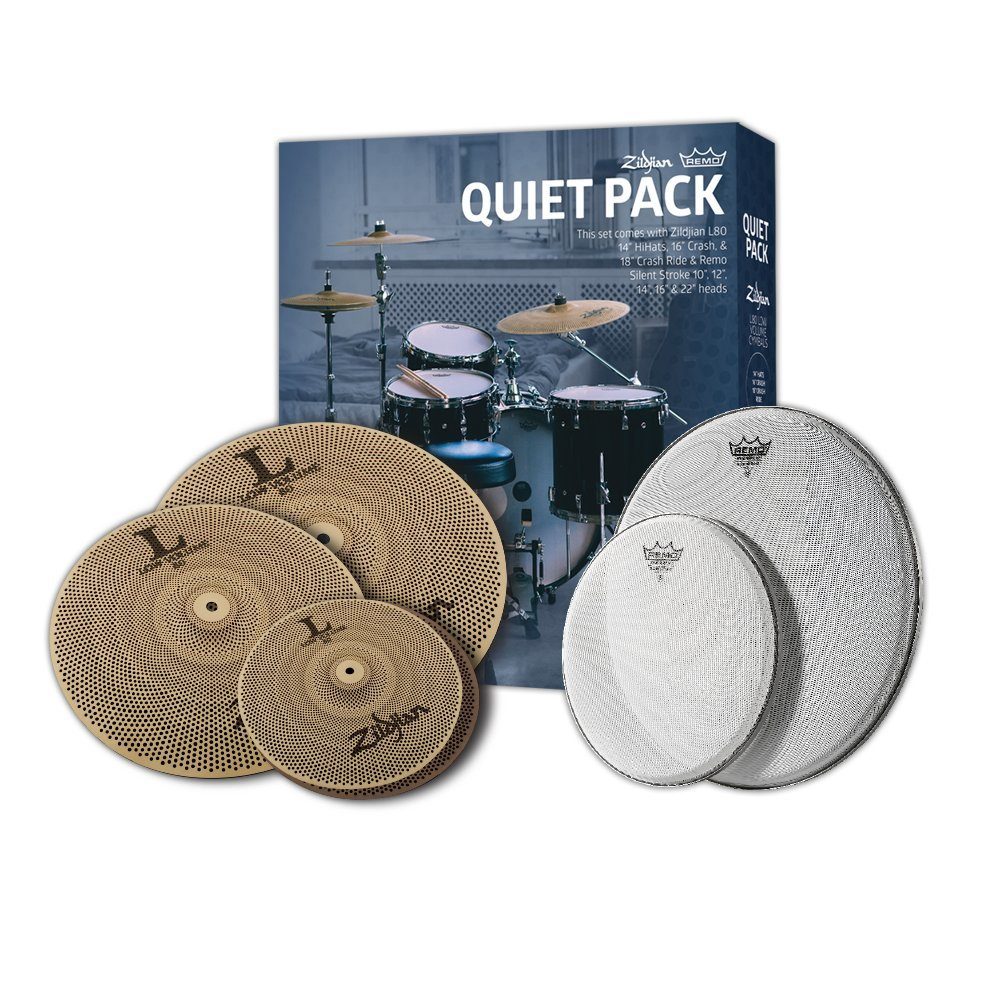
These cymbals are probably the best option out there because they feel amazing. Switching these cymbals out isn’t that bad either. Using the Zildjian Low Volume Cymbals in combination with the Remo Silent Stroke is my favorite option. For quick swapping, use the Zildjian Low Volume Cymbals along with the Vic Firth Drum Mutes.

Zildjian L80 Low Volume Cymbal Set (view item on Amazon) (commissioned links)

Quiet Pack - Zildjian Low Volume Cymbals with Remo Silentstroke (view item on Amazon) (commissioned links)

Electronic Drum Kits

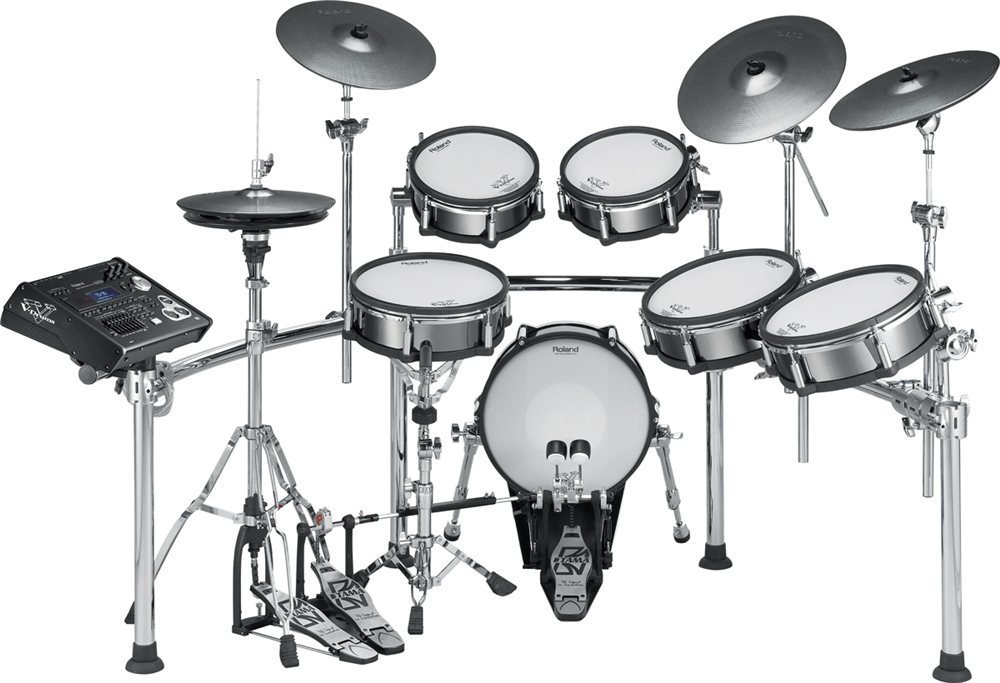
Obviously E-drum kits are a great option but they can be expensive. They play just like rubber or mesh pads but, with headphones or speakers, sound like a professionally mixed drum kit. Some can also have built in metronomes and songs to practice with. There are so many out there so I will break down some of the best ones in different price ranges.

As with my disclaimer earlier, e-drums can also feel a bit different than real kits. They will create a beautiful sounding drum kit when you hit the drum regardless of whether you are using good technique. When switching to a real kit, it might take some adjustment to create a good sound on an acoustic drum (ie. good rebound, clean strokes, etc.). Keep that in mind. 

The drum heads are usually made of rubber or mesh with a sensor inside to sense the hits. You can tune the mesh heads to have a tighter feel giving you an easier bounce. The rubber pads tend to have a harder surface than regular drum heads. This will prove difficult when you switch to a real drum set where the nicely tuned drum doesn’t have the same rebound you were used on the mesh or rubber pad. Another thing to note!

Note: Roland and Yamaha hi-hat pedals are not interchangeable! Without getting technical, the technologies basically work in opposite ways. Something to note when adding on to your kits or piecing together used pieces of equipment!

Roland

Best

Roland TD-25K

Roland TD 25-K (view item on Amazon) (commissioned links)

These are high end electronic kits and they have all the features you would ever want to perform with very realistic sounds. The sound module is a simplified version of the TD-30 and it’s really easy to use. It doesn’t really have any of the experimental sounds on it because it’s focused on being a traditional drum set. The drums have mesh heads that can be tightened/loosened to feel like a real drum. The cymbals sit on a stand just like a real cymbal and naturally sway when struck. They allow chokes (grabbing the cymbal for staccato hits) and have 3 zones so they can provide 3 different sounds depending on how you hit them. You can record your own performances right onto the module so you can assess your performances and share them with drum teachers, friends, etc.

Some have said that the rack is a bit small for setting up but I think it works just fine. I like to have the lightest and smallest hardware possible in case I have to set up on a tight stage. As with most setups in apartments, the heavy hi-hat ‘cymbals’ seem to thump the floor a bit more than desired. You can remedy this by putting a rubber pad down or switching to a lighter cymbal style pad.

It’s worth mentioning that this particular kit does not come with some essential items: drum throne, kick pedal, hi-hat stand, headphones, and drum sticks. These are generally personal items that drummers can be particular about so it is left up to you to decide on the brand/types of these that you want.

Roland TD-30KV

Roland TD30-KV (view item on Amazon) (commissioned links)

This monster literally has everything. Of course, it’s really expensive, but it’s the best. It has every feature of the TD-25KV and even a bit more. The hardware is better. Some of the drum and cymbal pads are better. The hi-hat cymbals are less clunky. The drums look like real drums despite the fact that they are e-drums. The module contains all kinds of extra sounds of which you can tweak. Again, this one does not contain the "personal" items such as the kick pedal, hi-hat stand, snare drum stand, throne, sticks, and headphones. Every e-drum loving drummer would love to have this kit but it is a bit too expensive. I would personally rather build a soundproof room (look below!) and use an acoustic kit!

Not Too Expensive But Worth It

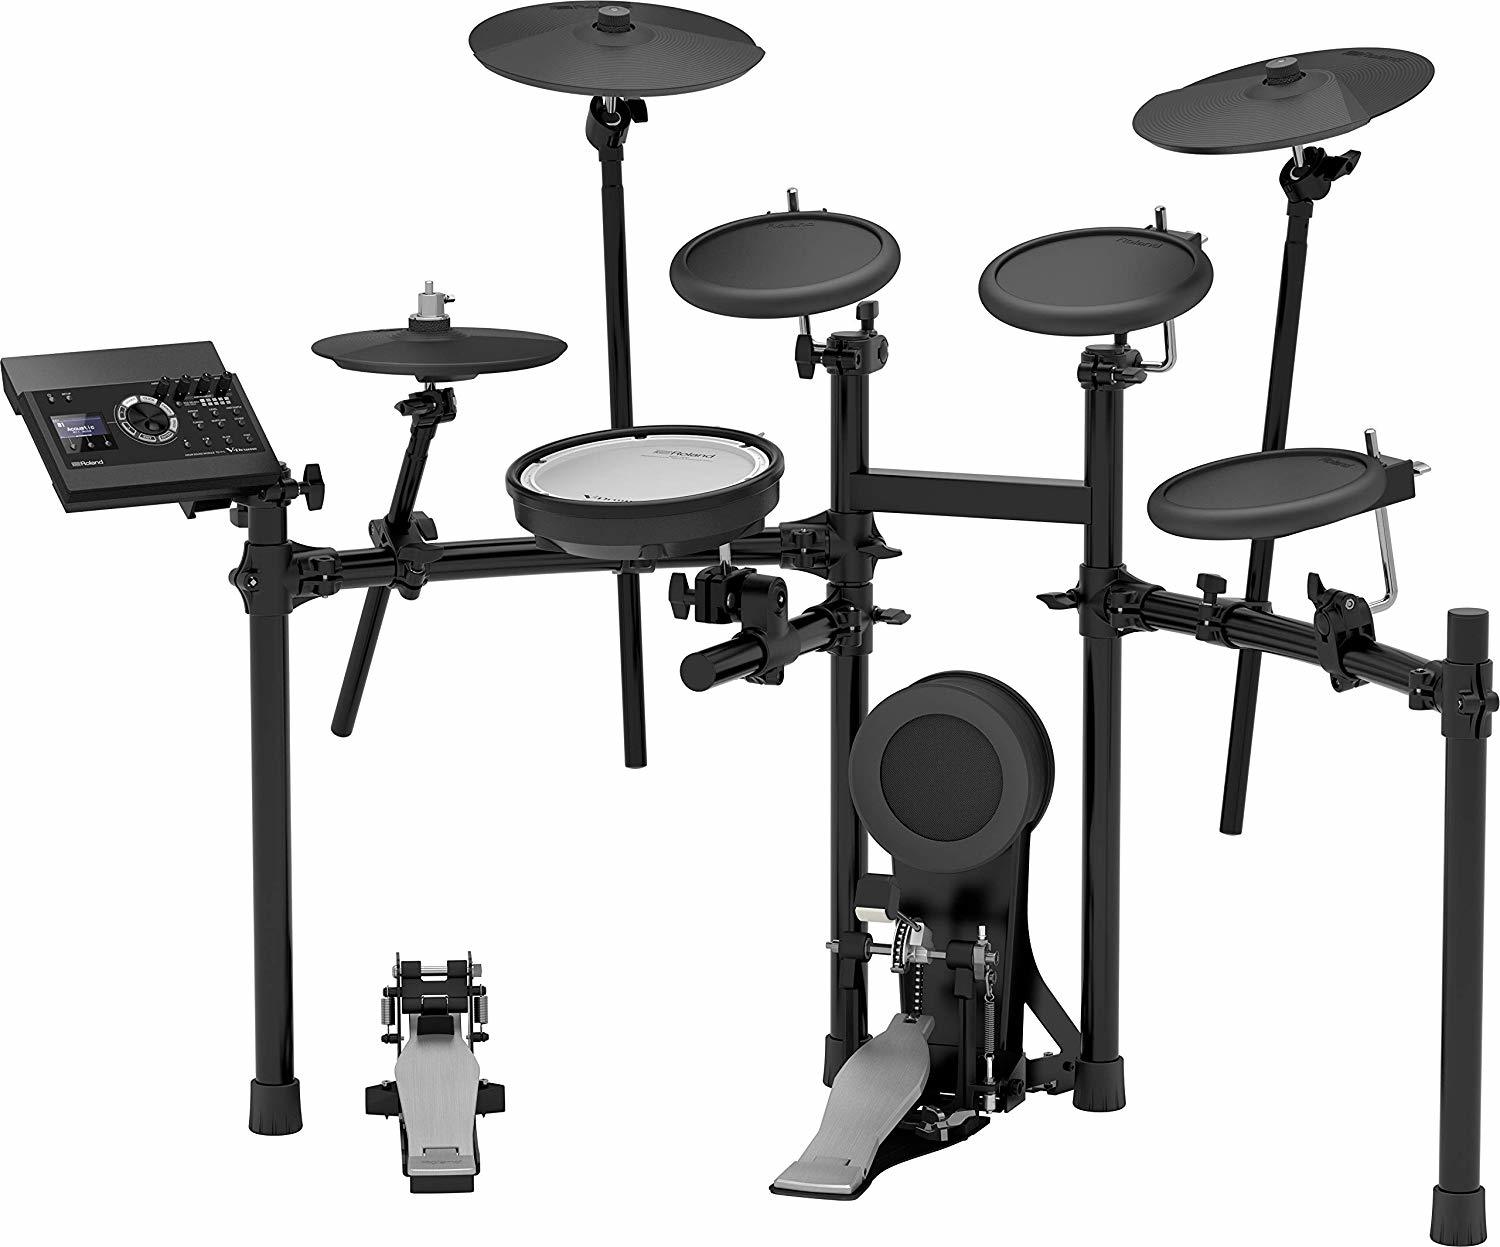
TD-17KL-S

Roland TD-17KL-S (view item on Amazon) (commissioned links)

If this price point works for you, you won’t be disappointed. This kit has many features you get on the nice kits but simplifies everything. It has the play-along features, click track, recording, etc. The module has some basic but great sounding kits to choose from. The only mesh pad you get is the snare drum pad, the rest are rubber. They are still responsive but you don’t get as good of a feel as you can from the mesh pads. The cymbals have 2 zones so you won’t get to hear a ride cymbal bell sound.

If I was buying a starter kit or a second practice kit and I didn’t want to disturb others with the noise, this is the one I would go with. Anything less, you will miss some quality and features, and anything more would be too expensive for what you’re using it for. You could still perform with this kit as well.

This particular one has some options on Amazon to add cords, sticks, headphones, etc. Remember though, you need a throne and kick pedal and possibly some other items depending on which package you select!

Beginner

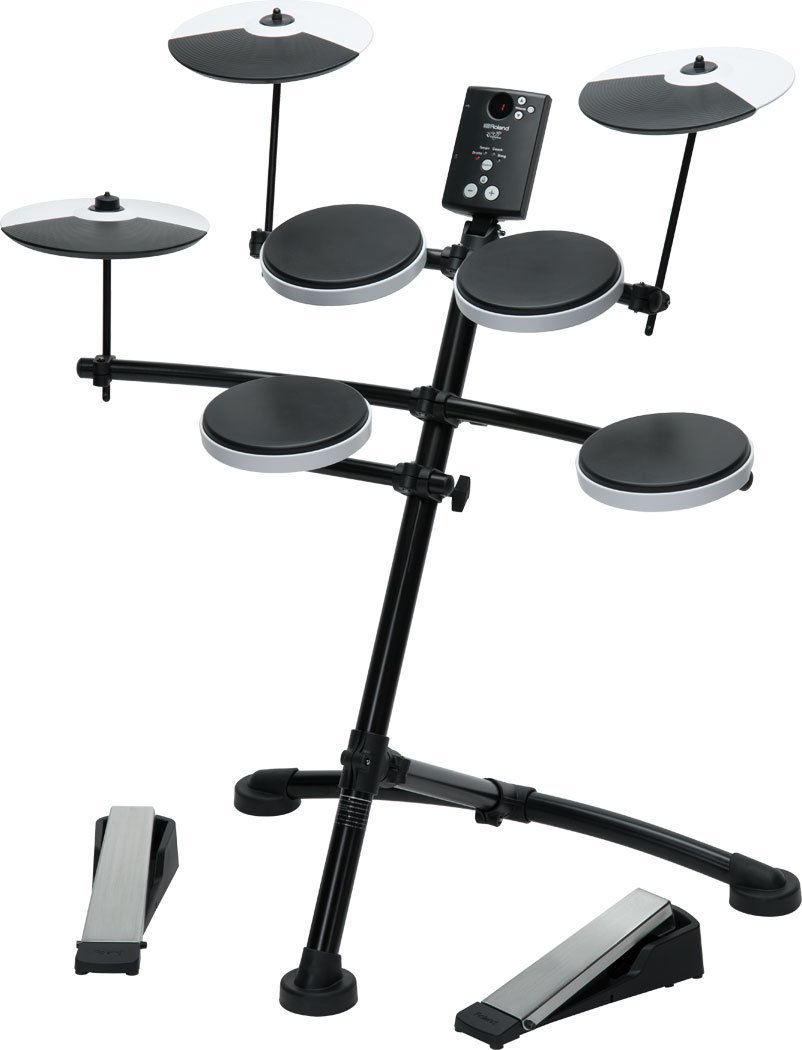
TD-1K

Roland TD-1K (view item on Amazon) (commissioned links)

This is an awesome beginners kit. The price is great and the quality surpasses the price. The module has 15 basic preset kits but they sound really great. You can’t tweak them like you can with the higher end kits but they definitely work from a practicing standpoint. The pedals that come with the kit are very basic and they leave a bit to be desired. The kick drum does not have a beater, just a sensor when your press down the pedal. This kit will feel quite a bit different from the higher end kits or real acoustic drum sets. I have heard of some people gigging with these but I’m on the fence about that. It is, however, super durable and lightweight.

You would only need to pick a throne, sticks and headphones to get rolling with this kit!

Yamaha

Not Too Expensive But Worth It

Yamaha DTX532K

Yamaha DTX532K with Accessories (view item on Amazon) (commissioned links)

Yamaha’s technology seems to rival just fine with Roland’s. This particular kit comes with everything you need to start playing including the throne, kick pedal, stands, and headphones. The cymbals are great because they support muting and swells. All the drum pads are silicone except the bass drum. With a rubber bass drum head, it might cause a bit of thumping in a 2nd floor or higher apartment. This is something you could upgrade later by buying a mesh bass drum pad. Only Yamaha’s expensive kits come with the mesh bass drum pad. It’s worth mentioning that there are apps you can use in conjunction with the Yamaha e-kits for recording, practicing, or just navigating the menus a bit easier.

Beginner

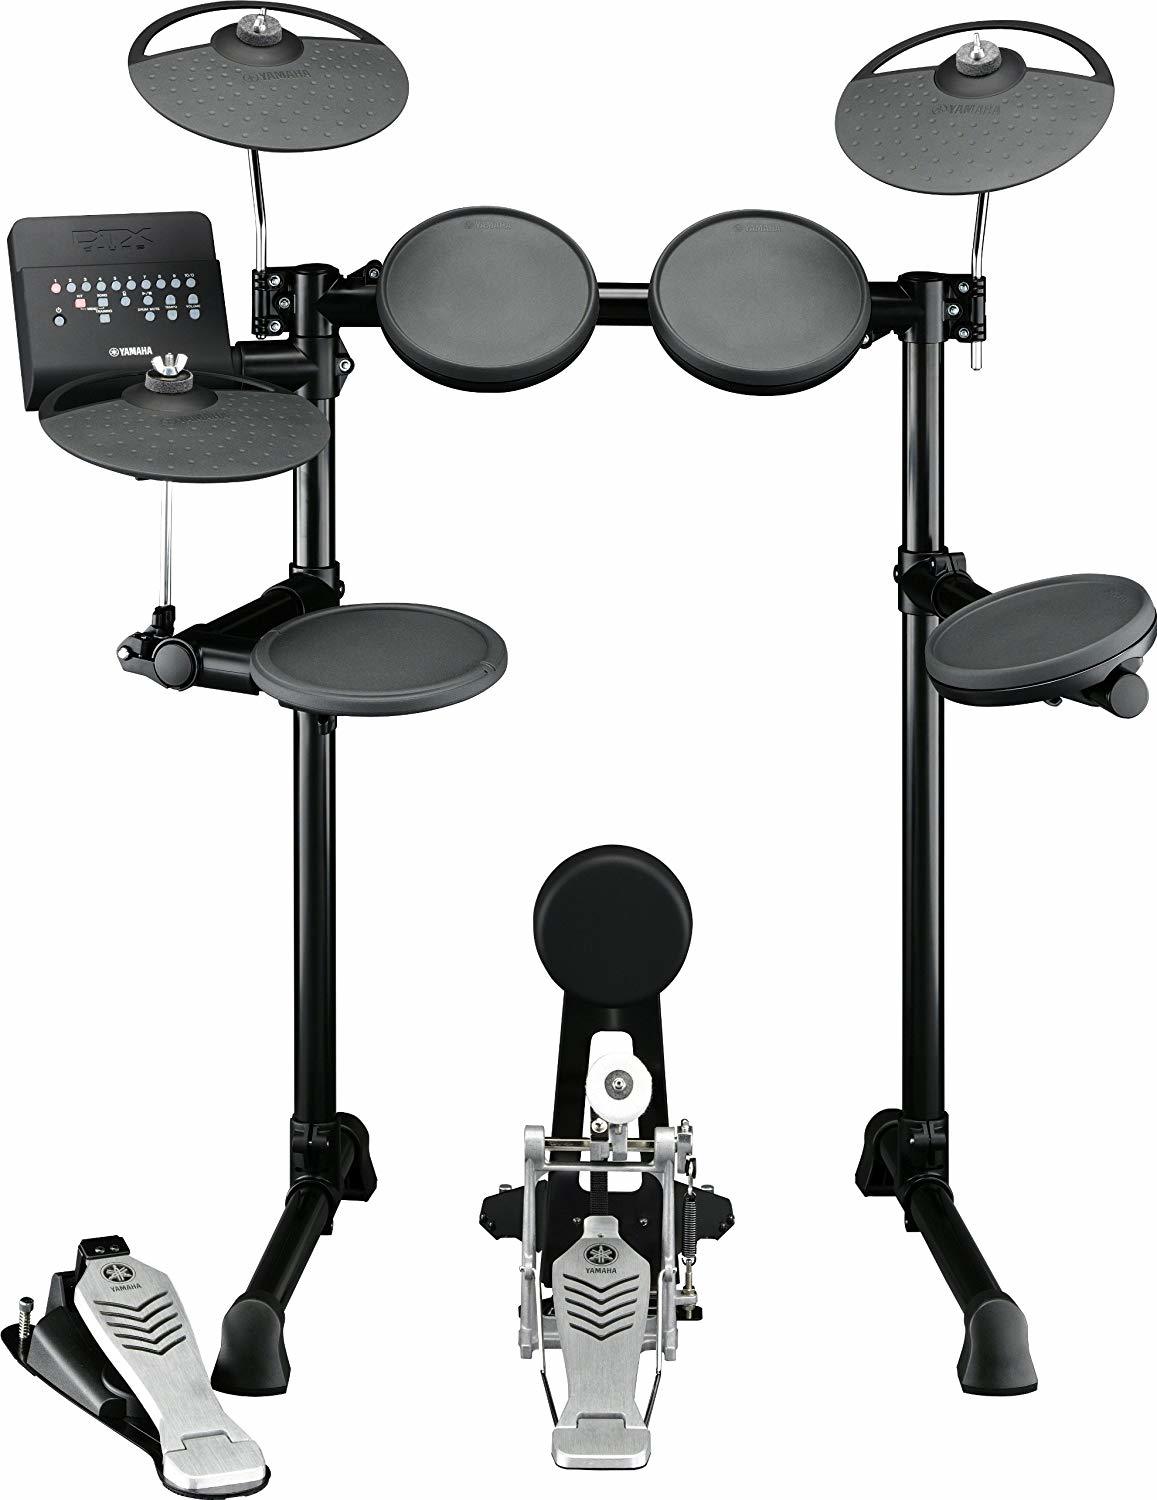
Yamaha DTX450K

Yamaha DTX450K (view item on Amazon) (commissioned links)

This one has a real kick pedal which goes a long way on a beginner kit. The price is still a little high for a beginner kit though. It’s pretty basic with rubber pads for all of the drums and cymbals. The snare does have 3 zones which allows for rim shots and side stick sounds. I think this one falls short on the cymbals and hi-hat. The hi-hat pedal won’t feel like the real hi-hat on the DTX532K and the cymbals only have one sound—no choke or swells. Again, this one is great for a beginner and the Yamaha line is really great with adding on and upgrading.

I would urge you to check out Yamaha’s homepage for their own comparison chart of all of their e-drum kits. You can go in depth to find exactly what you want out of your kit. Just go here:

Yamaha (USA) E-Drum Kit Model Comparisons

Alesis

Beginner

Alesis Nitro

Alesis Nitro (view item on Amazon) (commissioned links)

I found the price point on this kit to be the most intriguing. Their higher end kits just don’t compare to the Roland or Yamaha kits. For a kit at this price coming with all mesh heads, it’s quite a deal! One thing to note: it does not come with a throne! The pads feel really nice and the sounds are great. But, it always seems a little more difficult to dial in the right response settings on these Alesis kits. You can tell the pads aren’t the same high quality as the Rolands or Yamahas.

Other Beginner Option

Carlsbro CSD120

Carlsboro CSD120 (view item on Amazon) (commissioned links)

If you are looking for the most simple and inexpensive option to practice quietly, then this is it! This one does NOT come with a throne though. It’s very compact and has some good sounds that can definitely get you practicing. I would not suggest gigging with this kit.

Soundproofing & Treatment

If the muting and practice pad options don’t cut it for you and the e-kits don’t intrigue you, there’s always sound proofing and treatment. You can do as little or as much as you need to get the sound quieter depending on what your needs are.

Sound Treatment

Sound treatment can help a bit more than you might think. Simply placing foam pads across the walls might just be enough to kill the sound. Just buy some foam pads and glue them to a piece of cardboard or a thin piece of plywood and hang them like a picture. Center them on every large flat wall surface. These will help with the sound inside the room too if it is too lively and/or echoey. This is the best deal I found and you can buy these in packages with different amounts depending on how many you need.

12 Pack Acoustic Foam (view item on Amazon) (commissioned links)

Another helpful technique is hanging some foamed frames directly above your cymbals. This will really settle the cymbals down and help drastically inside the room as well. They have to be at least 2’ x 4’ (24 inches x 48 inches) to cover the entire length of the drum set.

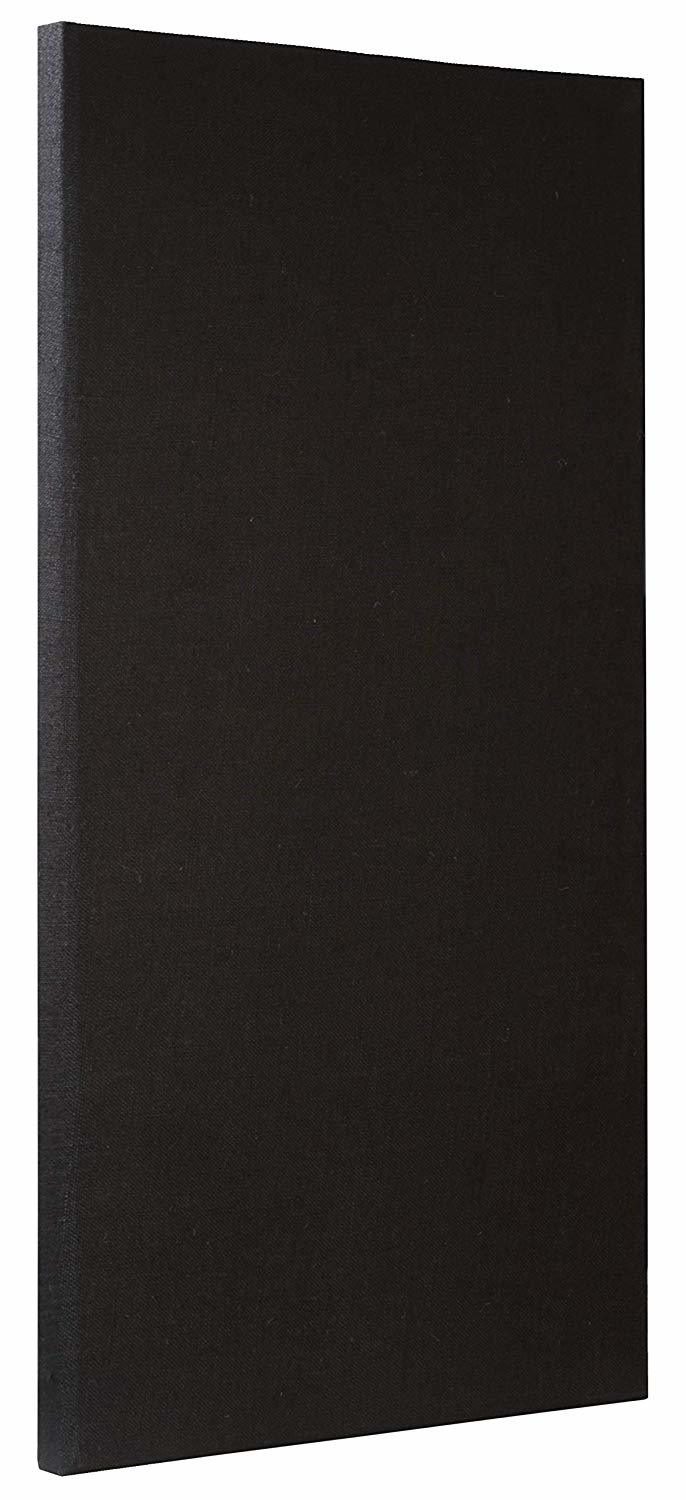
I hung up some homemade frames stuffed with foam and wrapped with cloth. These can also be mounted on the wall as well and they look a bit more attractive than the foam pieces glued to plywood or cardboard. You can build them or buy ones like these online for around $50 a piece. These particular panels comes in 3 different colors.

ATS Acoustic Panel (24"x48"x2") (view item on Amazon) (commissioned links)

I measured out the frames and put eye hooks on the ceiling and on the corners of the frames. Then I tied some string to suspend them about 8 feet above the ground where you drum set sits. Hopefully they hang at least 6 inches off the ceiling to allow them to trap reverberant sound in-between the frame and ceiling.

Here’s some instructions on how to build your own panels:

•How to Build Your Own Acoustic Panels at AcousticFreq.com

Soundproofing Windows

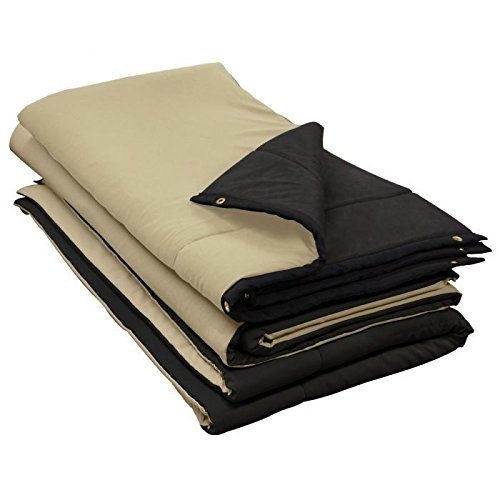
Windows can be the main culprit in letting sound escape. I would suggest hanging a vinyl cover or soundproofing blanket like these here. Trademark Soundproofing make some really nice window soundproofing products but they are very expensive—like $300! These here are more in the $100 range.

Audimute Sound Absorber (view item on Amazon) (commissioned links)

Audimute Sound Blanket (view item on Amazon) (commissioned links)

Soundproofing Walls

The options for soundproofing your walls range from relatively inexpensive to very expensive. There’s a lot of planning that would have to go into your project, assuming you’re handy enough to do the job yourself. Doing drywall can be a difficult job if you don’t know what you’re doing! Hiring out the work isn’t a bad idea as well if you want it done timely and efficiently.

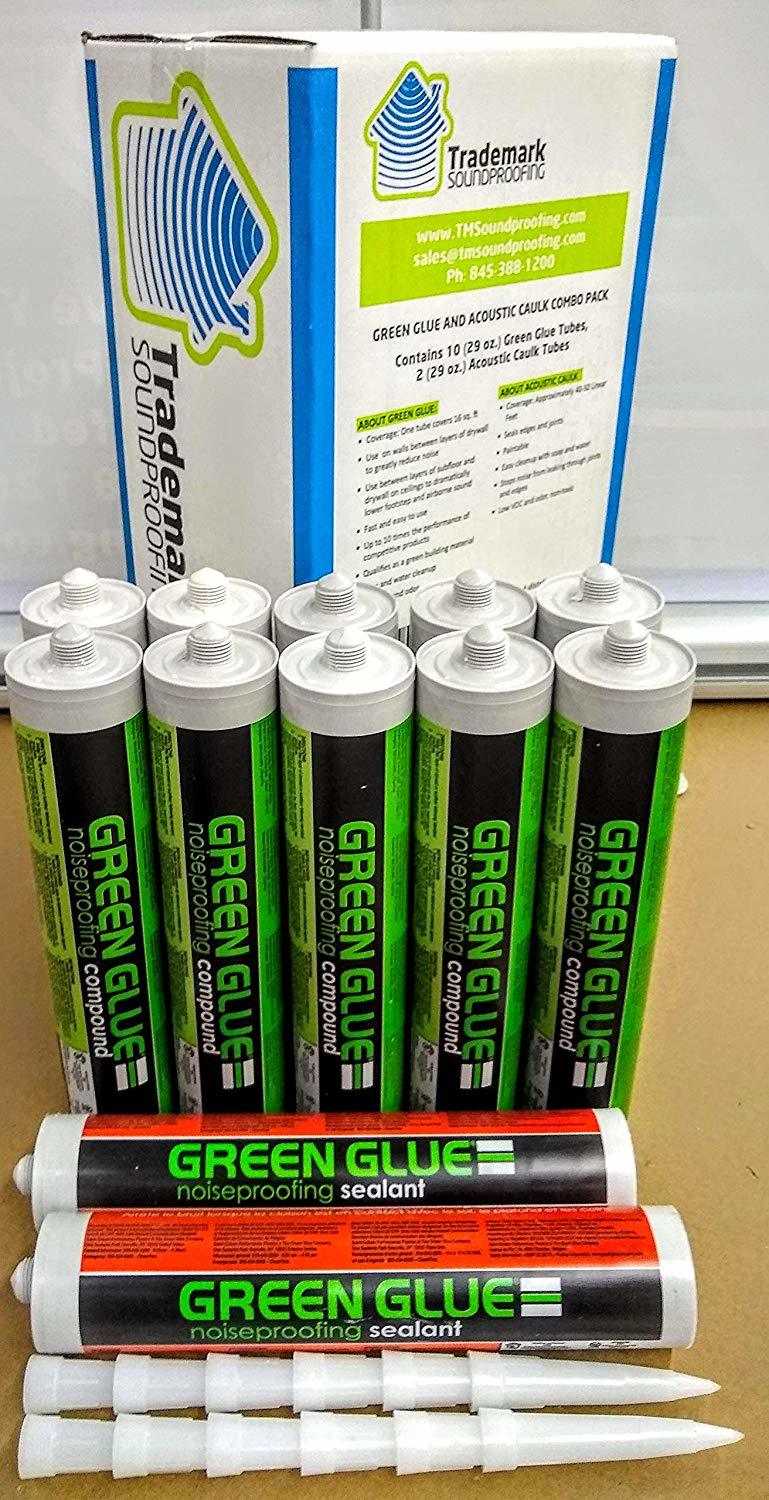
For the more modest and less expensive option, you can use regular pieces of drywall along with this product called Green Glue Compound. Essentially what you’re doing is adding another layer of drywall and putting the green glue in between the old drywall and the new drywall. Then you can re-trim and paint the wall. It’s much easier said than done!

Green Glue Compound & Sealant Combo Pack (view item on Amazon) (commissioned links)

You could also upgrade those pieces of drywall to soundproofing drywall. A regular piece of 4’x8’ drywall can cost as little as $7.50 versus a 4’x8’ piece of soundproofing drywall can cost about $55. You need 2 tubes of green glue per 4’x8’ sheet of drywall which cost about $20 per tube. You can get better pricing if you buy packs of tubes or 5 gallon buckets. There is also a “sealant caulk” which is used on the perimeter of each piece of drywall. One tube of the sealant covers about 50 linear feet for $20. There are packs of the compound and sealant together to help you save a little bit of money.

Green Glue Compound - 5 Gallon Bucket (view item on Amazon) (commissioned links)

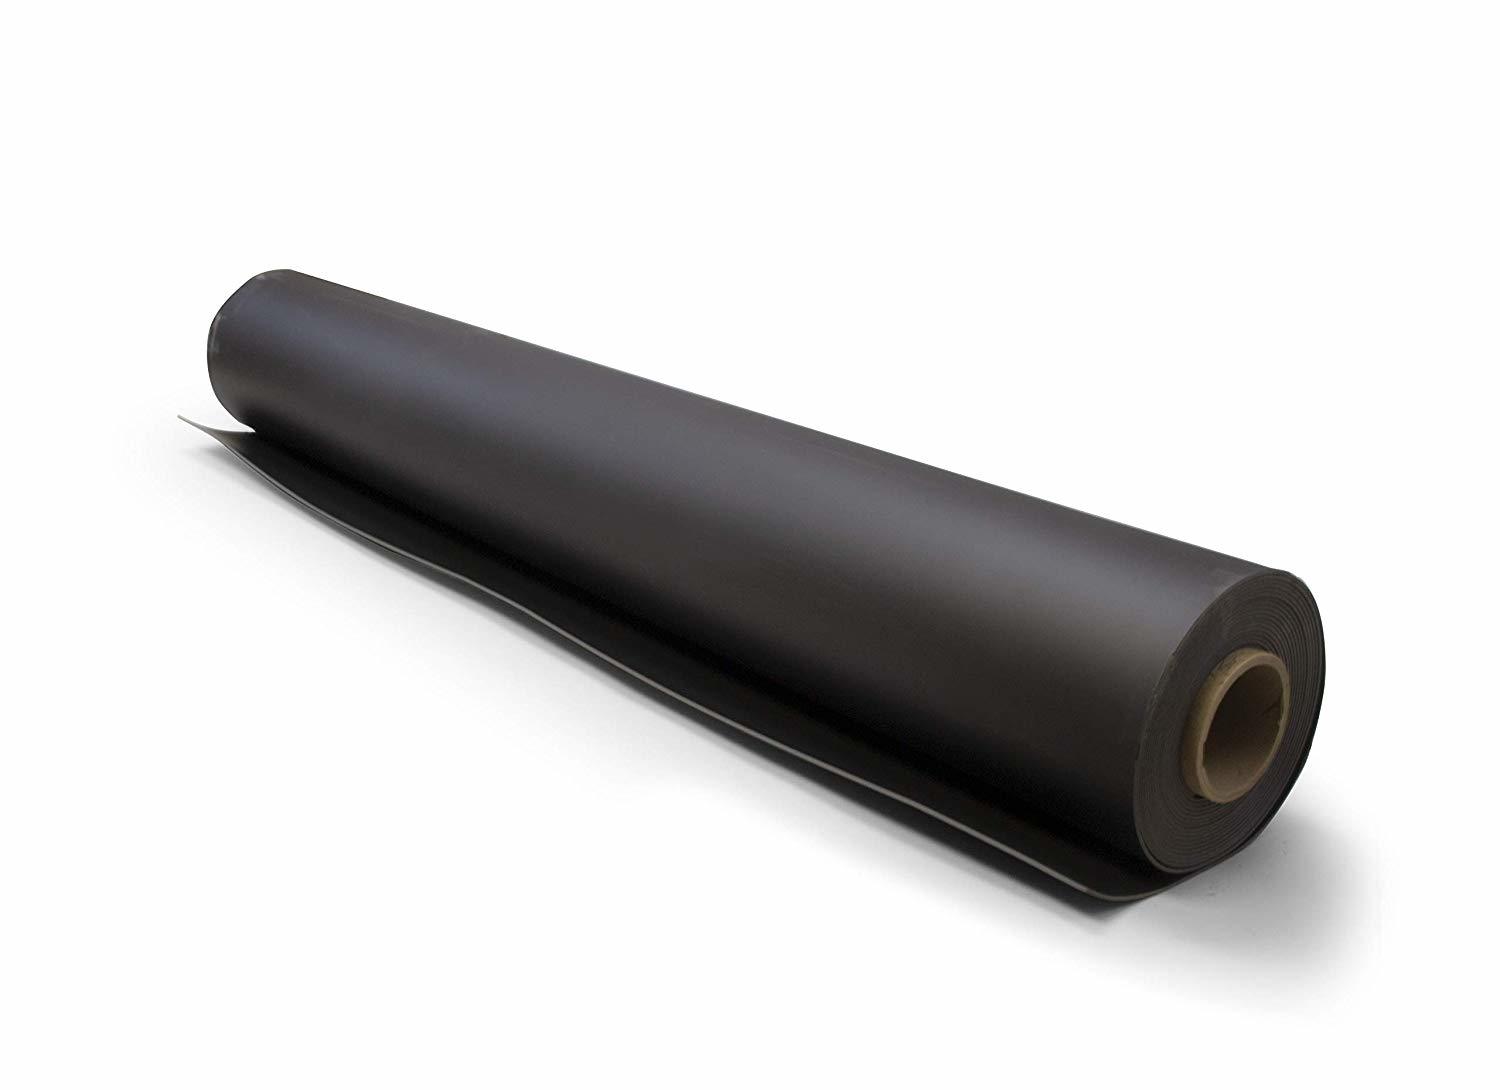
There are also vinyl soundproofing rolls that can be applied over studs, joists or in suspended ceilings. I have never tried these myself but if you are doing this yourself, I have heard that the rolls are extremely heavy and bulky and difficult to install because of their weight.

Soundsulate Vinyl Roll (view item on Amazon) (commissioned links)

So what would it cost?

If you hire out the work, drywalling a typical 12’x12’ room without the sound proofing products would cost about $600-$800. You would want to make sure you do the ceiling or floor as well depending if you are in a basement or an upstairs room. You could estimate by adding the cost of the green glue compound at about $400 and the sealant at $200 plus the added labor equalling about $800. If you want the soundproofing drywall, you would add another $600. So a very rough estimate would be about $2500-3000 for a thoroughly soundproofed 12’x12’ practice room. That’s still cheaper than some of the high end e-drum kits!

You can definitely save anywhere from $1000-$1200 in labor if you want to do it yourself. I am handy and like to do a lot of these DIY projects myself but I don’t feel comfortable giving my own directions on how to do this. Here are some resources that I would use for this DIY project.

•Soundproofing at TheSpruce.com

•Hanging Drywall at Homeadvisor.com

•Green Glue Installation at GreenGlueCompany.com

Soundproof a Ceiling

Soundproof a Floor

Soundproof a Window

So that's it! I've given you every option that I found effective to allow you to practice your drums without bothering anyone! And now that you are able to practice...time to get at it! And when you're ready to organize your practicing in a way that's most effective, check out my two part article:

Definitive Drum Practice Guide from Beginner to Advanced - Part 1 - Scheduling and Gear
Definitive Drum Practice Guide from Beginner to Advanced - Part 2 - Practice Session

As a member of the worldwide drum community, please share this to support me and I will do the same for you!

**Full Disclosure: I earn a commission if you click any of these links and make a purchase, at no additional cost to you.**
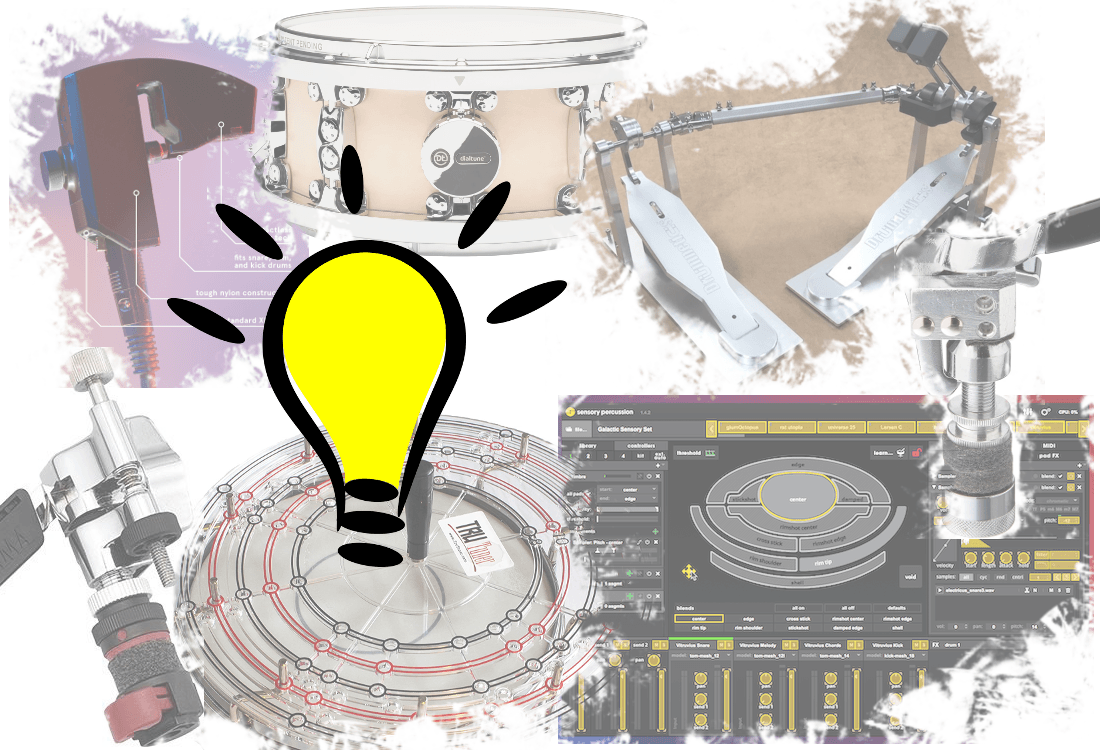
Everything a KID Needs to Start Drumming

I love to see the excitement in a child when they decide they want to do something new...like taking up drumming. I have a young son myself and he loves drumming. I taught him a whole summer of lessons and now he thinks he knows it all! Ha! But, there are a few things that I was able to set him up with so he had the right tools to start learning.

I'm going to go over everything your child would need to get started in drums or percussion. This would cover drum sets, sticks, lessons, books, pads, metronomes, etc. I am specifically writing this for my own new students but I know this will help other parents too. This article covers kids from ages 5-10. If they are older, take a look at my other article that covers ages 10 to adult: Definitive Drum Practice Guide from Beginner to Advanced - Part 1 - Scheduling and Gear

What Age Should they Start?

I always say that the age of five is probably the youngest a child could start learning drums. Of course, that depends on how much they are able to focus. Some kids at 5 years old can't focus at all while some can focus for at least 20-30 minutes. This is a relatively normal attention span with how most kids develop. My son didn't try lessons until he was 6 and it was a struggle for him to focus longer than 10 minutes. It would be safe to say that any child 8 years old and up would be ready to start learning drums.

Should They Get Lessons?

I have an opinion about “lessons vs. self-taught” that I would like to explain so I can help you decide on whether they should get lessons or not.

When you self-teach, in any subject or discipline, it only takes you longer to reach your goals if you do it without the direction of a teacher that has already reached similar goals. I understand that everyone learns a bit differently, but as long as you have a good teacher, they will always find a solution faster than you can. Otherwise you're just taking shots in the dark to try to figure out techniques, licks, etc.

Bottom line is, good teachers will always help you reach your goals faster. At a younger age (younger than 12), it is almost imperative to get them lessons. There aren't a lot of children that would be able to learn drumming without some direction to start with.

What You Need to Buy

Drumset, Practice Pad, or Percussion Kit?

This is the big question here. How far do you think they will go? Do they seem dedicated enough to invest in a drum set? That is going to have to be the question you ask yourself. Obviously there are drum sets of all sizes and colors. But you don’t need to start out by spending $800 on a drum set. You could start out with a beginner's drum set, practice pad, or percussion kit. This would get them started practicing techniques like single stroke or double stroke rolls. Even learning to hit a drum properly can be tricky at first. In this section, I will cover all types of options ranging from cost effective to higher end. One thing to remember, when you start buying adult sized, medium quality kits, they don't come with cymbals, pedals, or thrones (drum seats). Decent cymbals are almost always sold separately from drum sets and can range anywhere from $200-$500 for one cymbal!

Drumset

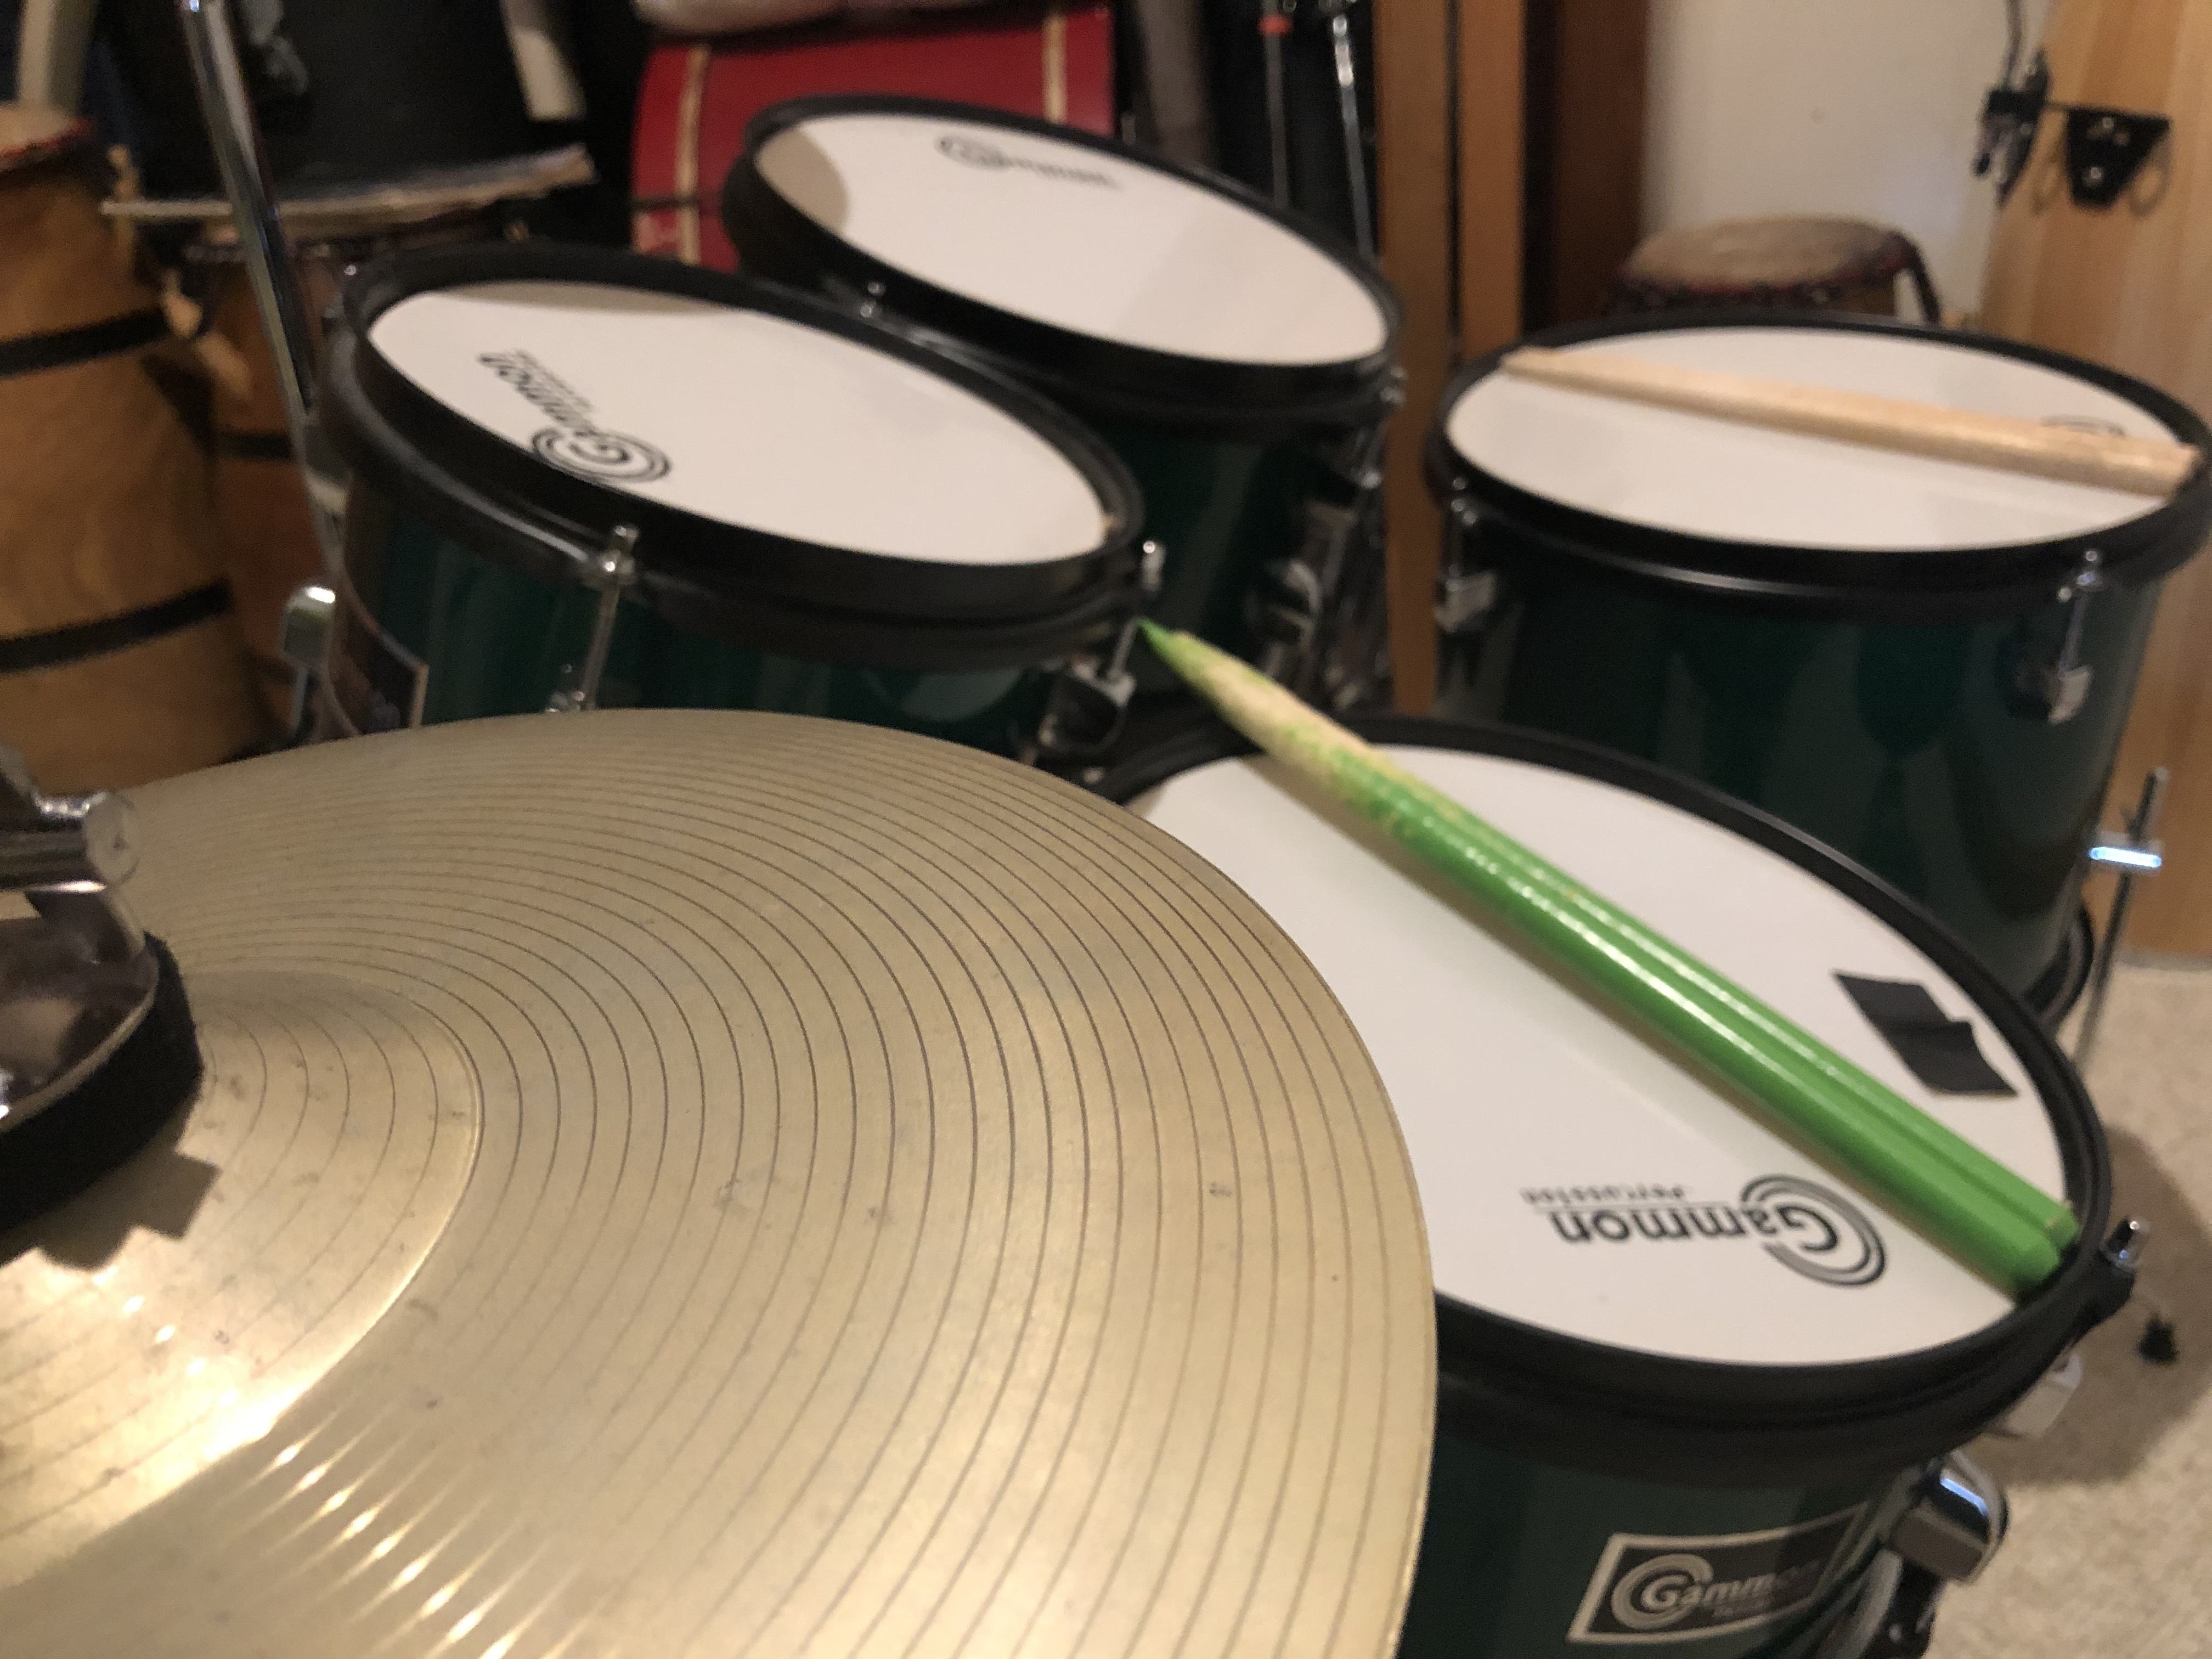
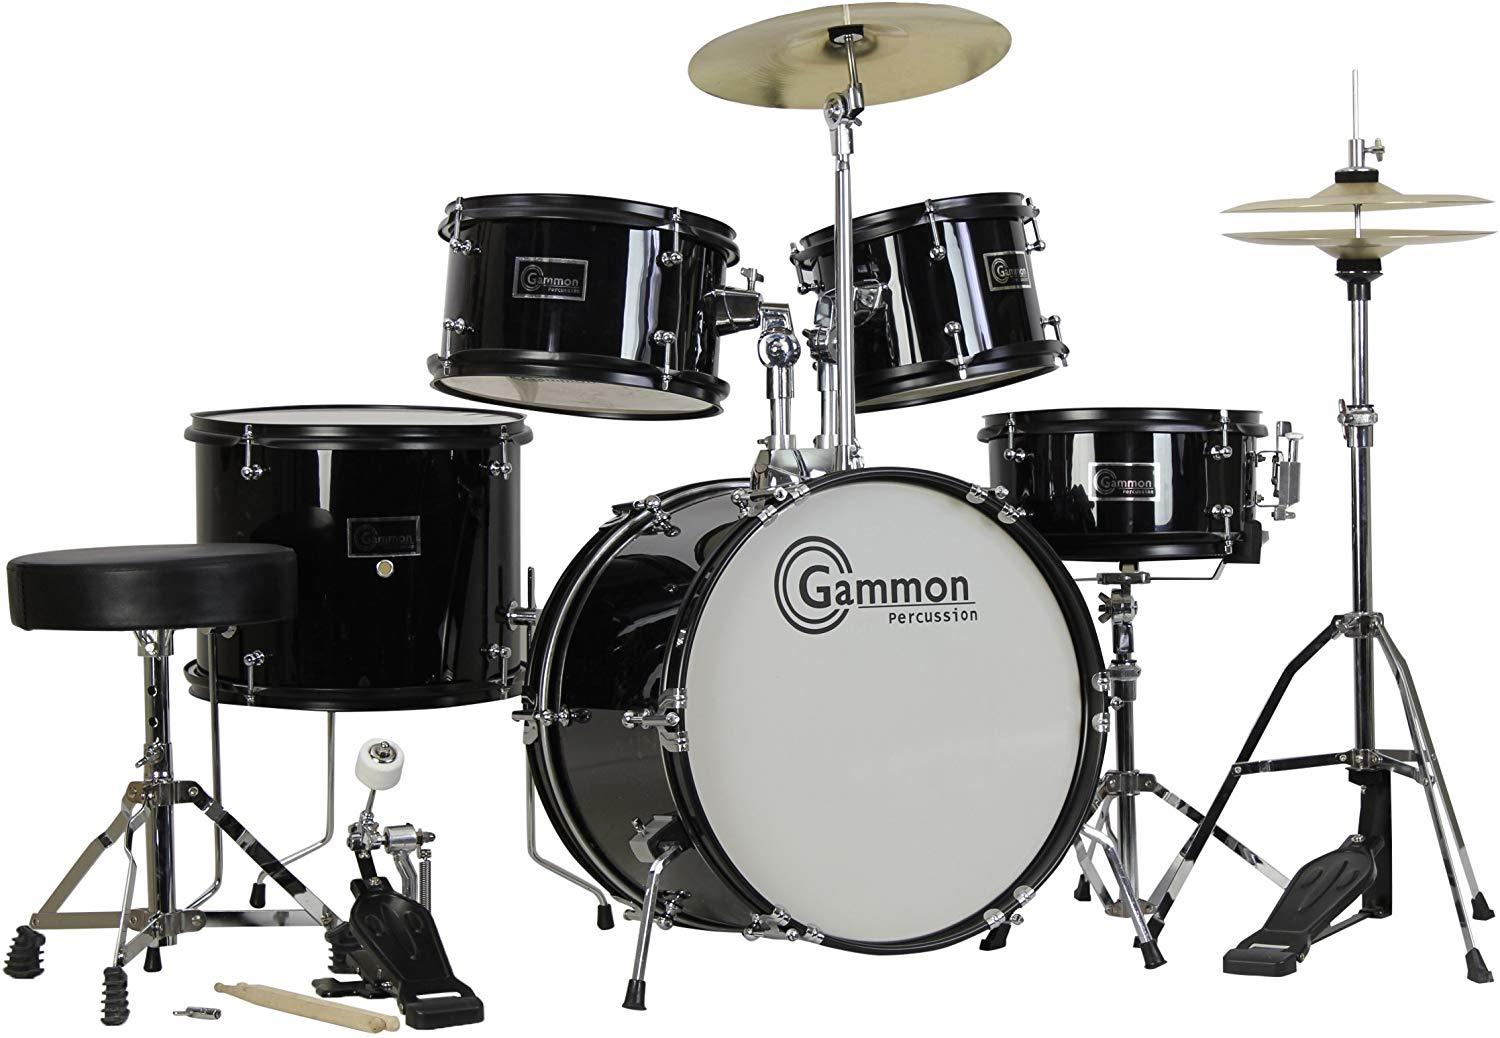
I bought my son this Gammon Drum set when he started showing a lot of interest. For the price, it's great. The cymbals could be better but I still thought it was worth the price. The drums sound pretty good and they are tunable. The cymbals could be upgraded at a later time if the student continues to stay interested. Cymbals can be expensive so buying them later can help get your child started while keeping the cost down. This set comes in a few different color choices as well.

Gammon 5-Piece Junior Starter Drum Kit with Cymbals, Hardware, Sticks, & Throne (view item on Amazon.com) (commissioned links)

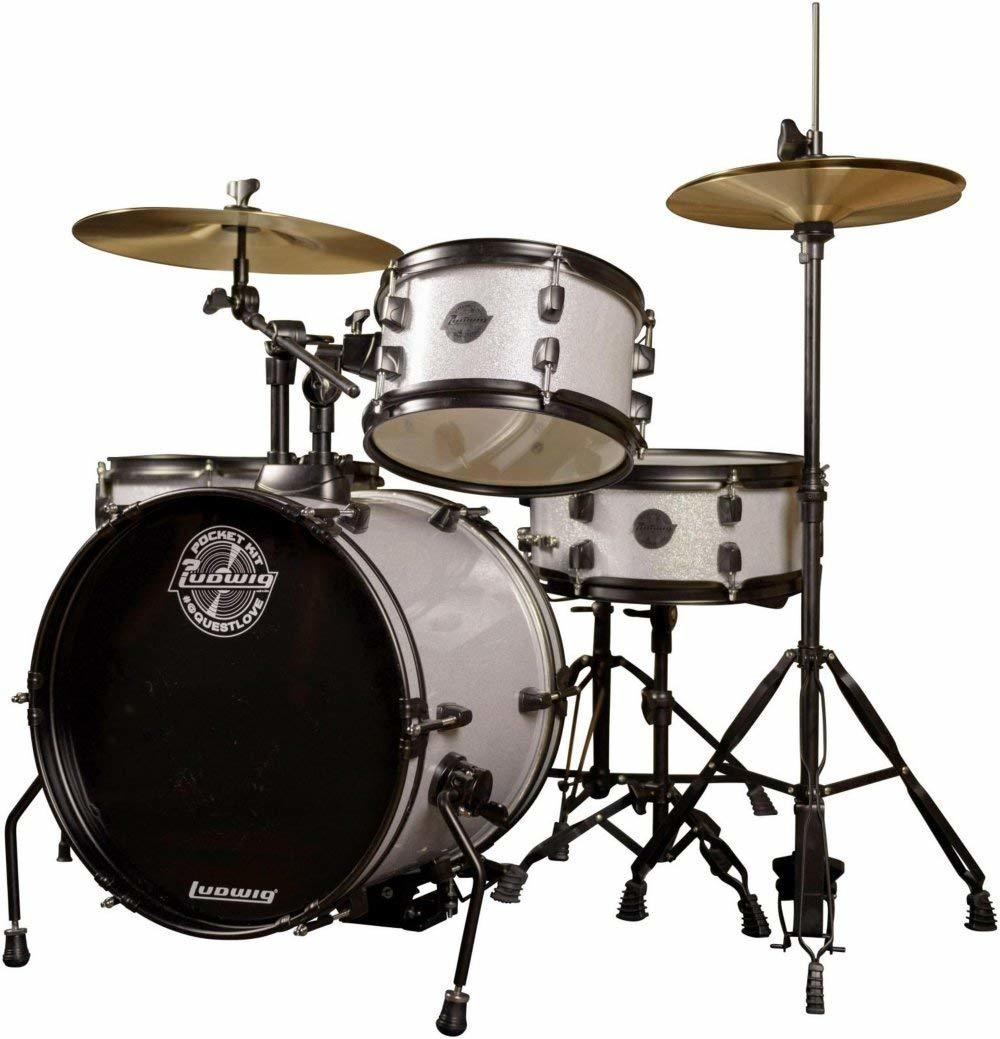
If you wanted to step up the quality in the drum set, you could take a look at this Ludwig Questlove Pocket Set. Buying a name brand will help a lot with resale value if they happen to lose interest. I will say with this kit as well, the cymbals still aren't much to be desired. However, this kit can be grown into and upgraded a bit easier than the previous kit, and it will last longer too. There are a few colors to choose from on this kit as well!

Ludwig LC178X016 Questlove Pocket Kit 4-piece Drum Set (view item on Amazon.com) (commissioned links)

If you want to support your child's interest in drums, and keep your neighbors in good standing with you, you might want to look at an electronic drum set. These can be virtually silent when played but heard in headphones or controlled by volume through speakers. It has a built in metronome and other practice tools right in the module and a bunch of sounds sounds to play with. I do have to mention that nothing can replace the sound and feel of a real acoustic drum set. Learning on a electronic drum set can be good for a while but eventually, they will need to learn techniques that are difficult to replicate on an electronic drum set.

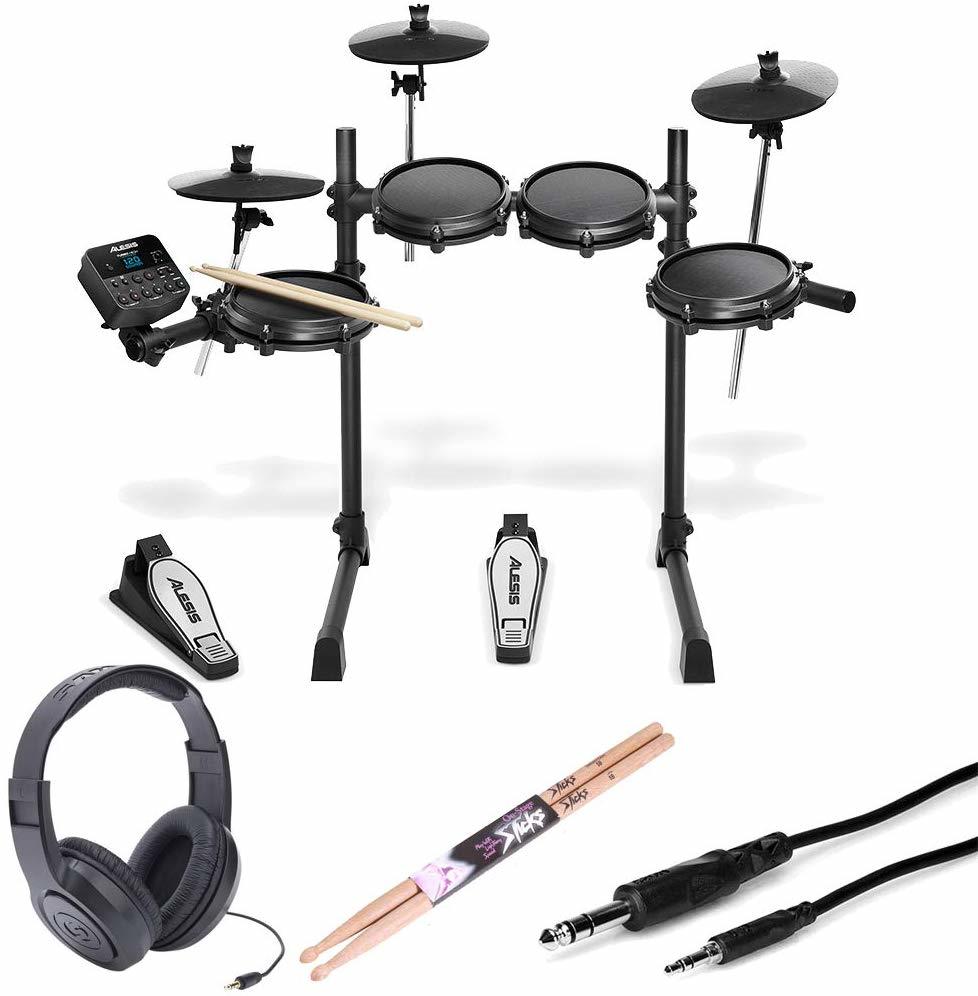
This Alesis Turbo kit is very affordable and comes with everything you need including sticks and headphones. The sticks might be a bit too long for a smaller person but I have some other options listed below.

Alesis Turbo Mesh 7 Piece Electronic Drum Kit With a Pair of Drum Sticks + Samson SR350 Headphones + Hosa 3.5 mm Interconnect Cable, 10 feet - Deluxe Accessory Bundle (view item on Amazon.com) (commissioned links)

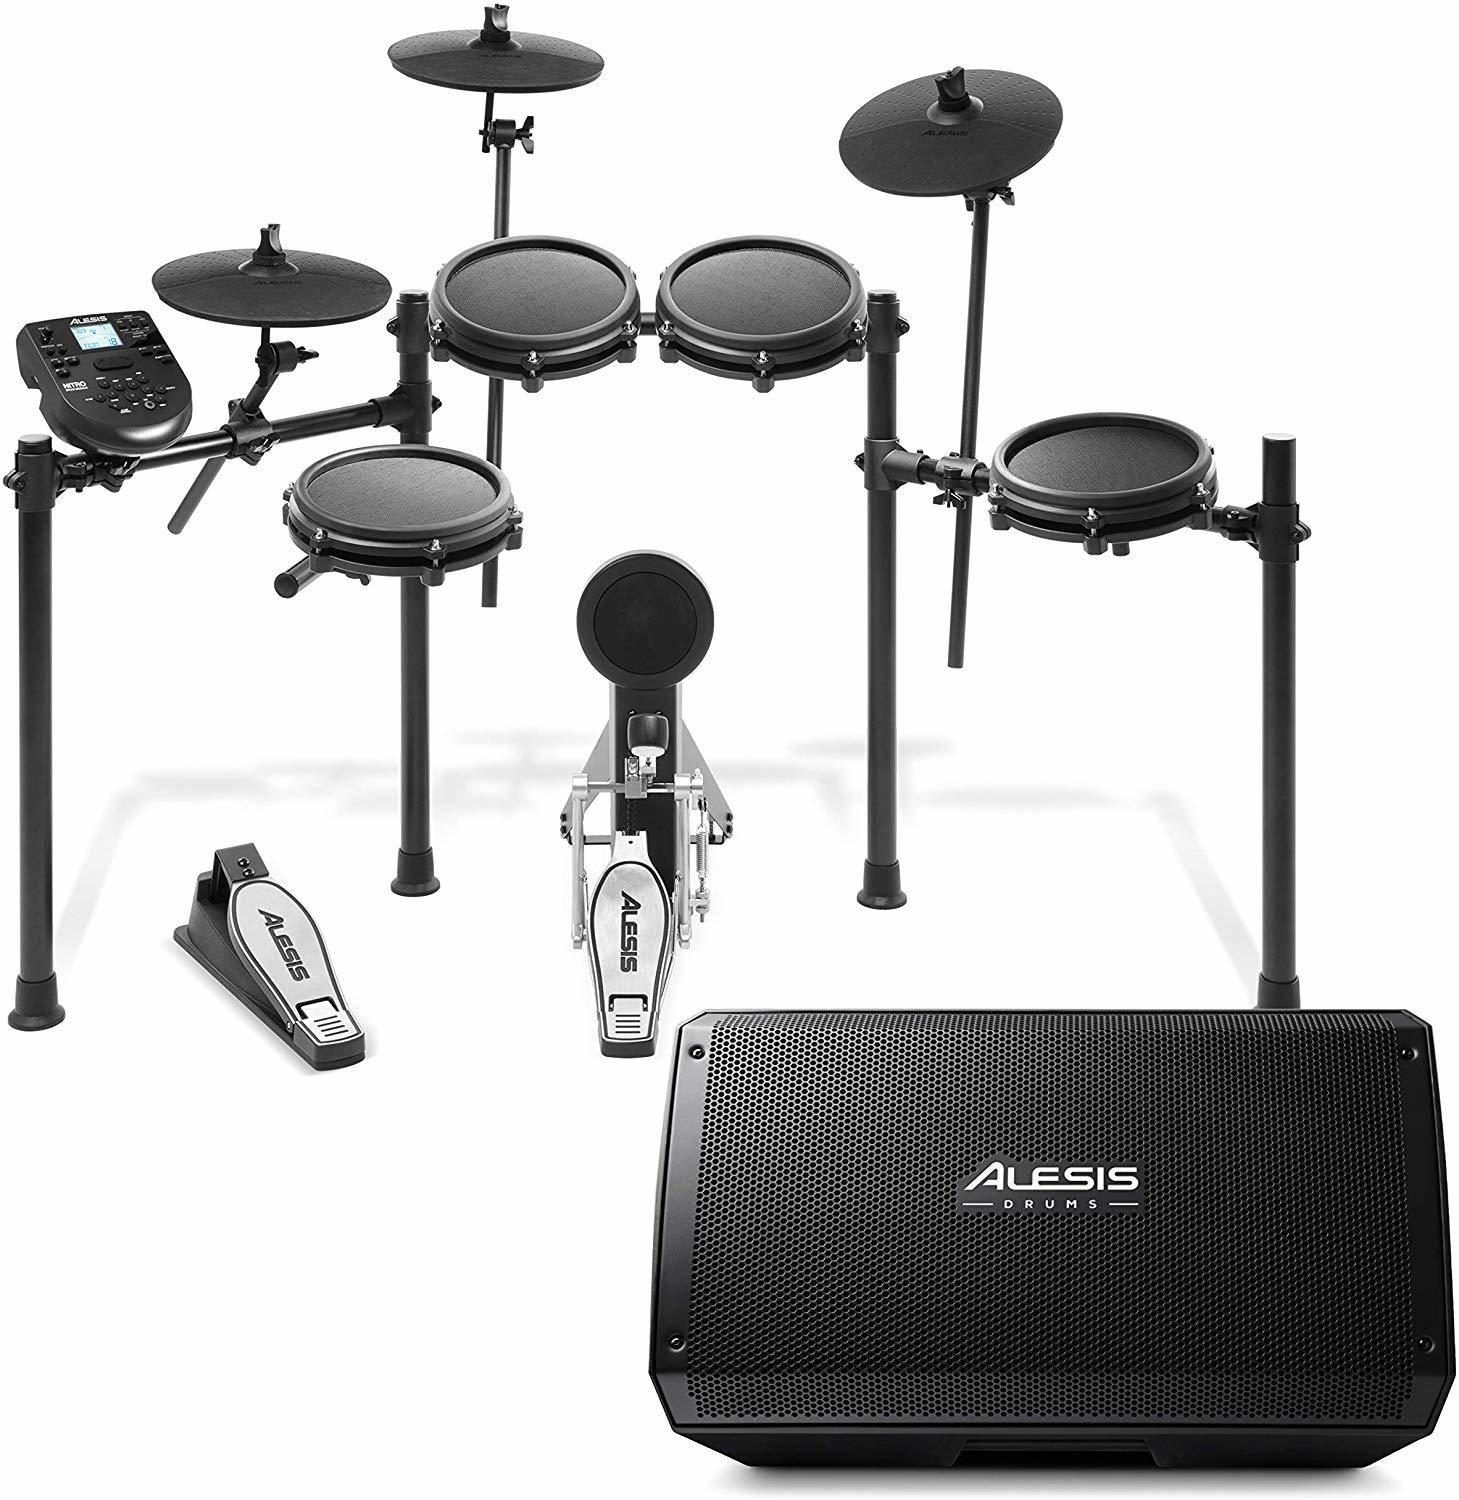
If you wanted to upgrade or buy a package with a speaker, you can take a look at this Alesis Nitro kit with a speaker included.

Alesis Nitro Mesh Kit + Strike Amp 12 | 8-Piece All-Mesh Electronic Drum Kit Bundled with 2000-Watt Ultra-Portable Powered Drum Speaker/Amplifier (view item on Amazon.com) (commissioned links)

Practice Pad

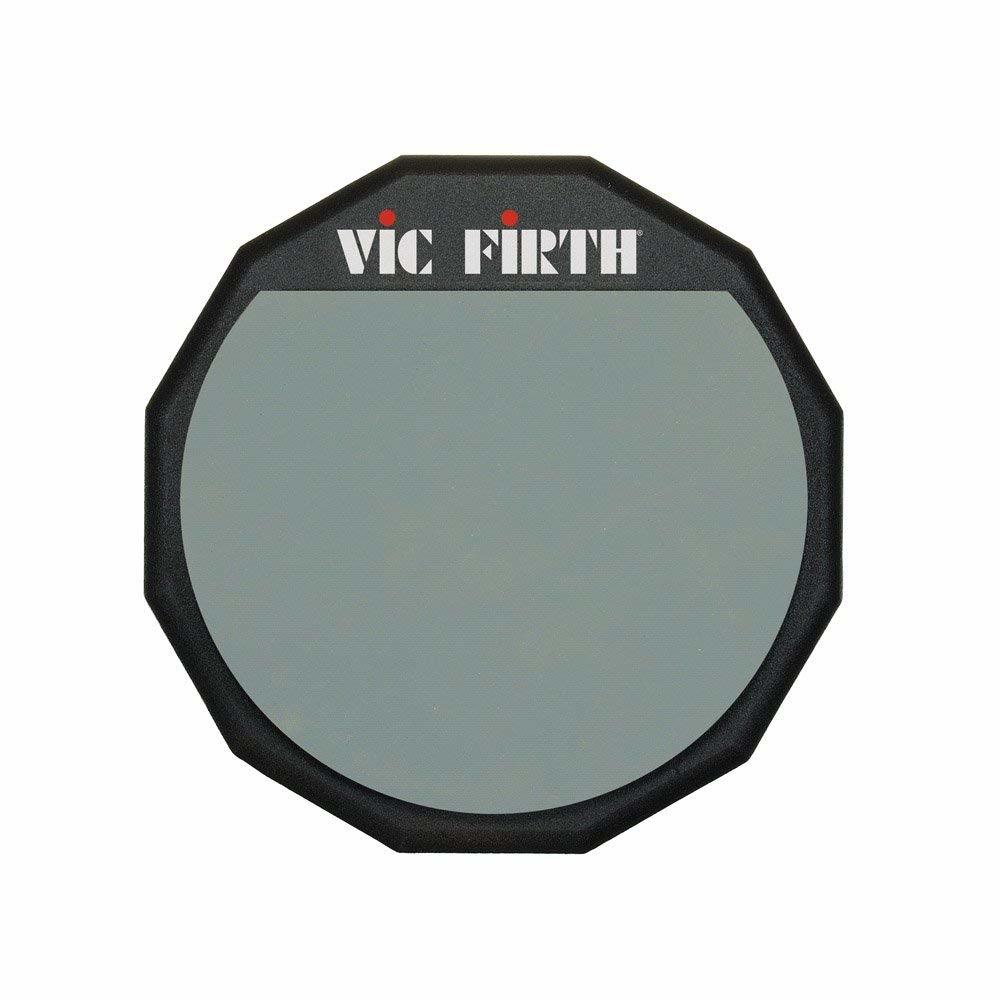
For around $20, you can get a practice pad and work on almost all the drumming techniques they will need in order to sound good on a drum set. And your student will always need a practice pad. I have three myself and I use them all the time. They can use them for warm-ups backstage before performances, late night practice when they can’t be loud, practicing on a beach, or on the john! They’re smaller and easier to transport than a drum set!

Vic Firth 6" Single Sided Practice Pad (view item on Amazon.com) (commissioned links)

Percussion Kit

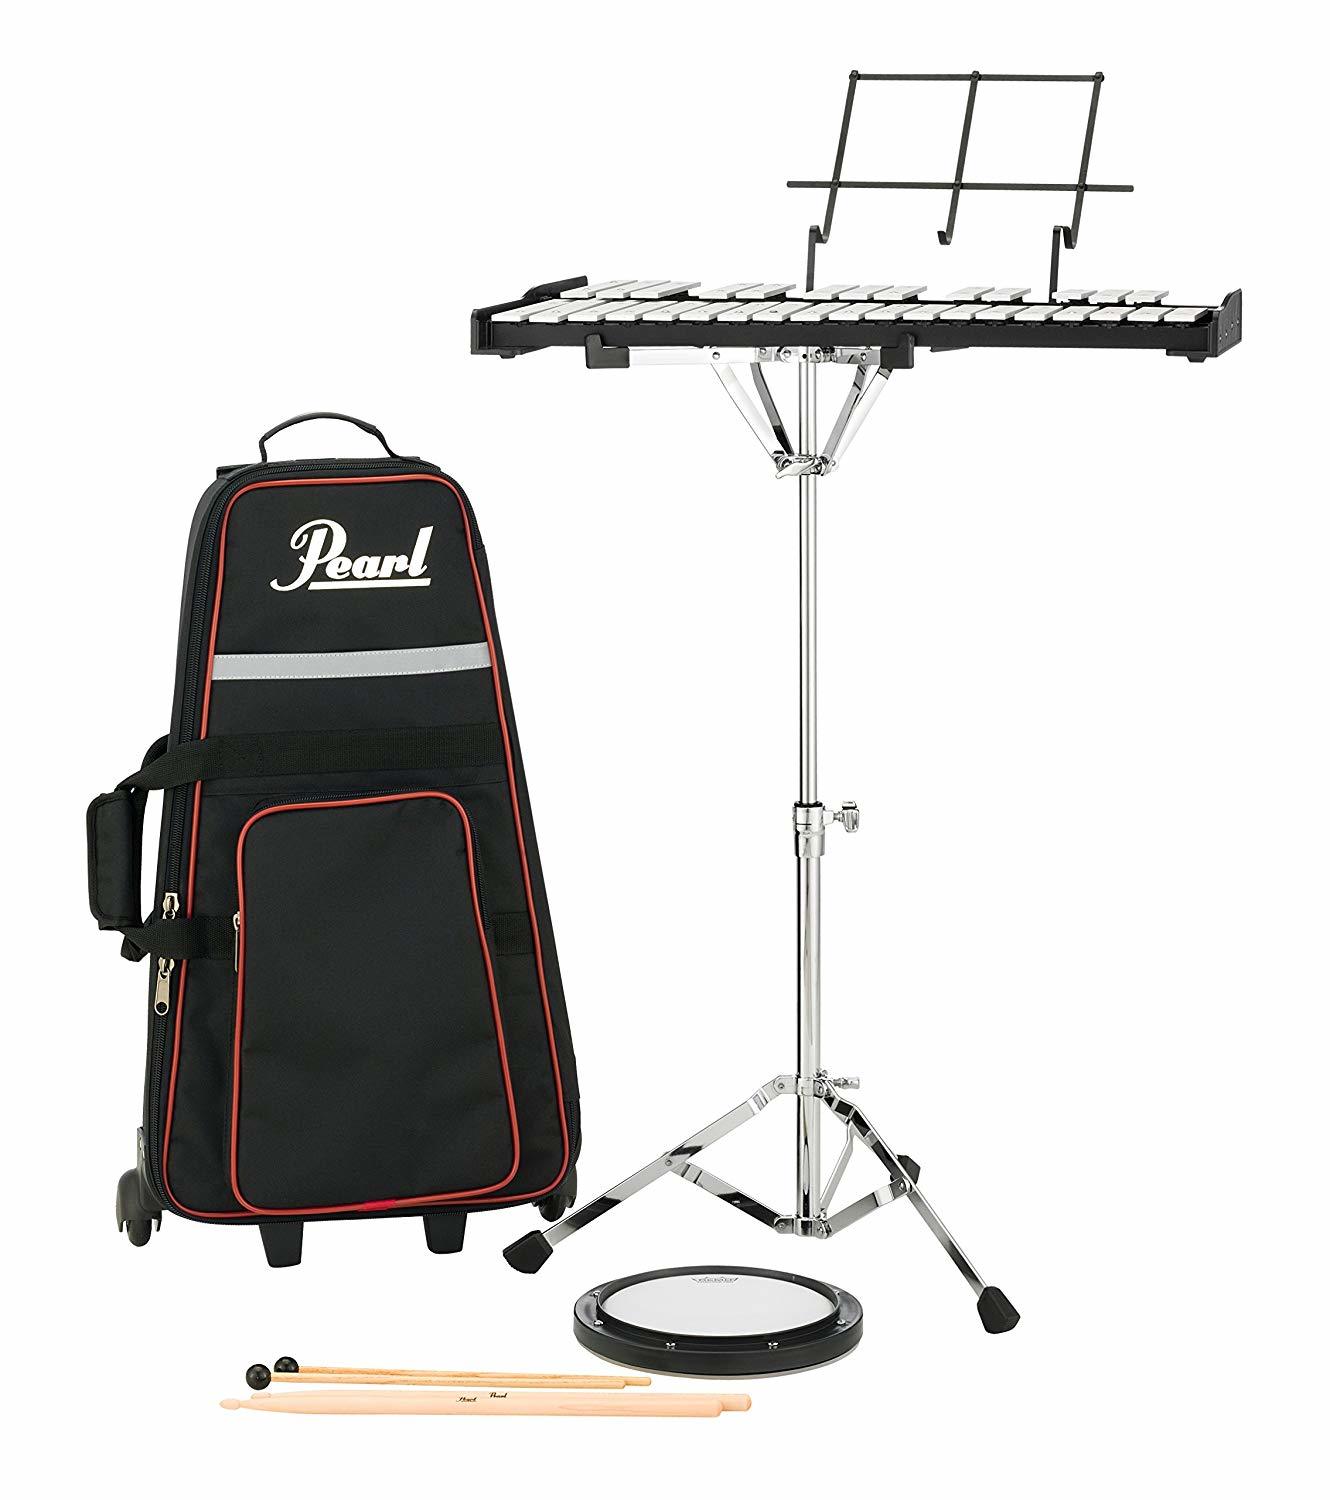
When a student joins the school band, a lot of schools require that you purchase a percussion kit. This is a kit that includes sticks, practice pad, bell kit, mallets, and a multi purpose stand. I would highly suggest getting a good quality one for two reasons. First, the cheap ones are really bad and will fall apart before school years end. Secondly, the resale value on a brand name kit will not go down by much. It will sell without trouble because people are always looking for these.

Pearl PK910C Educational Bell Kit (view item on Amazon.com) (commissioned links)

Sticks

Every drummer needs drumsticks, but what kind? There are literally hundreds of different types of drumsticks. At this age, the length and weight are the most important because standard/adult sized sticks might be a bit heavy. A lot of kids like to get sticks with their favorite characters or band on them. As long as the drum sticks are about the length of their forearm, it should work well for them. I like these Vic Firth Kidsticks, they come in blue or pink.

Vic Firth Kidsticks (view item on Amazon.com) (commissioned links)

For kids under 12 and have joined school band or a community band, then the Vic Firth SD1 Jrs. are what you'll need. They are a bit bigger than drum set sticks but they work better for concert snare drum and tom work.

Vic Firth American Custom SD1 Jr. Drumsticks (SD1JR) (view item on Amazon.com) (commissioned links)

Metronome

One item that musicians overlook is a metronome. This is an essential practice tool for any musician. A metronome is a small electronic device or a phone app that makes a “click” noise at a perfectly constant speed that you set it to. The clicks are measured by “beats per minute” or BPM. For the math junkies, a metronome set at 60 BPM will click 60 times in one minute.

Almost all music is set to a constant pulse and it is essential for all musicians to have a solid internal pulse that doesn’t speed up or slow down (unless intentional). The only way to practice your internal pulse is to practice along to a metronome set to a perfectly constant tempo.

As a drummer, it is a bit more difficult to practice with a metronome because our instrument is naturally loud. And, as a beginner, it is difficult to control the volume at which we play. So, a lot of metronomes are too quiet to hear while we practice with them. The solution is to get some sort of an in-ear monitor or headphones. This helps block the outside sound allowing us to hear the click.

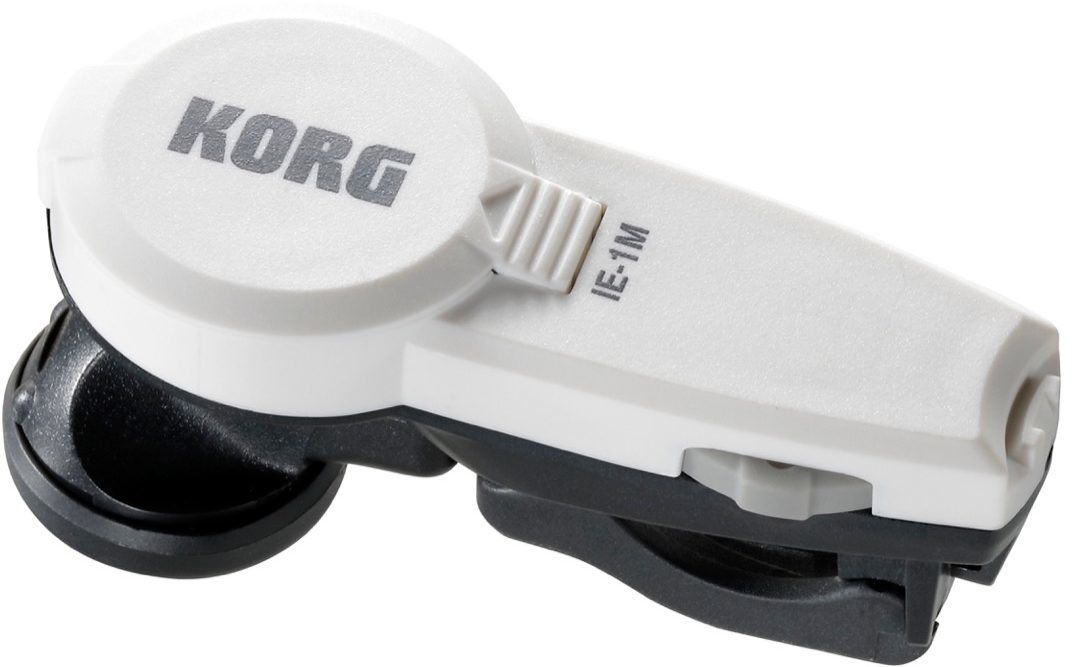
There are many metronome apps available on our phones that are free. If you go that route you could get these sound isolation headphones: Shure SE215-CL Sound Isolating Earphones. Or, you could use other headphones you already own for the time being but they might not provide very much isolation. Otherwise, you can purchase this ‘all-in-one’ in ear metronome: Korg In-Ear Metronome.

Shure SE215-CL Sound Isolating Earphones (view item on Amazon.com) (commissioned links)

Korg IE1M In-Ear Metronome (view item on Amazon.com) (commissioned links)

Practice Book

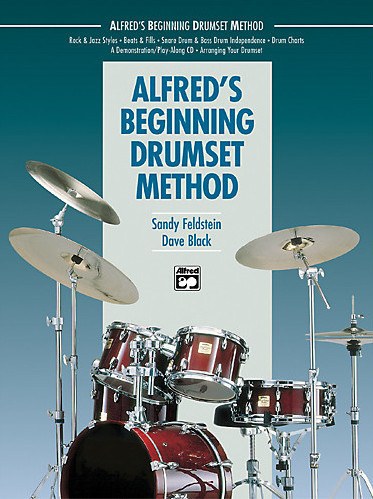
This is the one book I go to as the definitive starting drum set method. Alfred's Beginning Drumset Method is perfect. It starts with reading music and rhythms, holding the sticks, and playing basic rock beats and eventually moves along to more advanced beats and a jazz section in the second half. This is the book I started with myself!

Alfred Beginning Drumset Method Book with optional CD (view item on Amazon.com) (commissioned links)

And with that, I think your little beat maker is ready to get started! Don't hesitate to email me with any questions!

As your student moves along, I would strongly suggest reading my two part series on practicing. The links are right here:
Definitive Drum Practice Guide from Beginner to Advanced - Part 1 - Scheduling and Gear
Definitive Drum Practice Guide from Beginner to Advanced – Part 2 – Practice Session

Thanks for reading!

**Full Disclosure: I earn a commission if you click any of these links and make a purchase, at no additional cost to you.**
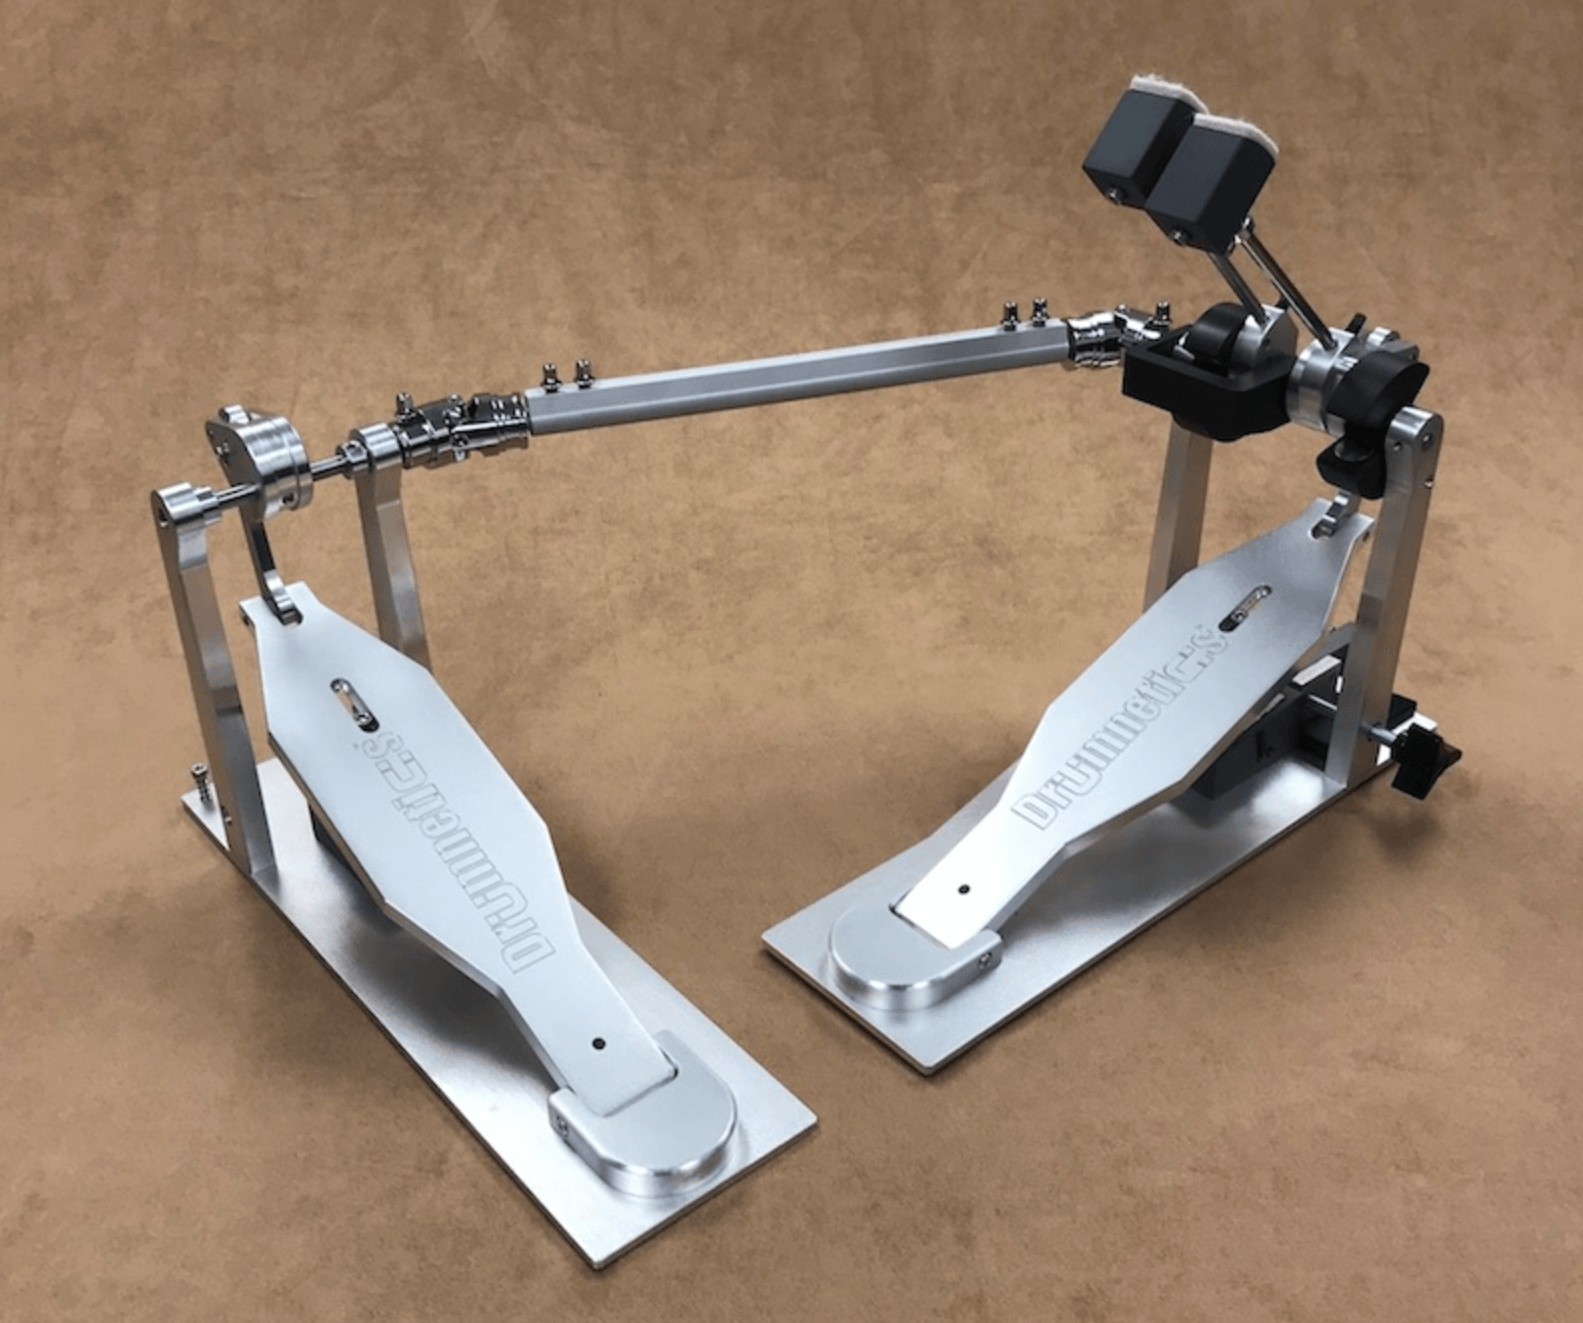
Simple Song Charts

Most drummers might think that you only need to chart songs if you’re filling in or joining a new band AND that you need to know how to read music to do it. I have found that charting songs can be helpful in ANY context and you don’t have to know how to read music to do so.

Aside from the obvious uses, I have used song charts for writing music, learning or reworking cover songs, remembering new original material, helping new members learn songs, prepping for online drum sessions, or any type of song organization. Whether your writing music with other musicians in jam situations or all by yourself, it’s very helpful to write out song forms and audition different structures.

There are many types of ways to chart a song. There are tabs, transcriptions, and charts. Tabs and transcriptions are usually exact notation, or at least close depending on the author. They can be helpful if you would like to learn exactly what the original artist played on that song. They are also a good way to learn cool beats and fills from your favorite drummers that you can’t figure out by listening to the recordings. Then you can add these your arsenal.

Song charts are much more of an abbreviated version of a tab or transcription. They can sometimes be pretty long and specific depending on the author. However, they can also be short and simple without any notation at all. When you’re at a level where you need to learn a lot of songs in a short period of time, song charts are more than adequate. That’s because you probably already have a tool box of beats and feels to choose from to use in a song so you wouldn’t need any beats or fills written out exactly.

The point of a song chart is to remind you, in brief, of what the form of the song is and guide you in making decisions on what to play throughout the song.

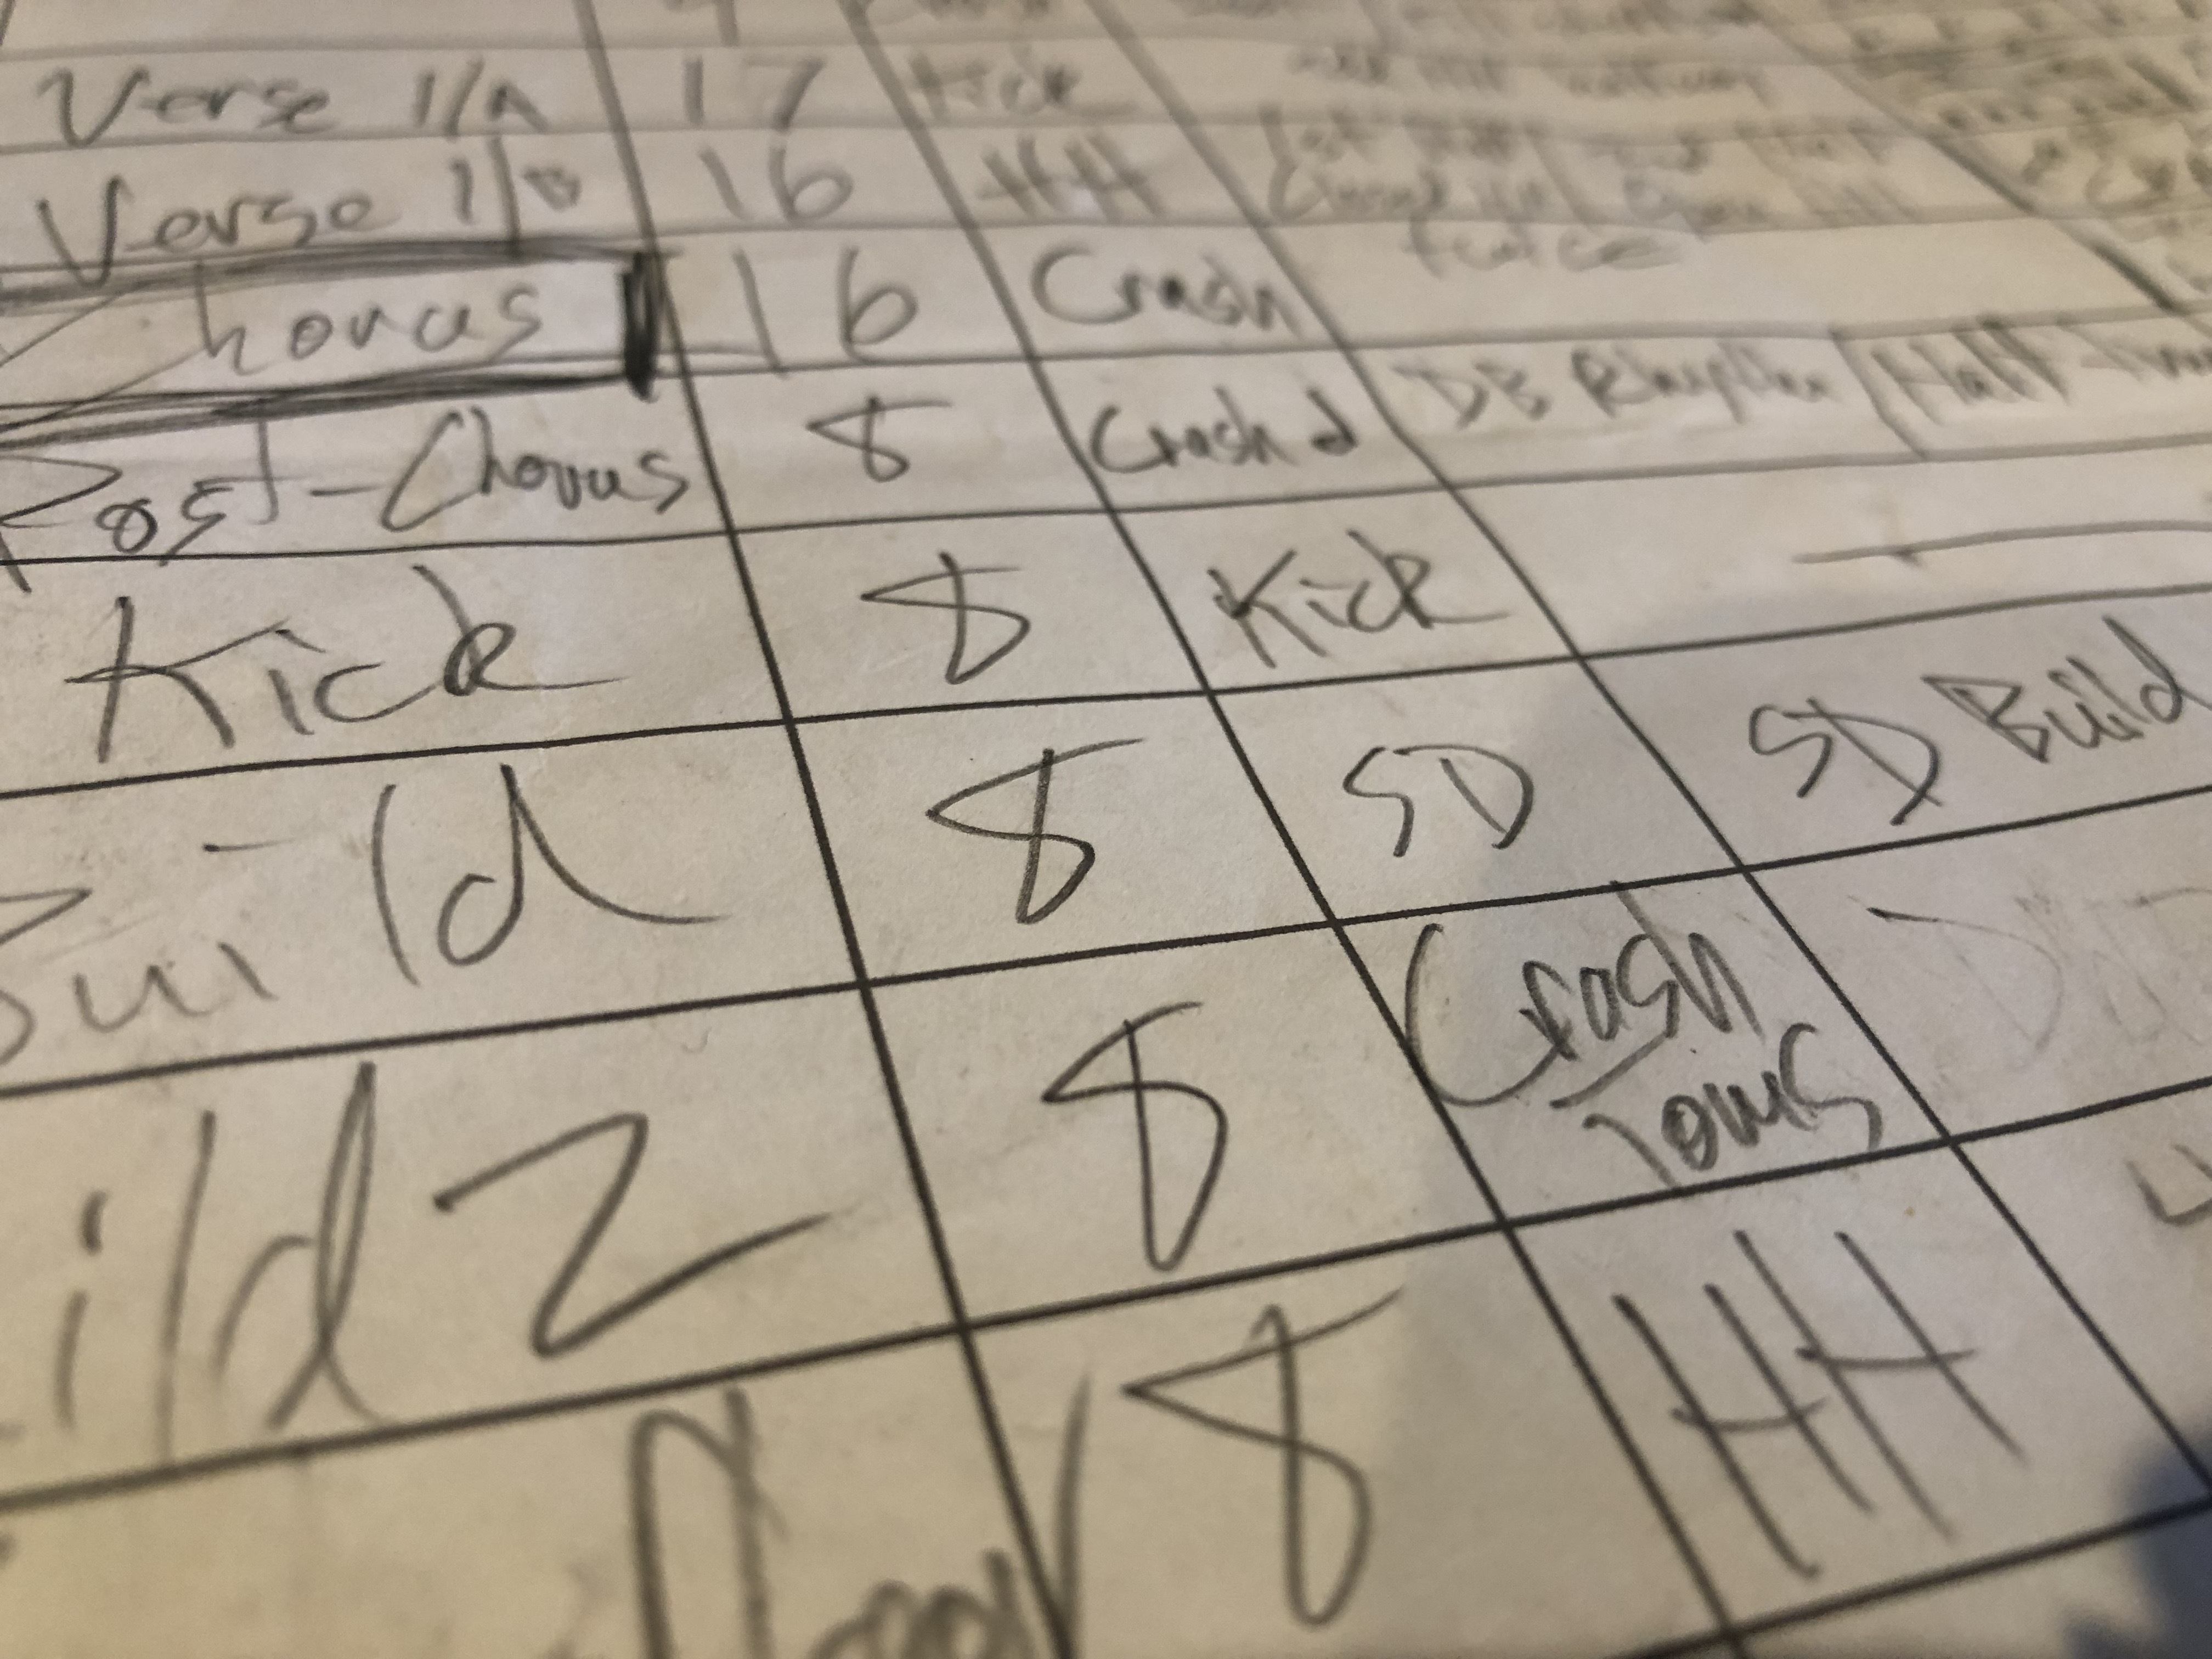
As a drummer, I found a few key elements that can guide you, on the fly, to play what you intend to play for a song.  My simple song chart can cover the grounds of being a “simple cheat sheet” all the way to having written out rhythms, beats, and fills. The key elements are: section name, amount of times, amount of bars or measures, what sound source to “ride” on, notes, and a staff with rhythms or beats.

Section
The section name is obvious, whether it be the verse, chorus, interlude or some section name you come up with. It will usually help remind you where the energy level is as well. Here are some basic suggestions that are commonly used when referring to different sections of a song.

  • Intro: The beginning of a song which sometimes doesn't include drums.
  • Verse: The verse is where the lyricist tells the story and the lyrics usually don't repeat in the song. Verses usually have a lower energy with quiet dynamics to build into the chorus.
  • Pre-Chorus: ​Sometimes songs have a pre-chorus after the verse to "setup" the chorus. It can sometimes build into the chorus.
  • Chorus: The chorus is the main "hook" of the song that usually gets stuck in your head. The chorus is usually pretty high energy, but not always.
  • Post-Chorus or Turnaround: This section is usually directly after the chorus. It is used to transition back into another verse or connect to an interlude or bridge.
  • Solo: ​The solo commonly comes after one or two choruses have happened in the song. A lot of times the solo is played over the verse and chorus sections without lyrics.
  • Bridge or Interlude: ​This section usually changes the chords or feel of the song. It can sometimes be very different from the verse/chorus sections of the song.
  • Transition: Any brief transition that connects two sections.
  • Tag: A tag, is the last phrase or line of a section repeated before it resolves to the final note. It is pretty standard that when you tag a part of a song, that you play the tag 3 times before resolving the progression which leaves you hanging until after the 3rd repeat.
  • Outro or Ending: The outro, of course, comes at the end of the song. It might tie into the intro or another part of the song but can usually be a little different from the rest of the song.

Amount of Times
This is where you specify how many times that particular section is repeated. If there is a 4-measure verse progression that is repeated, let’s say four times, sometimes it helps identifies the length easier than reading “16 bars”.

Amount of Measures
Knowing how many measures the section is can be helpful, especially if it’s an odd transition.

Sound Source
It’s helpful to know what the basis of the beat is when entering a new section. You could be riding the hi-hats, the ride cymbal, the toms for a jungle tom groove, or the snare drum some type of a second line groove. This can be telling of the energy level too. Just abbreviate the sound source (such as: RC, SD, HH, BD, etc.). This is the only element in this chart that is "drum-centric". If you are an instrumentalist looking to use this sheet, you could use this column for the key of the song or the chord progression.

Keyword Notes
The “keyword notes” are very helpful when you need to describe the beat a little bit in your own way. Sometimes I will use descriptions like, “half-time closed HH” or “SD build”. It could be anything that might remind you of the unique characteristic of the part.

Staff
The staff is useful if you need to write out a specific beat or rhythm to follow. It might be full ensemble hits, or a defining rhythm of the entire section that should be followed. This is your last resort when you just need to write out the part. This column can be omitted by those that don’t read music on a staff.

Remember, these charts are for you, so you can use whatever abbreviations and notes you like that will help you. These charts are simple enough that you can glance at them during a gig to give you a heads up about the next section.

If you print them out but want to be inconspicuous, just place them on the floor by your hi-hat or tape them to the top of your bass drum. If you put them on an iPad or tablet, you will be able to flip through as many songs as you need to get through the gig. Tablets mounted on kits are so common these days, you won’t look like you’re looking at a song chart during the gig.

Sometimes it's necessary to write out the parts a bit more for a drummer. Especially if you are a composer writing a part for a drummer. I really like how Goran broke down how to write drum charts in his article here. These charts would be more of a simplified but notated which would work great to communicate a drum part without over-complicating things for a competent drummer. Check that out here: Goran Grooves - How to Write an Efficient Drum Chart

Of course, I have provided my simple song chart for you to download and print for free. Grab it right here:

How to Practice Creative Drum Improvisation – Improvised Rhythmic Permutations Exercise

To some, the idea of improvising is elusive as it is difficult. If you feel like you can’t improvise, then you probably just need to try a different approach. When you improvise, you can’t really be “wrong”. There isn’t a correct way to improvise.

Sure, you may want to stay in time or support the band, but you don’t have to. And, you shouldn’t expect to be able to do that right away. The best improvisations are captured when the musicians take risks out of their comfort zone. Sometimes you may want to make the time “elastic” to convey an idea in your head. Sometimes you are taking the forefront of the band for a solo or a transition into a new section or feel.

As long as your ideas are musical, confident, and purposeful, it can enhance the performance.

This exercise can help build confidence in improvising so you can push your comfort zone and create that magic on stage called improvisation. It has literally been one of the best things I have added to my practice regimen for many reasons:

  1. It can inspire deeper creativity whether your in a slump or are are feeling repetitious.
  2. It is a great ear trainer for deeper, longer, or more interesting phrasing.
  3. It can help you find weak spots in your sticking and/or coordination and independence so you know what you need to spend time working on.
  4. It can help you with timing, subdivisions, and metronome playing.

I was originally taught this exercise from my old teacher and longtime friend, Jesse Peterson, around the year 2000 or 2001. He was a former student of Dave King (The Bad Plus, Happy Apple, Dave King Trucking Company). If you are familiar of either of these guys playing, you can hear a masterful approach to phrasing and improvisation in their playing.

I was blown away when I saw that Dave actually referred to this exercise in a recent Drumeo video about improvising. When I saw this, I knew I wanted to share the clear and concise way Jesse taught me. He made it into an exercise with clear rules to improvise within. Concepts are more difficult for some of students to grasp without direct guidelines.

When Jesse showed this to me, he taught it as if it was a daily warmup and I think it can be a very powerful exercise if it’s done regularly. The genius behind Dave and Jesse literally changed my life and my drumming forever—and I’m not kidding. I am grateful that they taught me this exercise and I do not claim it as my own.

Improvised Rhythmic Permutations Exercise

Basically, set your metronome by choosing a tempo anywhere from 60 to 80 bpm or even up to 100 or 120 bpm depending on your skill level. With the metronome, improvise by hitting random sound sources as quarter notes only (directly on the metronome clicks). Do not hit the same sound source more than 2 or 3 times in a row. Be sure to incorporate all of your limbs and accents.

After improvising simple quarter note ideas and phrases, move on to quarter note triplets. After that continue onto eighth notes, eighth note triplets, sixteenth notes, and eventually sixteenth note triplets.

As you improvise hitting random sound sources, you will start to hear rhythmic phrases that you’ll want to react to. Embrace the idea that the phrases are longer than a one bar drum fill and allow them to extend beyond the barline. It is important that you still know where the beats AND downbeats are. This is where you ears will start to learn unique accents and phrasing.

It literally forces you to “think outside the bar lines”

Don’t limit yourself to clean hits on the drums and cymbals. Incorporate hi-hat foot splashes, ruffs and buzzes, cymbal chokes, drum rims, hardware slides, cymbal screeches, etc.

As you get comfortable with this exercise, you can begin to break the rules a bit by adding some rests, hitting 2 or more sound sources at the same time, hitting more than 2 hits on the same sound source. Just remember that it is important to set rules or guidelines to improvise within in order to explore your improv capabilities.

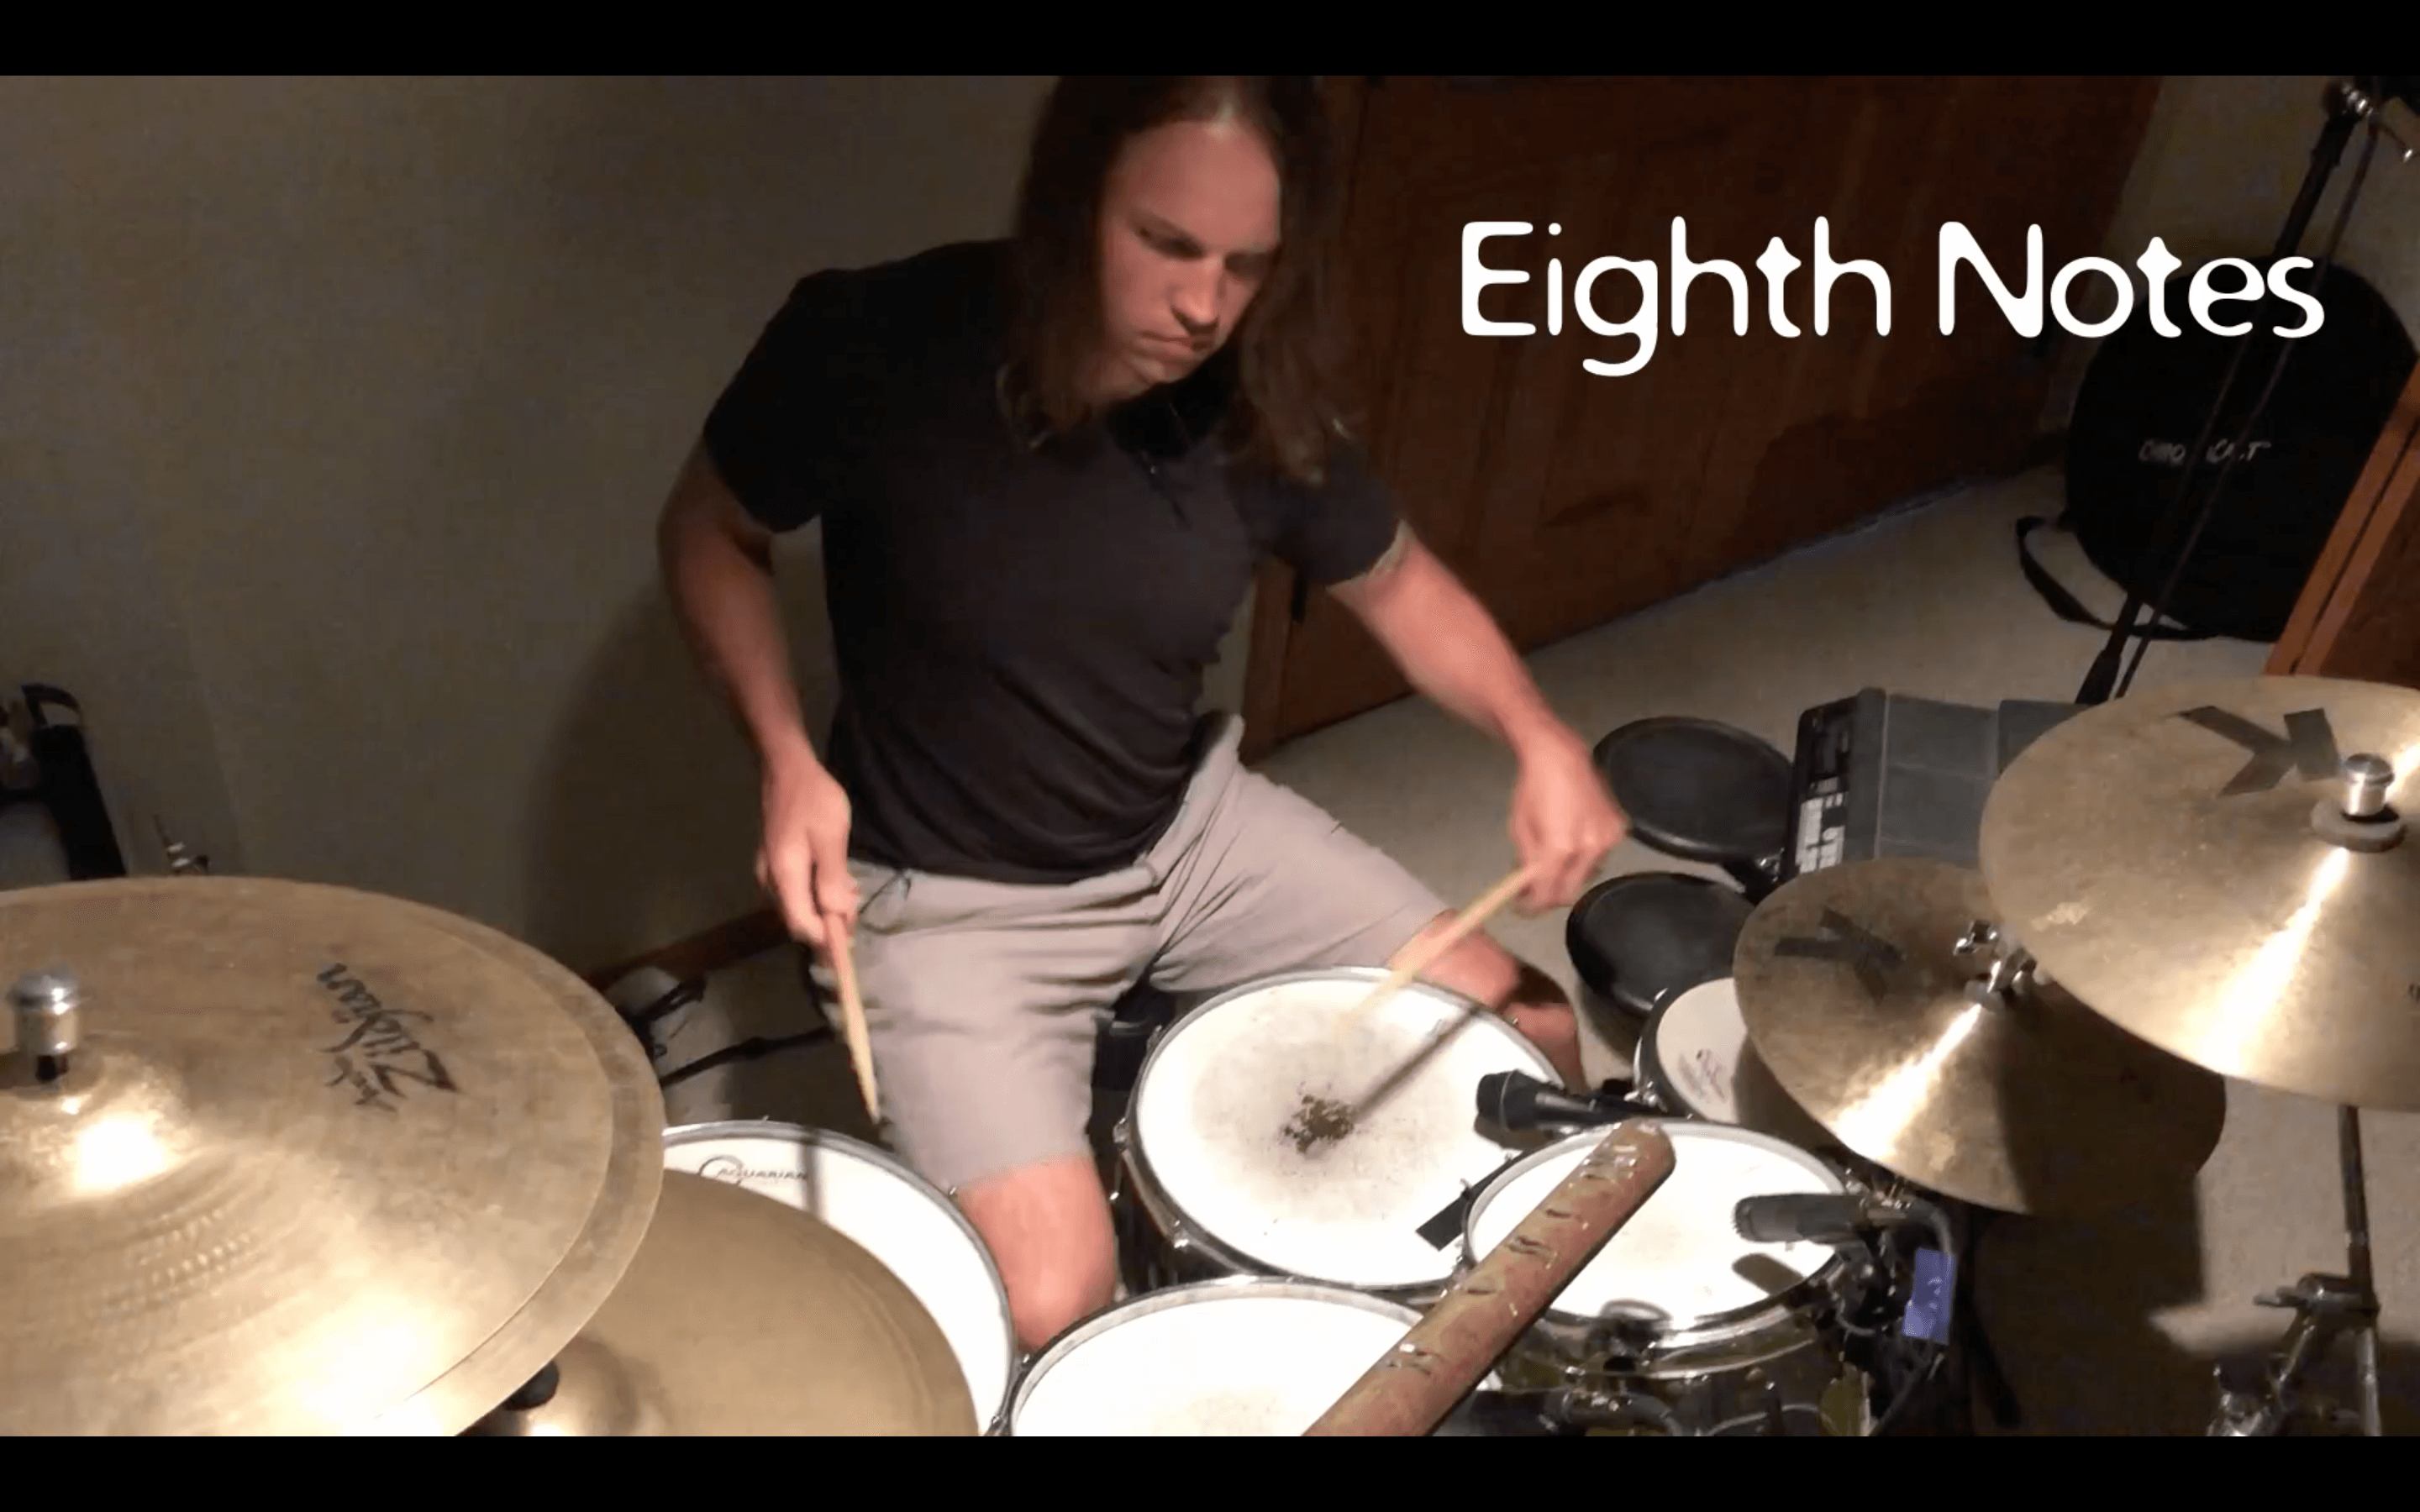
I have provided a video of myself doing this exercise as one of my warm-ups until I couldn’t keep it together anymore. If you don't make any mistakes when you're doing this, you're not taking enough riffs to explore new phrasing and rhythms!

Simplify or Challenge Yourself

At first you may want to keep it simple and remove the triplets. You could just go from quarter notes, to eighth notes and then to sixteenth notes. Eventually, you should add the triplets back in. You could even make it an advanced exercise by adding quintuplets, septuplets, and beyond!

To hear Dave King refer to this exercise, check out the video below and skip ahead to 19:43 or 31:25. He explains his approach to this idea and then plays an example. Make sure you take the time and watch the entire video—literally AMAZING and priceless lesson on improvisation.

Comment below with videos of your own versions of the “Improvised Rhythmic Permutations Exercise”! Thanks for reading!

Everything You Need to Make Drum Videos

Musicians need to wear many “different hats” these days. A musician’s title used to just be drummer & writer or drummer & producer. Now, it’s drummer/writer/producer/educator/cameraman/video editor/marketing agent…etc. It’s a lot to take on but it doesn’t need to feel overwhelming. We are creative people and these can be fun and artistic in their own way. 

“Sometimes you have to learn to like the necessary duties in your business by making them interesting so you can be successful.”

I think every drummer needs a website and drum videos as much as they need a business card. Before you even go to an audition, they want to hear your recordings. But, it’s not just audio they want anymore…they want video too!

There are so many studio tricks available today that studio recordings don’t always show the raw talent. So they want to see you performing your music too. They also want to see your stage presence and look—remember this is a show, not just a listening party.

In this article, I’m going to show you everything you need, in the most cost effective way, to make your own videos. But before we get too far, I want to suggest that you consider getting the monthly plan with Adobe Creative Cloud for a variety of reasons. Most importantly, they work with Mac or PC. In addition, here’s all the programs you might need to make your videos:

If you're going the DIY route, there are so many other tools Adobe offers that you will need as a musician or band. They would include:

  • Dreamweaver and Fireworks for building websites and web application (commissioned links)
  • Photoshop for graphic design (commissioned links)
  • Illustrator for album layouts/fliers (commissioned links)
  • Audition for sound editing (commissioned links)

With all that said, you do have some more inexpensive options for all of this. However, they will:

  • Include numerous and separate time consuming learning curves
  • Have separate costs that can add up
  • Have less ease of integration
  • Be programs that simply aren’t the standard for so many applications

Recording Video

Smartphone Cameras

Do you have a smartphone? If so, you probably have a very high quality video recorder. I have used my iPhone 10 for most of my videos and it records in 4K (UHD). However, I only edit and upload in 720 pixels or 1080 pixels (still HD). My computer can really bog down when I edit a video in 4K. It’s also not necessary for drumming videos. 1080p is an ideal resolution. Check to see if your phone can record in at least 720p.

Sometimes phone video recording apps don’t record at a constant frame rate so you need to get a better video recording app. Recording at 30 fps (frames per second) is the best for YouTube. I found that if you pay even a little bit of money for a recording app, you’ll be way better off in the long run.

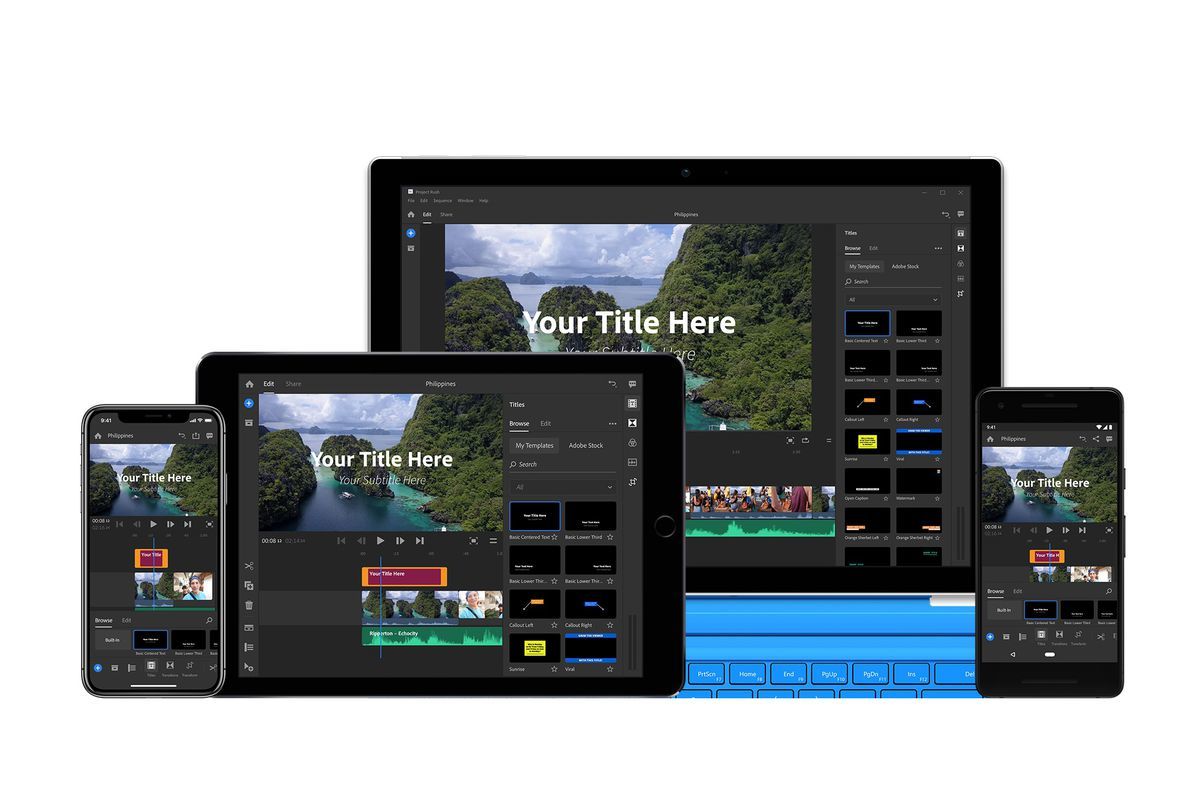
Adobe Premiere Rush (Mac, iOS or PC, Android)

I’m on my Adobe soapbox so I will suggest Adobe Premiere Rush. This program will integrate as a phone app for recording and a computer program for editing as well. You can pay $10 a month for just Adobe Premiere Rush, or $21 a month for Rush and Premier Pro which will give you a bit more editing power and a few extra programs as well. Again, best option out there for Mac, iOS, PC, or Android.

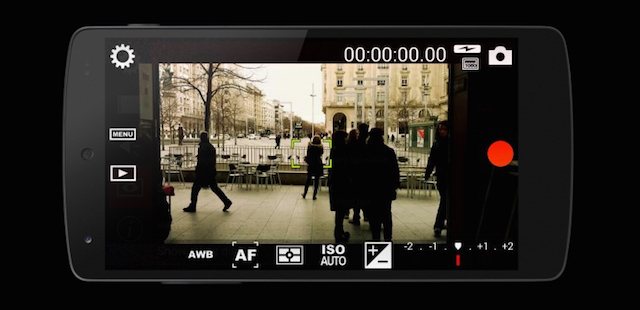
ProMovie Recorder (iOS) & Cinema FV-5 (Android)

For iOS, I have used ProMovie Recorder. There’s a free version but you really need to pay $3 to remove the watermark. It’s totally worth $3 though. For Android, I found Cinema FV-5 to be similar in quality and ease of use and it only cost $5. These are the easiest, strongest, and most affordable apps that allow you to adjust the fps to record your drumming videos.

Smartphone Stand

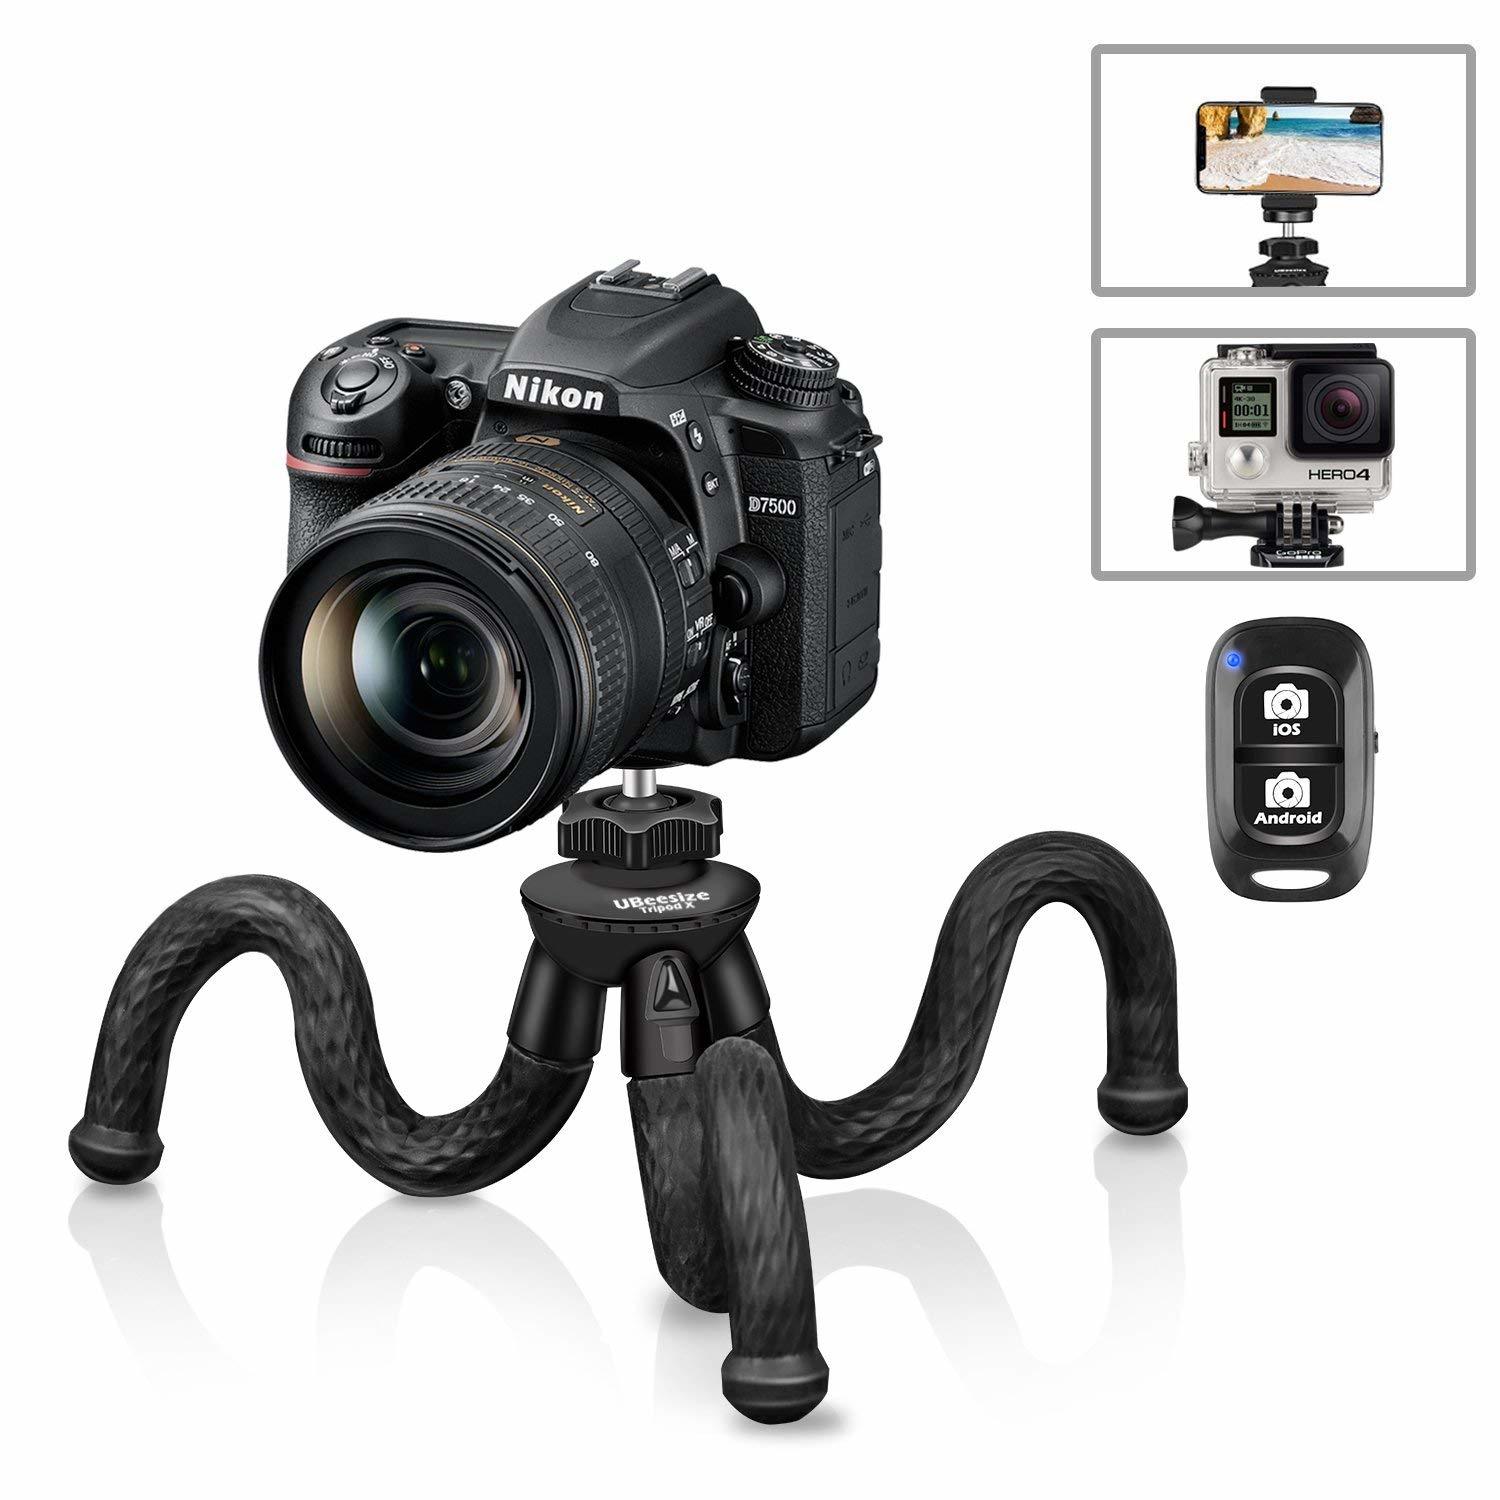
UBeesize Flexible 12 Inch Mini Tripod Stand

This UBeesize Mini Tripod Stand works great to hold my phone when recording. It can latch onto almost anything and comes with tons of attachments including a bluetooth controller to start your app to record. It’s everything you need and very affordable.

Cameras

If you don’t have a smartphone or you would prefer to use a different camera or add a second shot angle, there are many options for you. I have mainly listed cameras that record in HD 1080p since the 4K models are considerably more expensive. I haven't used all of these but I have done extensive in-depth research on these cameras to give you the best options.

Panasonic Full HD Camcorder HC-V770

Panasonic Full HD Camcorder HC-V770 (commissioned links)

This Panasonic HC-V770 is a full HD (1080p) camcorder that would give you a beautiful high quality video. The coolest feature is the wi-fi smartphone twin video capture with an app. You can use your smartphone or tablet as a real-time remote to control the camcorder from a distance, check your shot while you are sitting at your kit, or use Wi-Fi functions to enable real-time broadcasting for Facebook live, etc. Very high quality camera for the price! It comes in at around $400.

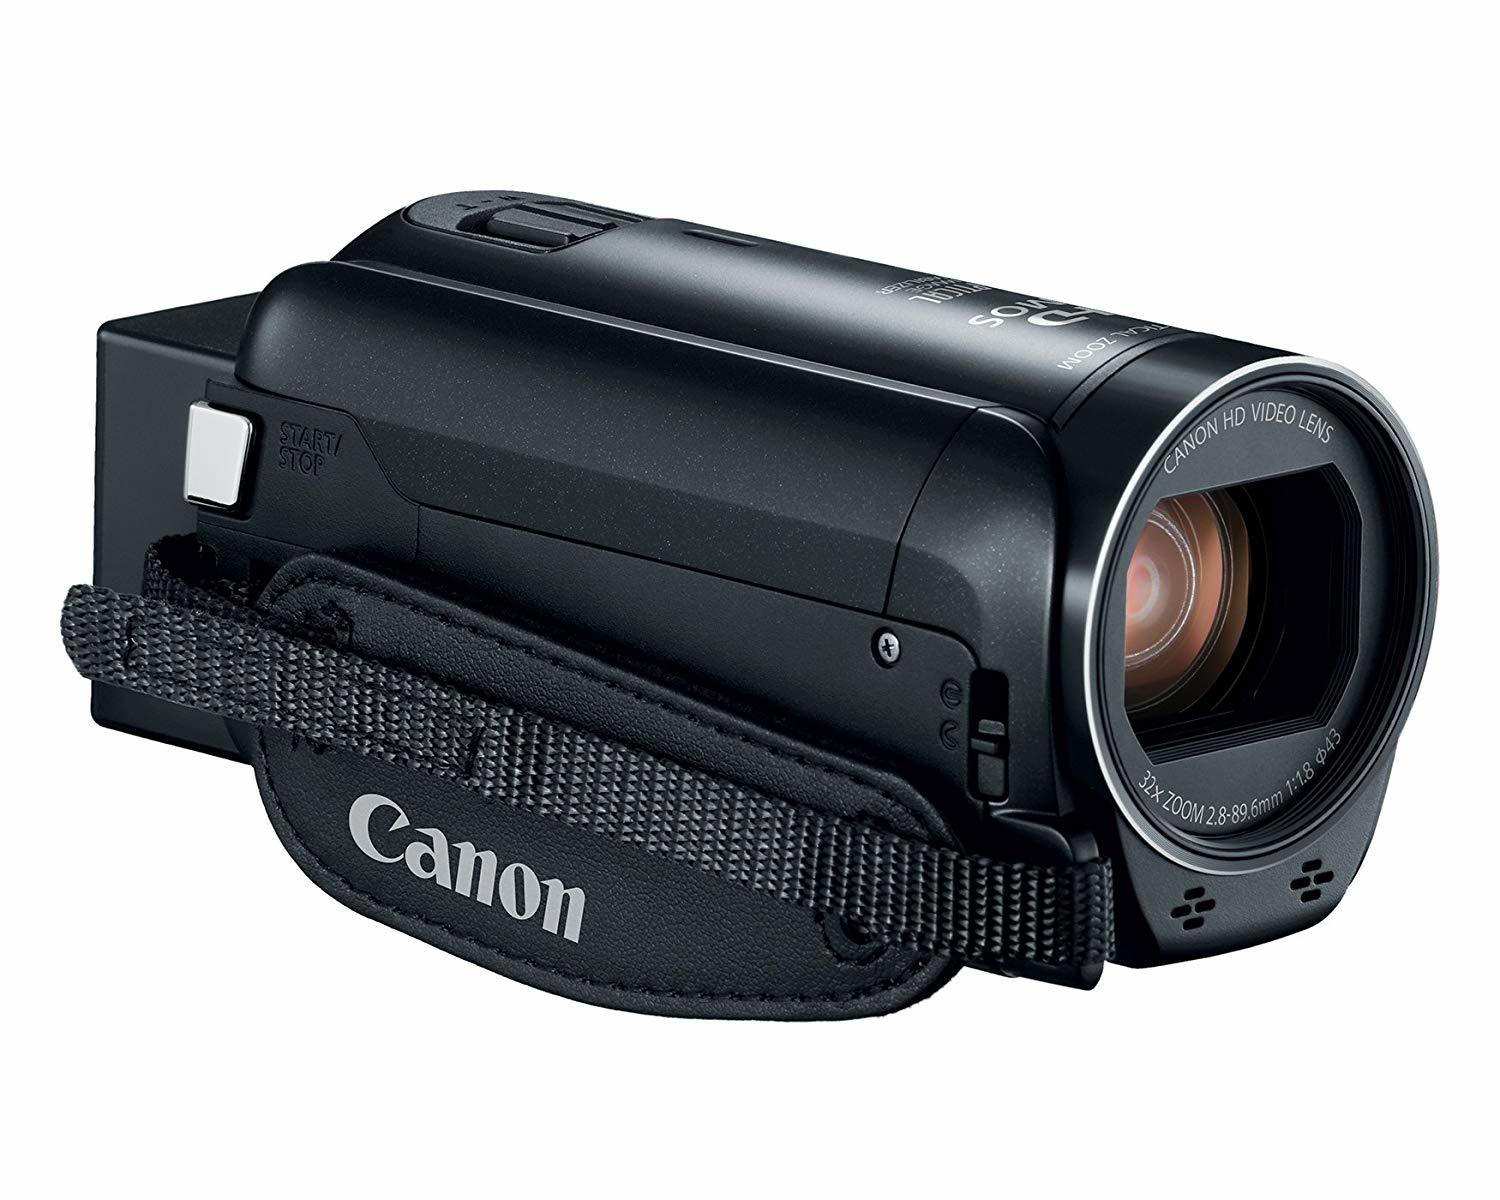
Canon VIXIA HF R800 Camcorder

Canon VIXIA HF R800 Camcorder (commissioned links)

This Canon VIXIA HF R800 is much more affordable with everything you need to film high quality 1080p videos. Make sure you check all the packages available on Amazon if you want memory cards, stands, etc. The touch screen also makes focusing and changing settings a lot easier. It will record at 1080p and 30 or 60 fps (30 is what you want for YouTube). There is a 32x optical zoom lense and it also has an external microphone input. This one is priced around $200.

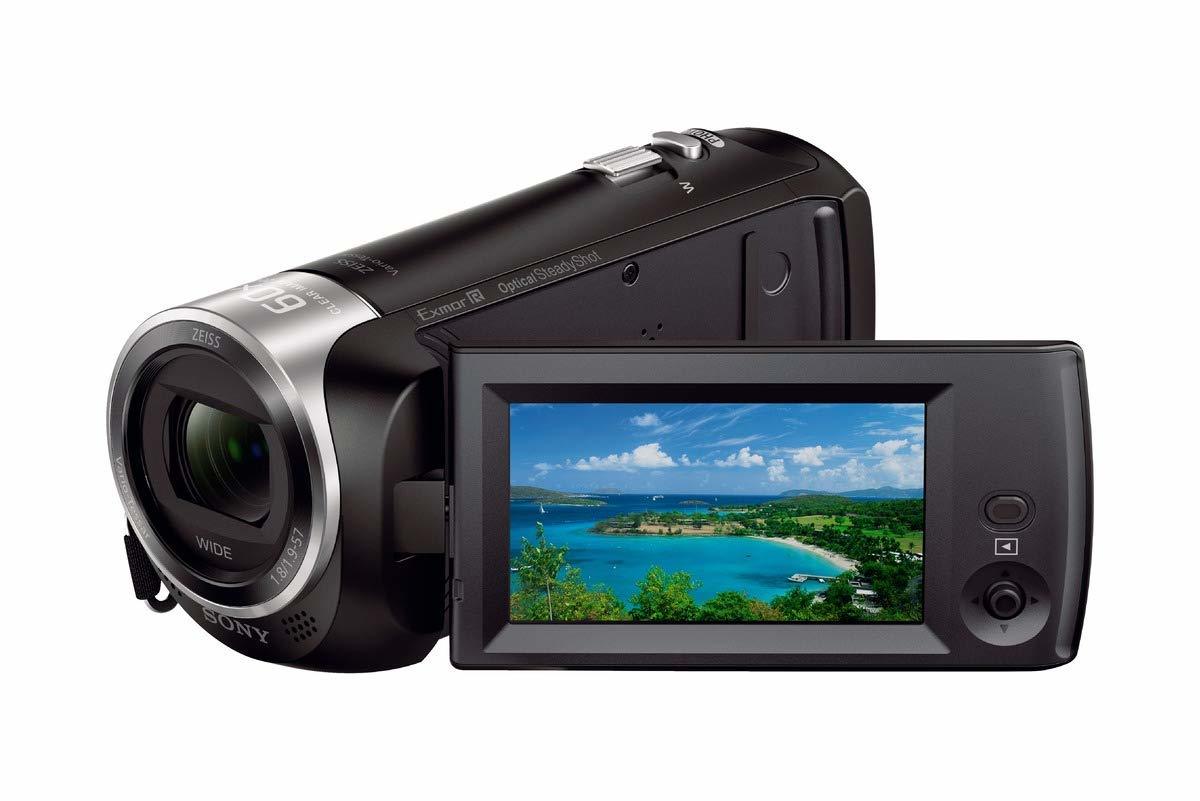
Sony HDRCX405

Sony HDRCX405 (commissioned links)

This Sony HDRCX405 is one of the best quality HD cameras I could find at an affordable price. With a trusted brand like Sony, you know this camera is legit. It’s super lightweight and the USB cable is attached so you don’t have to worry about losing it. Zoom capabilities are up to 30x and it records in 1080p and 30 or 60 fps (30 is what you want for YouTube). This one sneaks in at around $180.

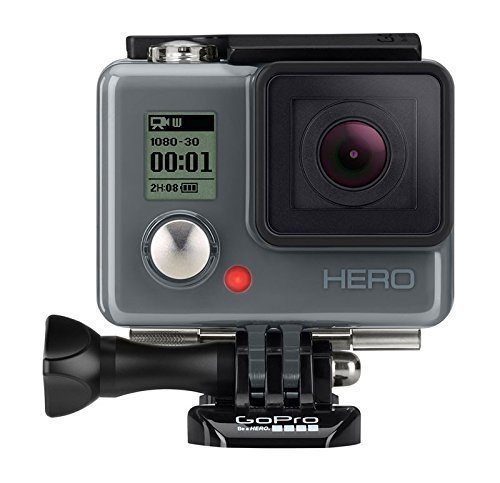
GoPro Hero

GoPro Hero (commissioned links)

If you're ok with the refurbished GoPros, you can get a camera here for under $100! The waterproof/durability features aren't necessary for recording drumming videos but their cameras are so inexpensive, you really can't go wrong. You can record at 1080p and 30 fps (30 is what you want for YouTube). I would strongly advise AGAINST getting the off-brand knock-off GoPros for cheaper. This is a legit GoPro and is the least expensive 1080p camera you will find anywhere...this is it. If you want a new GoPro, I would suggest looking at these:

You will also need a stand for your camera. Many of these cameras offer a tripod add-on to your purchase which is almost always a good deal. Otherwise, this Amazon Basics tripod is a solid and affordable option. I have not found an Amazon Basics product I didn’t like…yet. This will fit most any camera…even a GoPro.

Recording Audio

You need to have a quality audio recording to go with your video if the video recorder doesn’t have a good microphone--which they usually don't. If you would like to bring your audio recordings to a higher level, I would suggest looking at my other article: Everything You Need to Become an Online Session Drummer.

...but if your budget is limited, I have some awesome suggestions:

Yamaha EAD10

The Yamaha EAD10 (view item on Amazon) (commissioned links)

The Yamaha EAD10 is a single mic system for your entire drum kit that clamps your bass drum. With extremely intelligent technology, the EAD10 listens to your entire drum kit and can discern each drum within a 4 foot range of the unit. This unit attaches to a module and gives you a wide variety of mix and effect options. I am amazed at the quality of recording you can get out of a one-mic setup for your entire kit. This is the ultimate option for people on a budget wanting to start making their own drum videos.

Zoom H1n Handy Recorder

Zoom H1n Handy Recorder (commissioned links)

The Zoom H1n Recorder is a device with two stereo built in condenser mics. It gives you a stereo image and has other built in compressors and limiters to get you fantastic recording. I fell in love with this thing when our jazz/fusion trio, Catacosm, recorded a few tunes at rehearsal with it. Crystal clear stereo image and tons of space record entire rehearsals or numerous takes on a video.

The H1n will screw into a standard 1/4” screw if you already have a stand. Just don’t forget a stand if you didn’t get one of the Amazon packages that offers one with it. Here's a great package deal with accessories:

Staging and Costume

Make your backdrop clean and/or enticing. You can either keep it simple to avoid viewer distractions or have an interesting theme of pictures, art, etc. You might want a sign with your name/channel or the name of your band, etc. Also wear some clothes that express you and your taste. If you wear some everyday rags, it won’t look as appealing. Just wear what you would wear on stage for a show.

What do you want to record?

There are a lot of different types of videos you can make so make sure you plan out what it is you want to record. Drum covers or music videos can showcase your playing and gain fans or aid you in getting gigs. Drum covers seem to be overdone these days so if you are going to do one, try to pick an interesting song or give the song a creative angle to set yourself apart from the other videos out there.

Drum lessons and tutorials are very helpful for the drumming community. I think every drummer has a unique voice to share. Share your approach on fills, song structure or unique setups or hacks. The possibilities are endless. Make sure research what is already out there so your not reiterating the same information.

Drum Covers

For drum covers, I found a couple of cool websites where you can get some popular songs without the drums on the recording--sometimes called "drumless songs". Both of these sites charge $3 for an MP3 download of a track. Drumless Version has a large library you can either buy the whole library or single tracks. Karaoke Versie is cool because you can customize what instruments are in the recording. Take a look at both of these sites to see what works for you.

Copyrights on Drum Covers

You can upload drum covers to YouTube because Google automatically analyzes your upload. If it recognizes the song, it will give the monetization royalties to the original song writer if the songwriter approves the cover. I have heard that people have changed the pitch of the song and google can still pick up on it. Sometimes you can change the pitch and squeak by but I would not suggest that you do this. The original songwriters deserve the royalties.

Facebook does not have the same monetization capabilities to redirect royalties. If you upload a drum cover directly to Facebook, you could get flagged or even get your page shut down. However, you can still upload your drum covers to YouTube and share them on Facebook. Here is a link to YouTube’s explanation on their policy:

YouTube Help: Monetizing Eligible Cover Videos

Music Videos

If you are a band or artist looking to make your own music video, then you don’t need to worry about recording audio for the video (assuming you already recorded the track in a studio). So your focus is completely on the visual aspect. Obviously, the DIY approach is effective for lesser known bands. With some creative visuals, you can really make some cool videos with the tools available today. Most of the dazzle will be in the editing and effects which I will go over in the Video Editing Software section.

Tutorials & Lessons

Tutorials and lessons are a great way to give back to the drumming community. If you build up enough followers, you could even put together a paid lesson or tutorial package to download in which could make some easy passive income. If you are doing any sort of tutorial that needs a screen recording from your computer, there’s a couple tools you’ll need to know about.

Screen Recording

Best

Adobe Captivate (Mac & PC)

Adobe Captivate (Mac & PC) (commissioned links)

First of all, if you go with the Adobe All Apps plan, it will include Adobe Captivate which is a very powerful tool for doing screen recordings. This will record your screen while giving you options for recording separating out the audio as well. Obviously the best choice but you need to pay monthly for this package.

Not Too Expensive But Worth It

Aiseesoft Screen Recorder (Mac & PC)

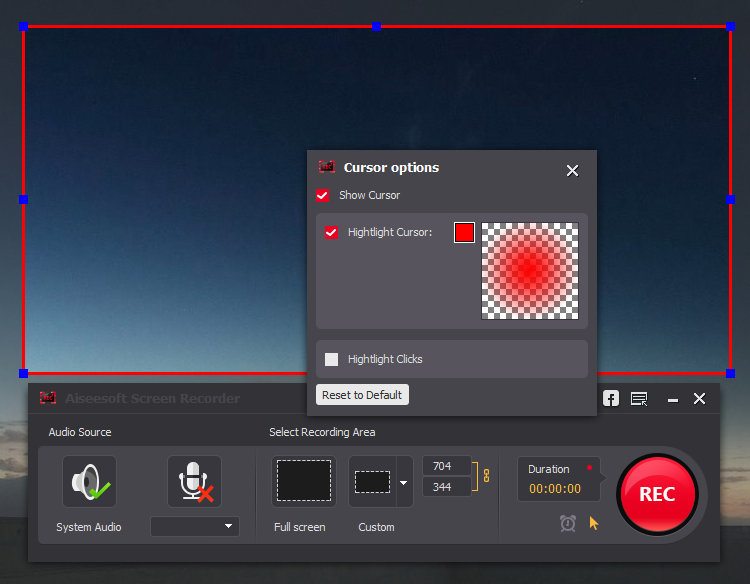
For a second choice, I have to suggest Aiseesoft Screen Recorder because it can capture audio and video at the same time AND it works on Mac or PC. It does cost a little money (like $40) but it’s worth it in the end if you’re doing a lot of tutorials. There's even a 30% discount code provided here! All of the other screen recording alternatives can get a bit complicated because they require a separate program to capture the computer's audio.

Free

Quicktime (Mac & PC)

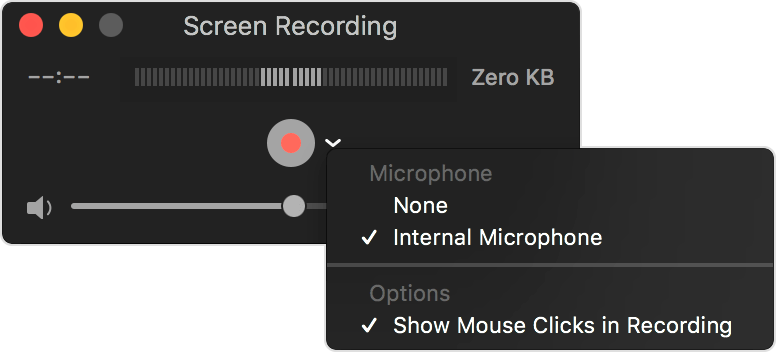
If you're looking for something free, I still have you covered. Quicktime has a simple video screen capture feature and even gives you the option to have a flash on your mouse whenever you click it so the viewer doesn’t miss your clicks. It comes already installed on Macs and works for PC too with a download—yes even Windows 10. The best part is, it’s free.

To do a screen recording on Quicktime, just go up to File > Screen Recording and the record window will come up. The little down arrow next to the record button will allow you to pick the source of the microphone it will record. If the viewer doesn’t need to hear your computer audio for this video, you can just talk into your microphone while you record and it will record the audio with the video. The only downside is that Quicktime won’t record the computer’s audio while recording without another program (see next section).

Soundflower & iShowU Studio (Mac)

For Macs, you need Soundflower. It’s another free program which allows you to record the audio directly from your sound card while your recording your screen capture. Then, you can also talk into your microphone and record it with your computer audio at the same time. 

I have used Soundflower for a long time and it has always worked well for me but it is a discontinued open source program. iShowU Studio is the new version of Soundflower but I never have used it. You can get information about both programs and how to set them up here since they can be a little tricky:

Installing Soundflower on ShinyWhiteBox.com

Voicemeeter Banana (PC)

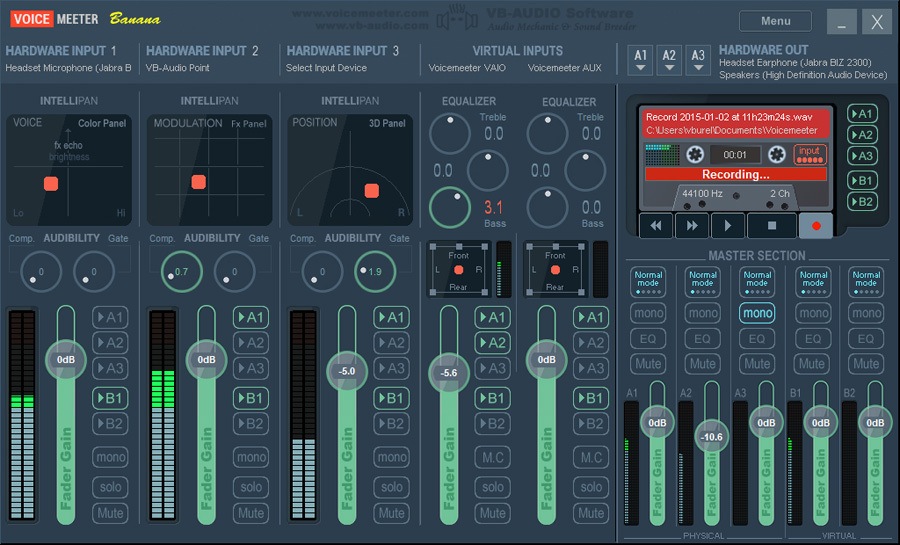
For PC, the best free option (optional donation) out there is called Voicemeeter Banana. There’s a bit of a learning curve with this program, but if free is what your looking for then this is it! It supports up to 5 channels of audio and has multi-channel EQ so there are plenty of features.

Video Editing Software

After you film all of this beautiful footage, you're going to need to edit it so it looks nice with text titles, fades, effects, etc. Here are some of the best and most affordable options.

Best

Adobe Premier Pro (Mac & PC)

Adobe Premier Pro (Mac & PC) (commissioned links)

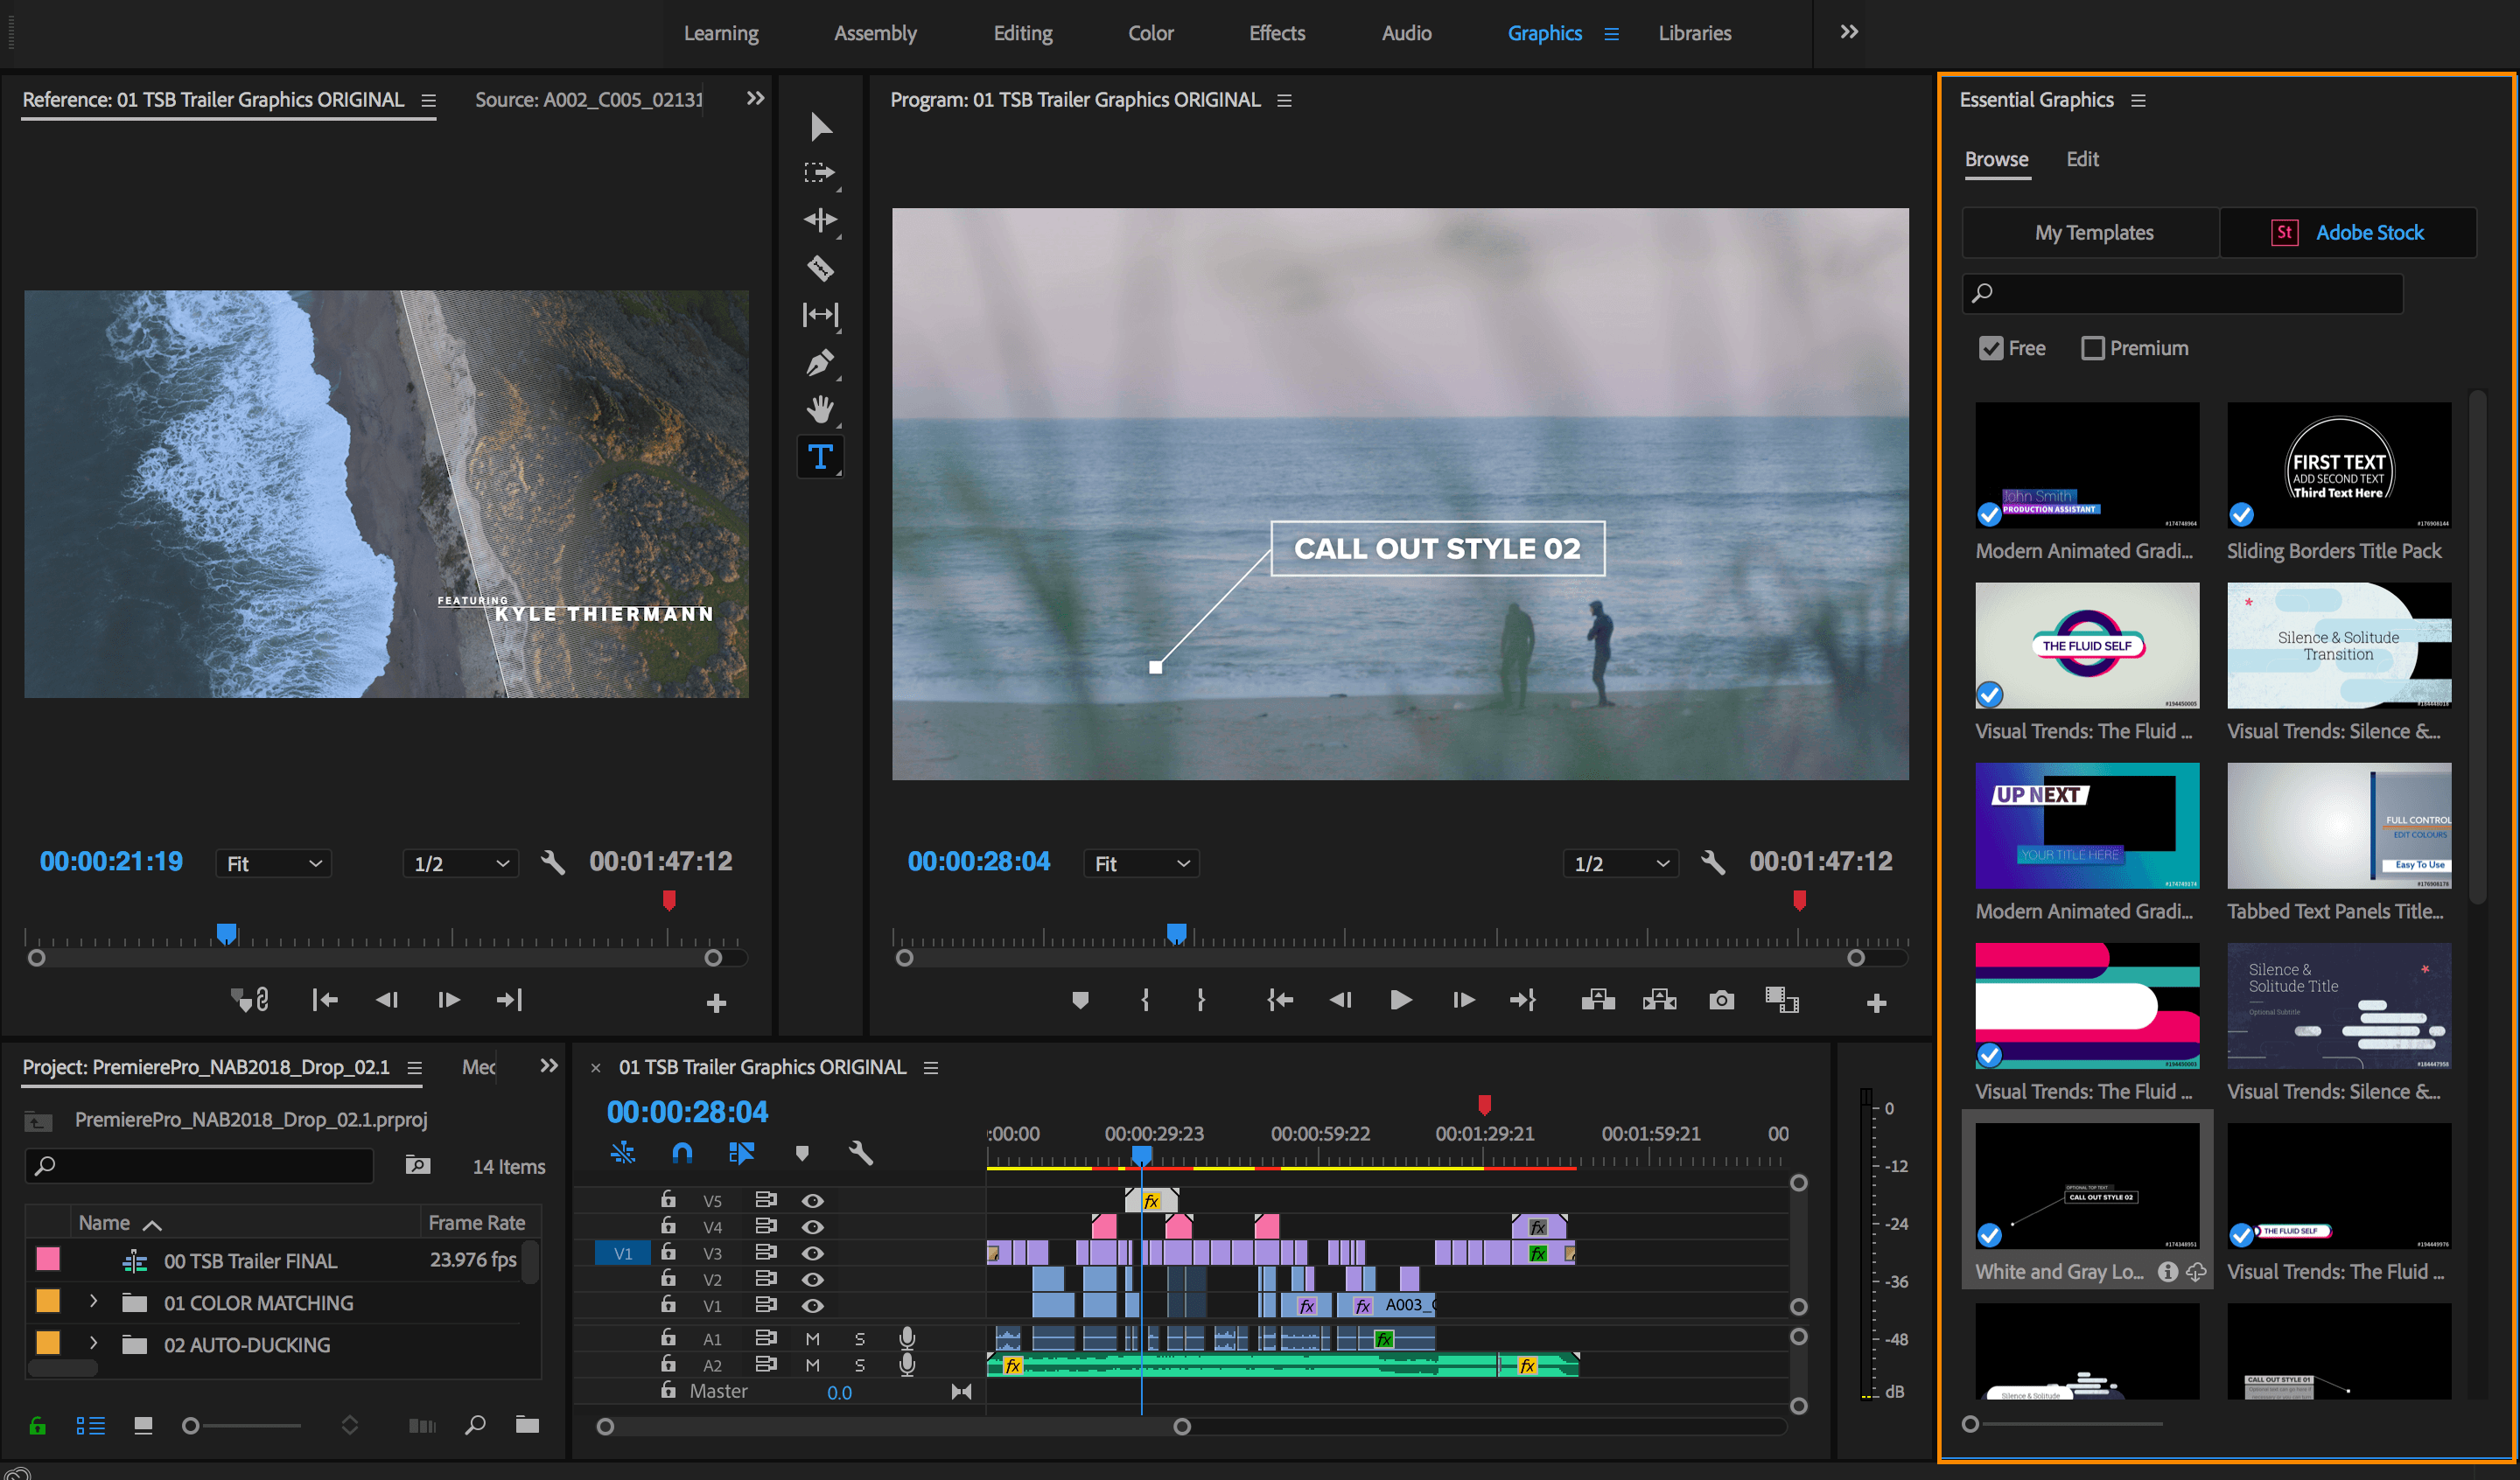
Adobe Premier Pro is an easy to use powerful video editing tool. I’ve already held the torch for Adobe up through this entire article so there’s no need to stop now! You can customize the user interface to make it simple and enhance your workflow and there are tons of useful filters you can use on your videos. If you bundle multiple programs in Adobe's plan, you will have a fully integrated set of programs to work with and find tons of other uses for them. A key integration is that you can edit files from Adobe Premiere Rush in
Adobe Premier Pro--so the transfer from smartphone to editor is seamless (this is huge).

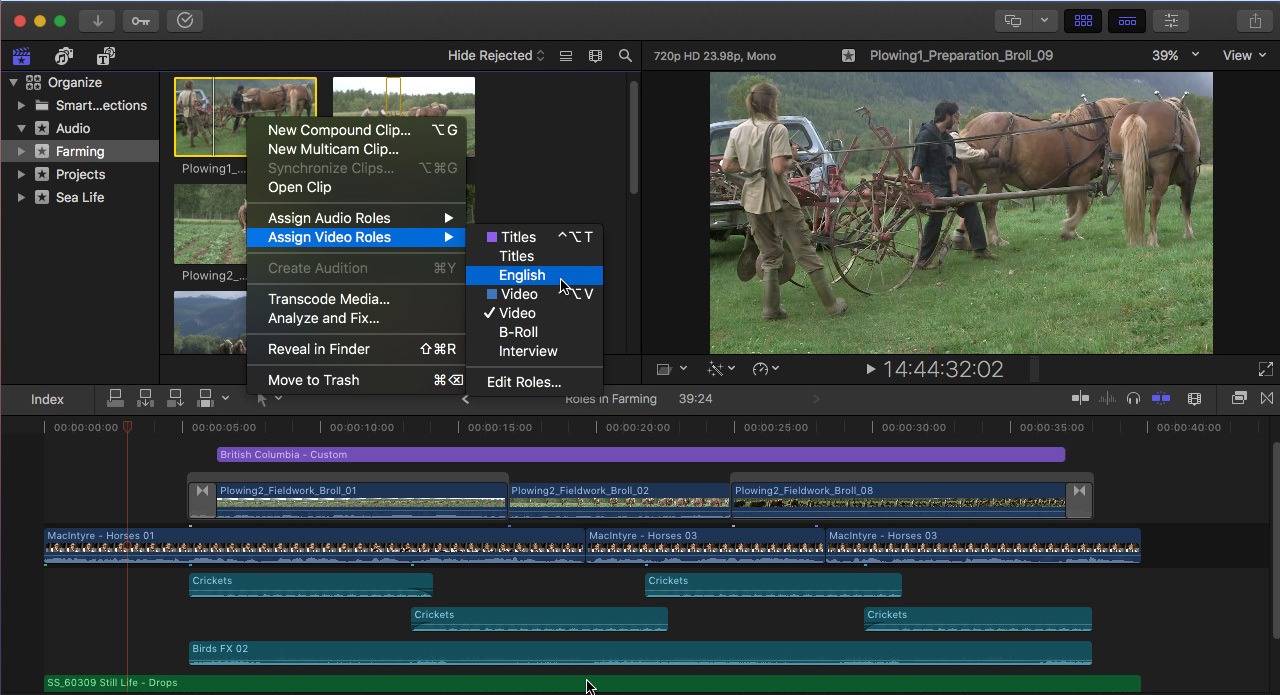
Final Cut Pro (Mac)

Final Cut Pro (Mac) (commissioned links)

For a mac, everyone knows that Final Cut Pro is a top notch video editing tool. The only problem is that it’s expensive. I couldn’t keep it off the list for those that love Mac products (which I do). It has extensive file format support so you shouldn't have trouble importing your videos regardless of the source. One of the things that makes Final Cut Pro unique is what they call the "trackless timeline" which can help you organize all of your media in your project. This is the standard for Macs---super user friendly and powerful. However, PC users have to look elsewhere.

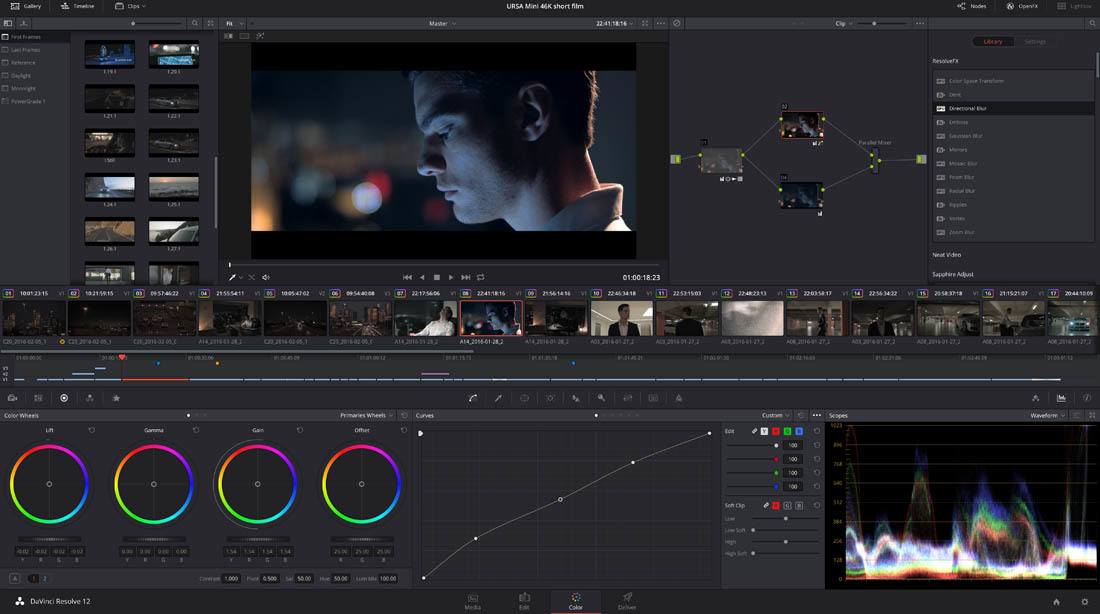
DaVinci Resolve Studio (Mac & PC)

DaVinci Resolve Studio (Mac & PC) (commissioned links)

Now this one I consider the underdog that deserves a lot of credit. Expect top notch features comparable to Final Cut and Adobe Premier and compatibility with both Macs and PCs. This program used to be mainly a color correction specialist for video but recent updates have given it a lot of power and functionality. The audio mastering is a useful feature for our intentions to polish up your audio before you upload them. "DaVinci Resolve Studio" is their full version upgrade from "DaVinci Resolve" which is free (see below). 

Not Too Expensive But Worth It

Adobe Premiere Elements (Mac & PC)

Adobe Premiere Elements (Mac & PC) (commissioned links)

So this is Adobe’s option to get away from monthly payments. For around $100, ‘Elements” doesn’t have all the features that Adobe Premier Pro has but it is more than adequate for editing drum videos. Again, Adobe is the best in the business.

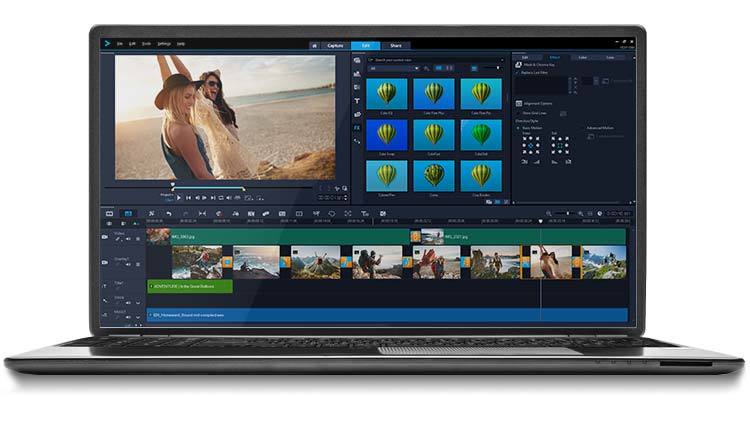
Corel Video Studio ​​Ultimate (PC)

Corel Video Studio is an easy to use video editing program and it provides a little more features than some of its competitors. Still a powerful tool but not quite like the “Best” options above. I have been in love with Corel's products for a long time. I used to use Paint Shop Pro before Adobe took over graphic/video world. The thing with this editor is, you can pickup the newest version or an older version on Amazon for a discounted price.

Free

DaVinci Resolve (Mac or PC)

Ahhh yes, free is good. DaVinci Resolve is the freeware  "beta" version of DaVinci Resolve Studio. It's great not having to cough up the cash right away and use it for free until you are ready for more features. This is by far my favorite choice for a free video editing software AND it works on a Mac or PC. So snag this up before they start charging for it! And of course, when you are ready, upgrade to the “Studio” version and you’ll be using a program that is as powerful as just about anything out there.

iMovie (Mac)

Everyone with a Mac knows iMovie. For a free video editor, it is very powerful. This program comes preinstalled on Mac computers. The problem I have with this program came when they updated it a while back and completely changed the functionality. At that point, it became unusable for me. However, I still know a lot of people that use it and love it…and it’s free.

Lightworks (Mac or PC)

I think I should mention a little something about Lightworks. It is yet another free video editing software option. I used it for quite a while but there were 2 quirks that pushed me away. First, it does not work the way most editing software works. There are a lot of tutorials online but everytime I start a new project, I have to relearn what I forgot because it functions in such a unique way. Secondly, the free version only lets you export in 720p. Those two cons were enough for me to look elsewhere.

So, the absolute cheapest way to go would include:

You can really get by spending only about $170. Then, if you want to upgrade from there; ie more camera angles, better sound, more editing power/effects, simpler workflow...you go up from there.

There you have it—everything you need to start making drum videos. If you have any suggestions, questions or just want to show me your videos, then comment below.

Thanks for reading!

**Full Disclosure: I earn a commission if you click any of these links and make a purchase, at no additional cost to you.**
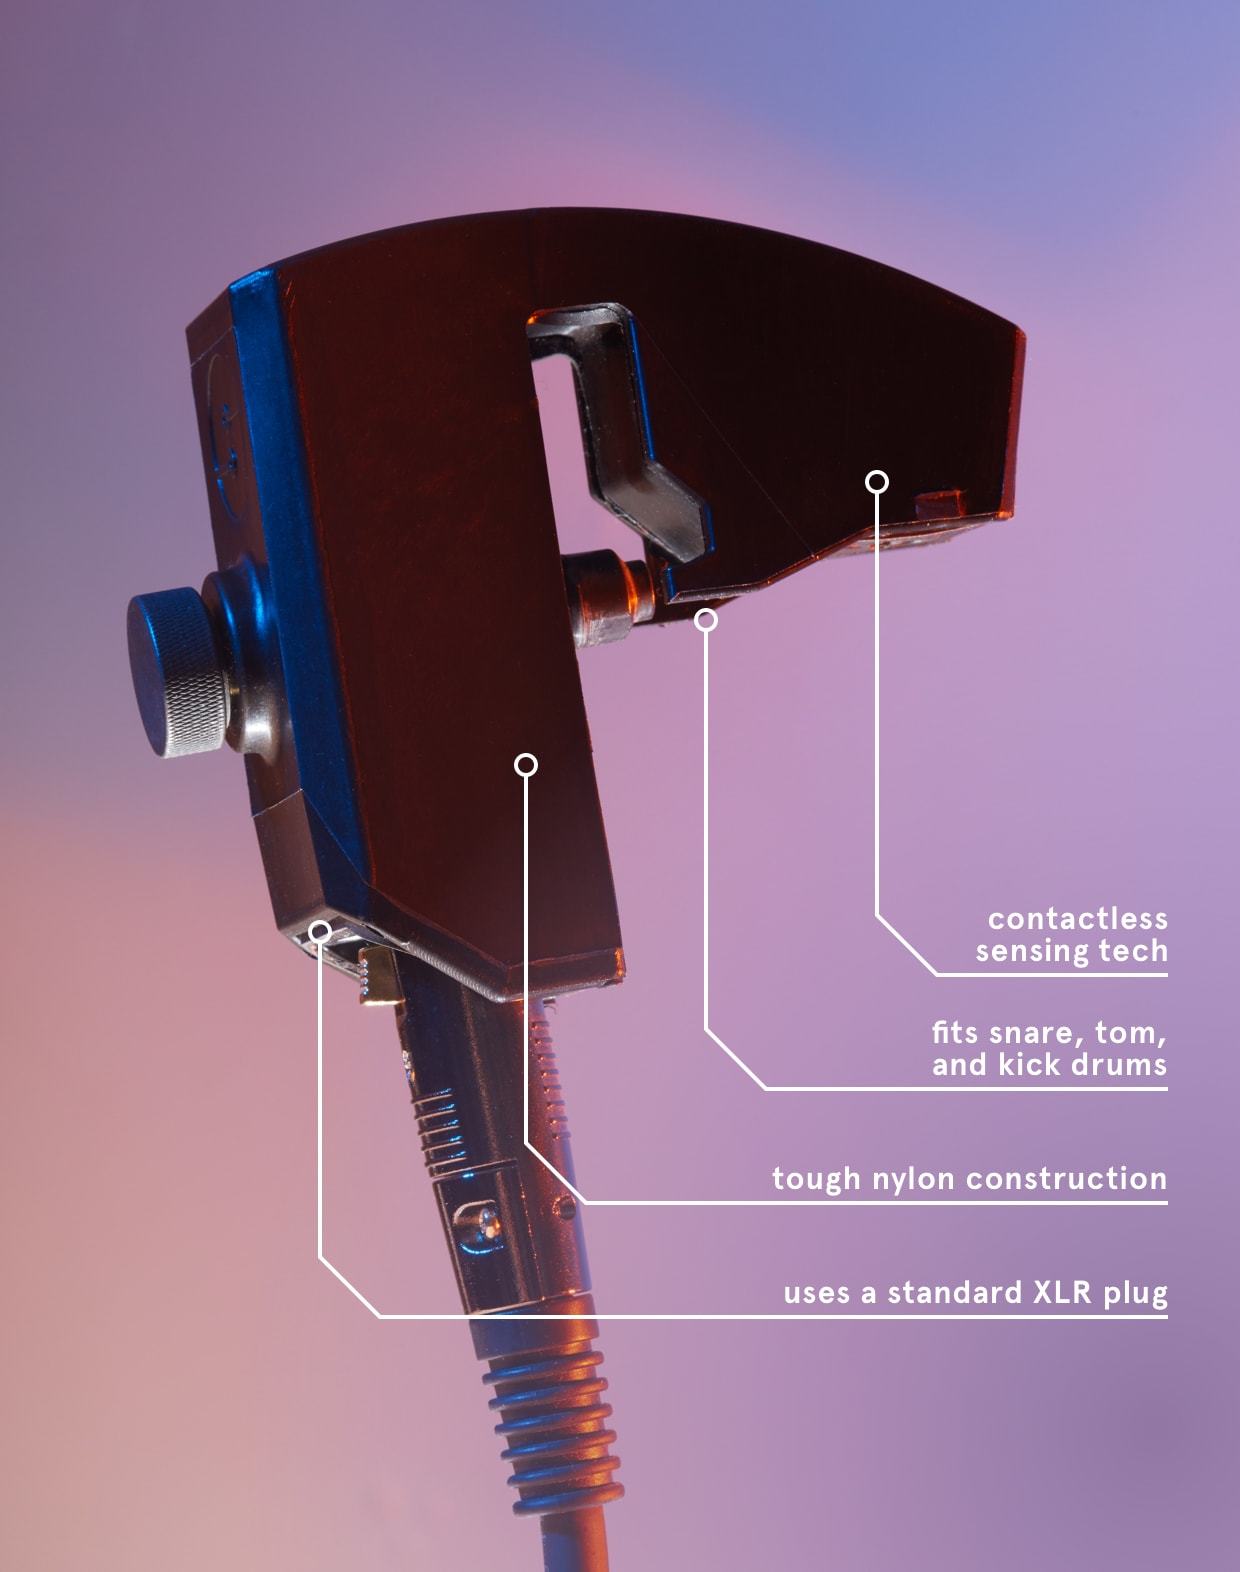
The Coolest Drum Gadgets You Didn’t Know You Wanted

We’ve all seen the “top gifts for drummers” and “essential gear” articles, but I haven’t seen many articles listing the uniquely useful drum gadgets. Some of these you have probably heard about but I’m willing to bet you haven’t heard of all of these. I use almost all of these regularly and I plan to eventually buy all of them. I just couldn’t wait to share all of the cool drum gear that you didn’t know you needed with optional drum hacks!

Tama Cobra Clutch (DISCONTINUED)

TAMA TAMHH905XP Cobra Clutch (view item on Amazon.com) (commissioned links)

The Tama Cobra Clutch is a product that has solved a problem for double bass drummers ever since Louie Bellson brought them to the bandstand. When you move your foot from your hi-hat to your second bass drum pedal, you relinquish the control of the hi-hat foot pedal and how much you want the cymbals open or closed. This clutch allows you to set your hi-hat at any level of openness with the push of a pedal. You can have your hi-hats tightly closed or slightly open for a sloshy sound while you play double bass.

Regular hi-hat clutch users, such as myself, have long desired having an option for the amount of slosh when playing double bass. Most drummers remedy this by setting their hi-hat to slightly open and never touching it. This is at the sacrifice of not having the option for a hi-hat wide open nor a loud 'chick' sound when using the hi-hat with your foot. At a hefty price tag, you can solve these problems with the Tama Cobra Clutch. This pedal sits to the side of your hi-hat pedal to easily set and unset.

Drum Hack
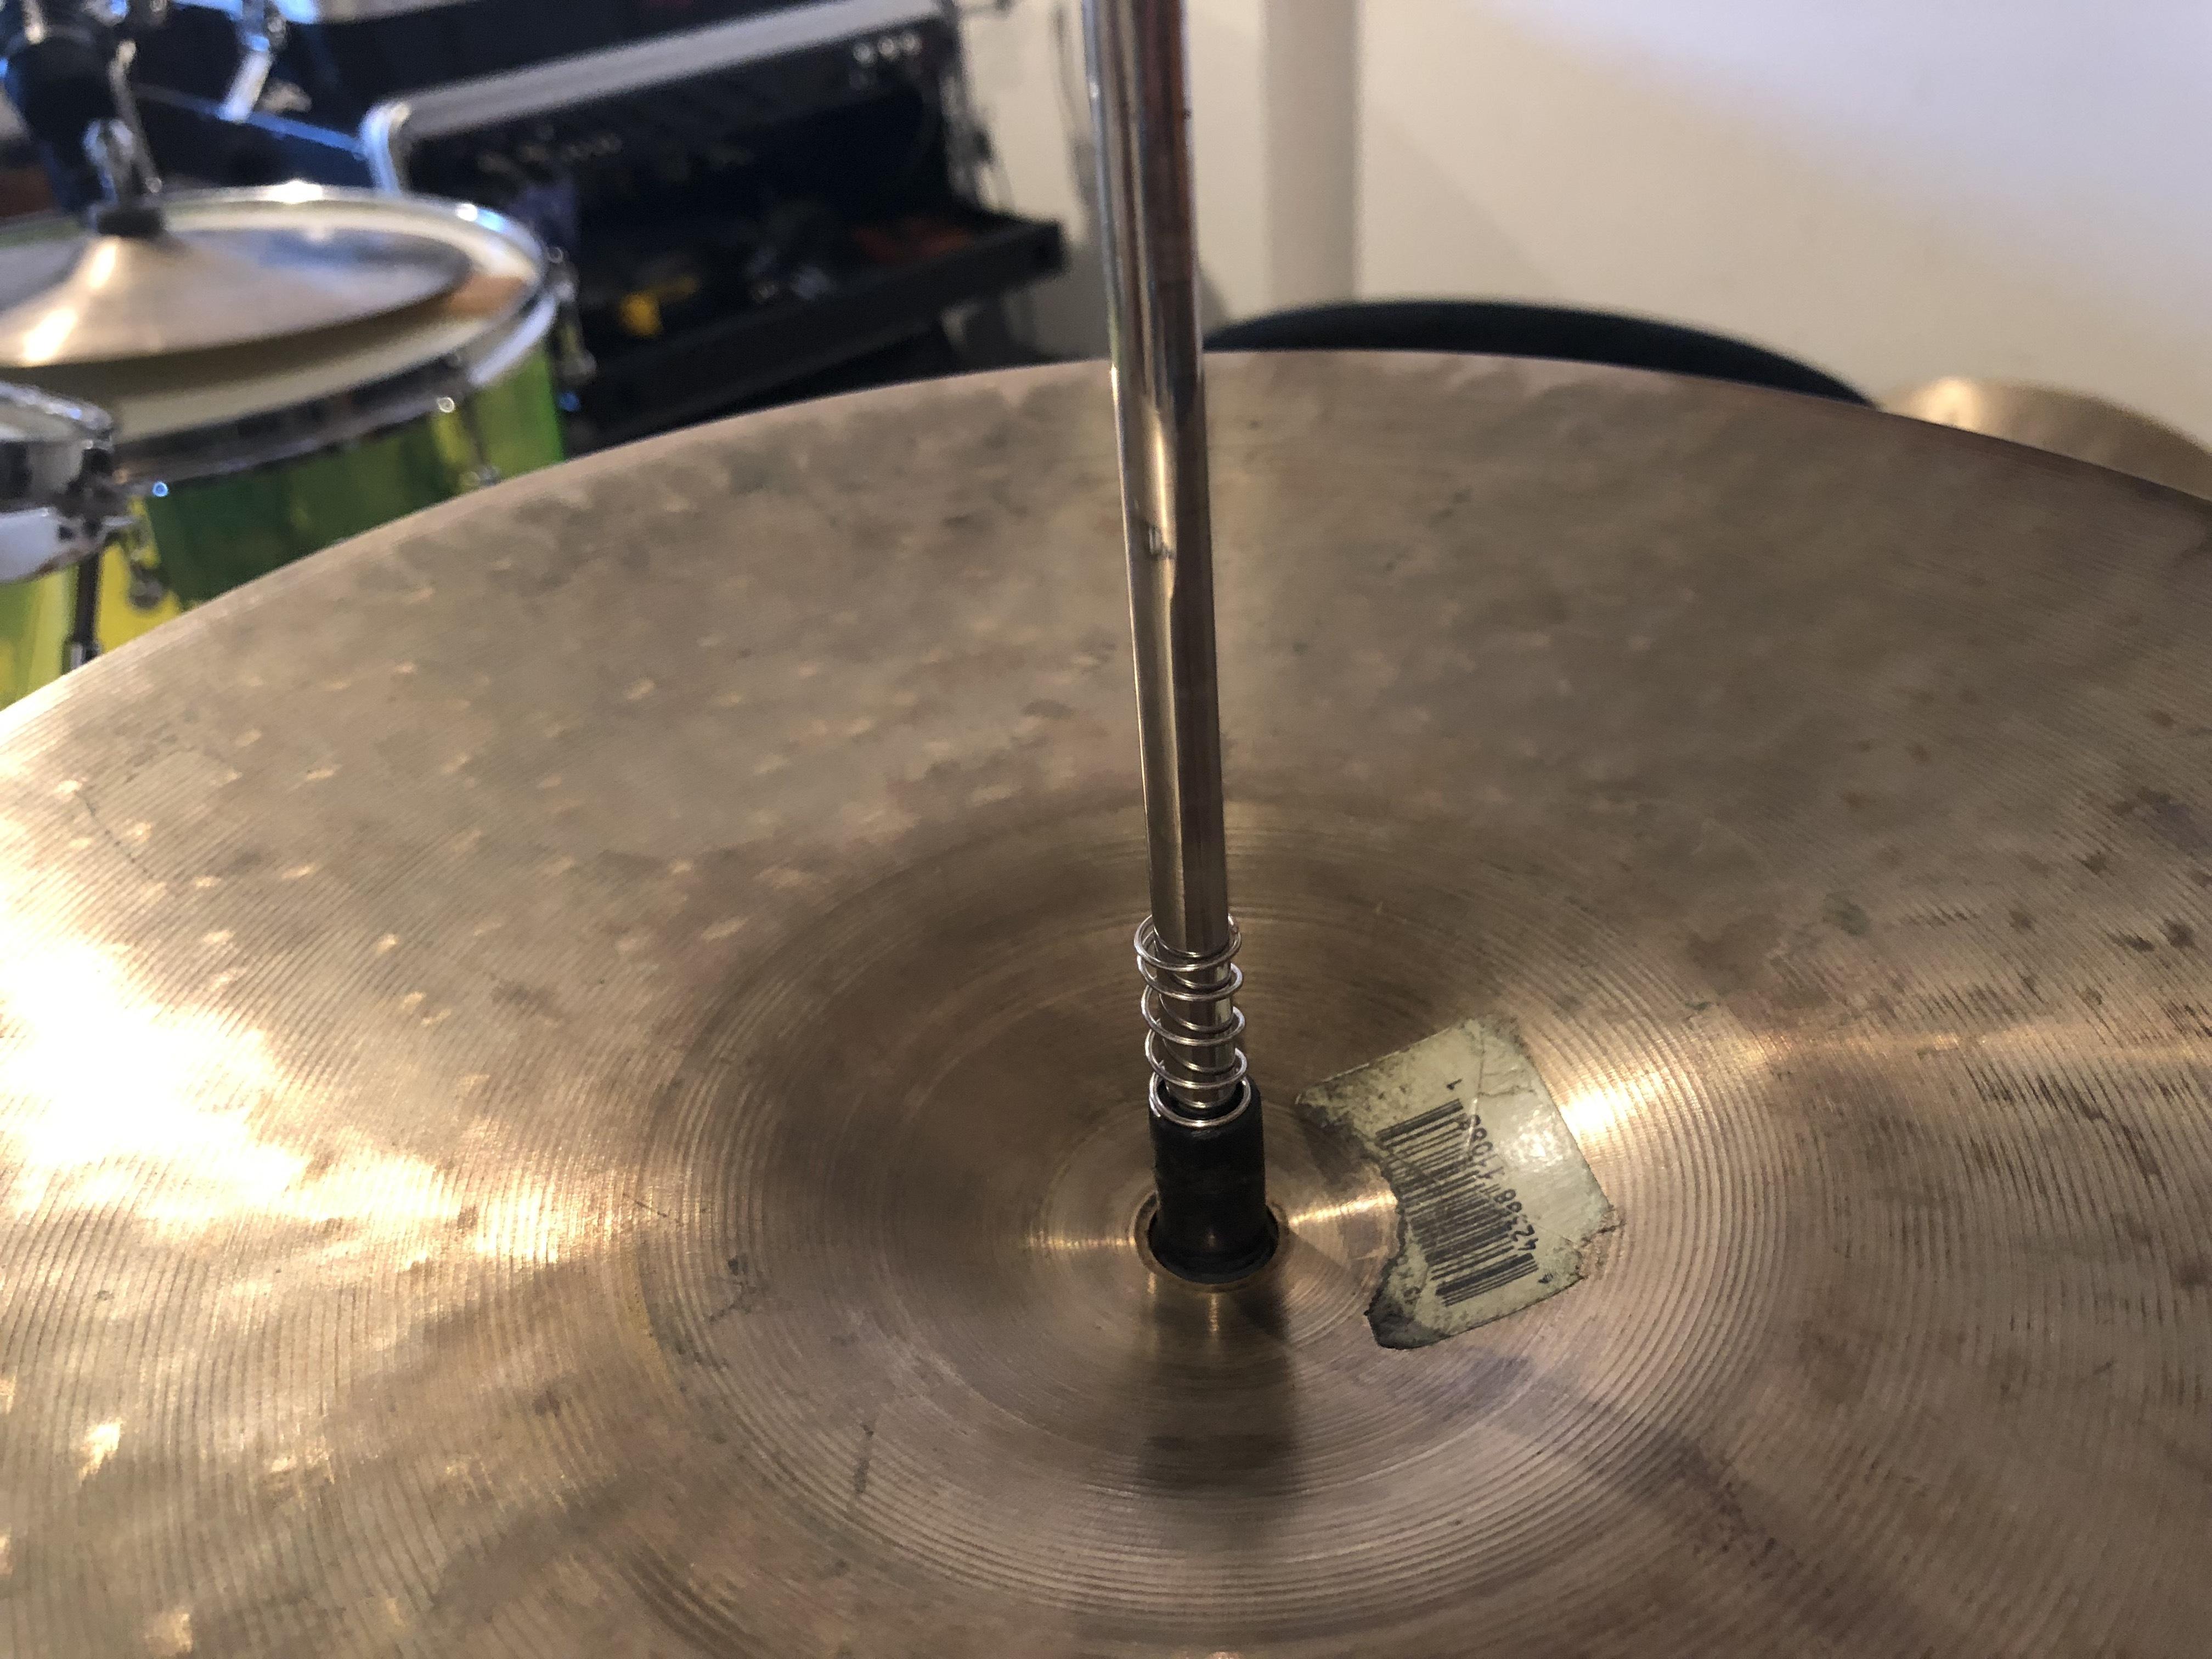
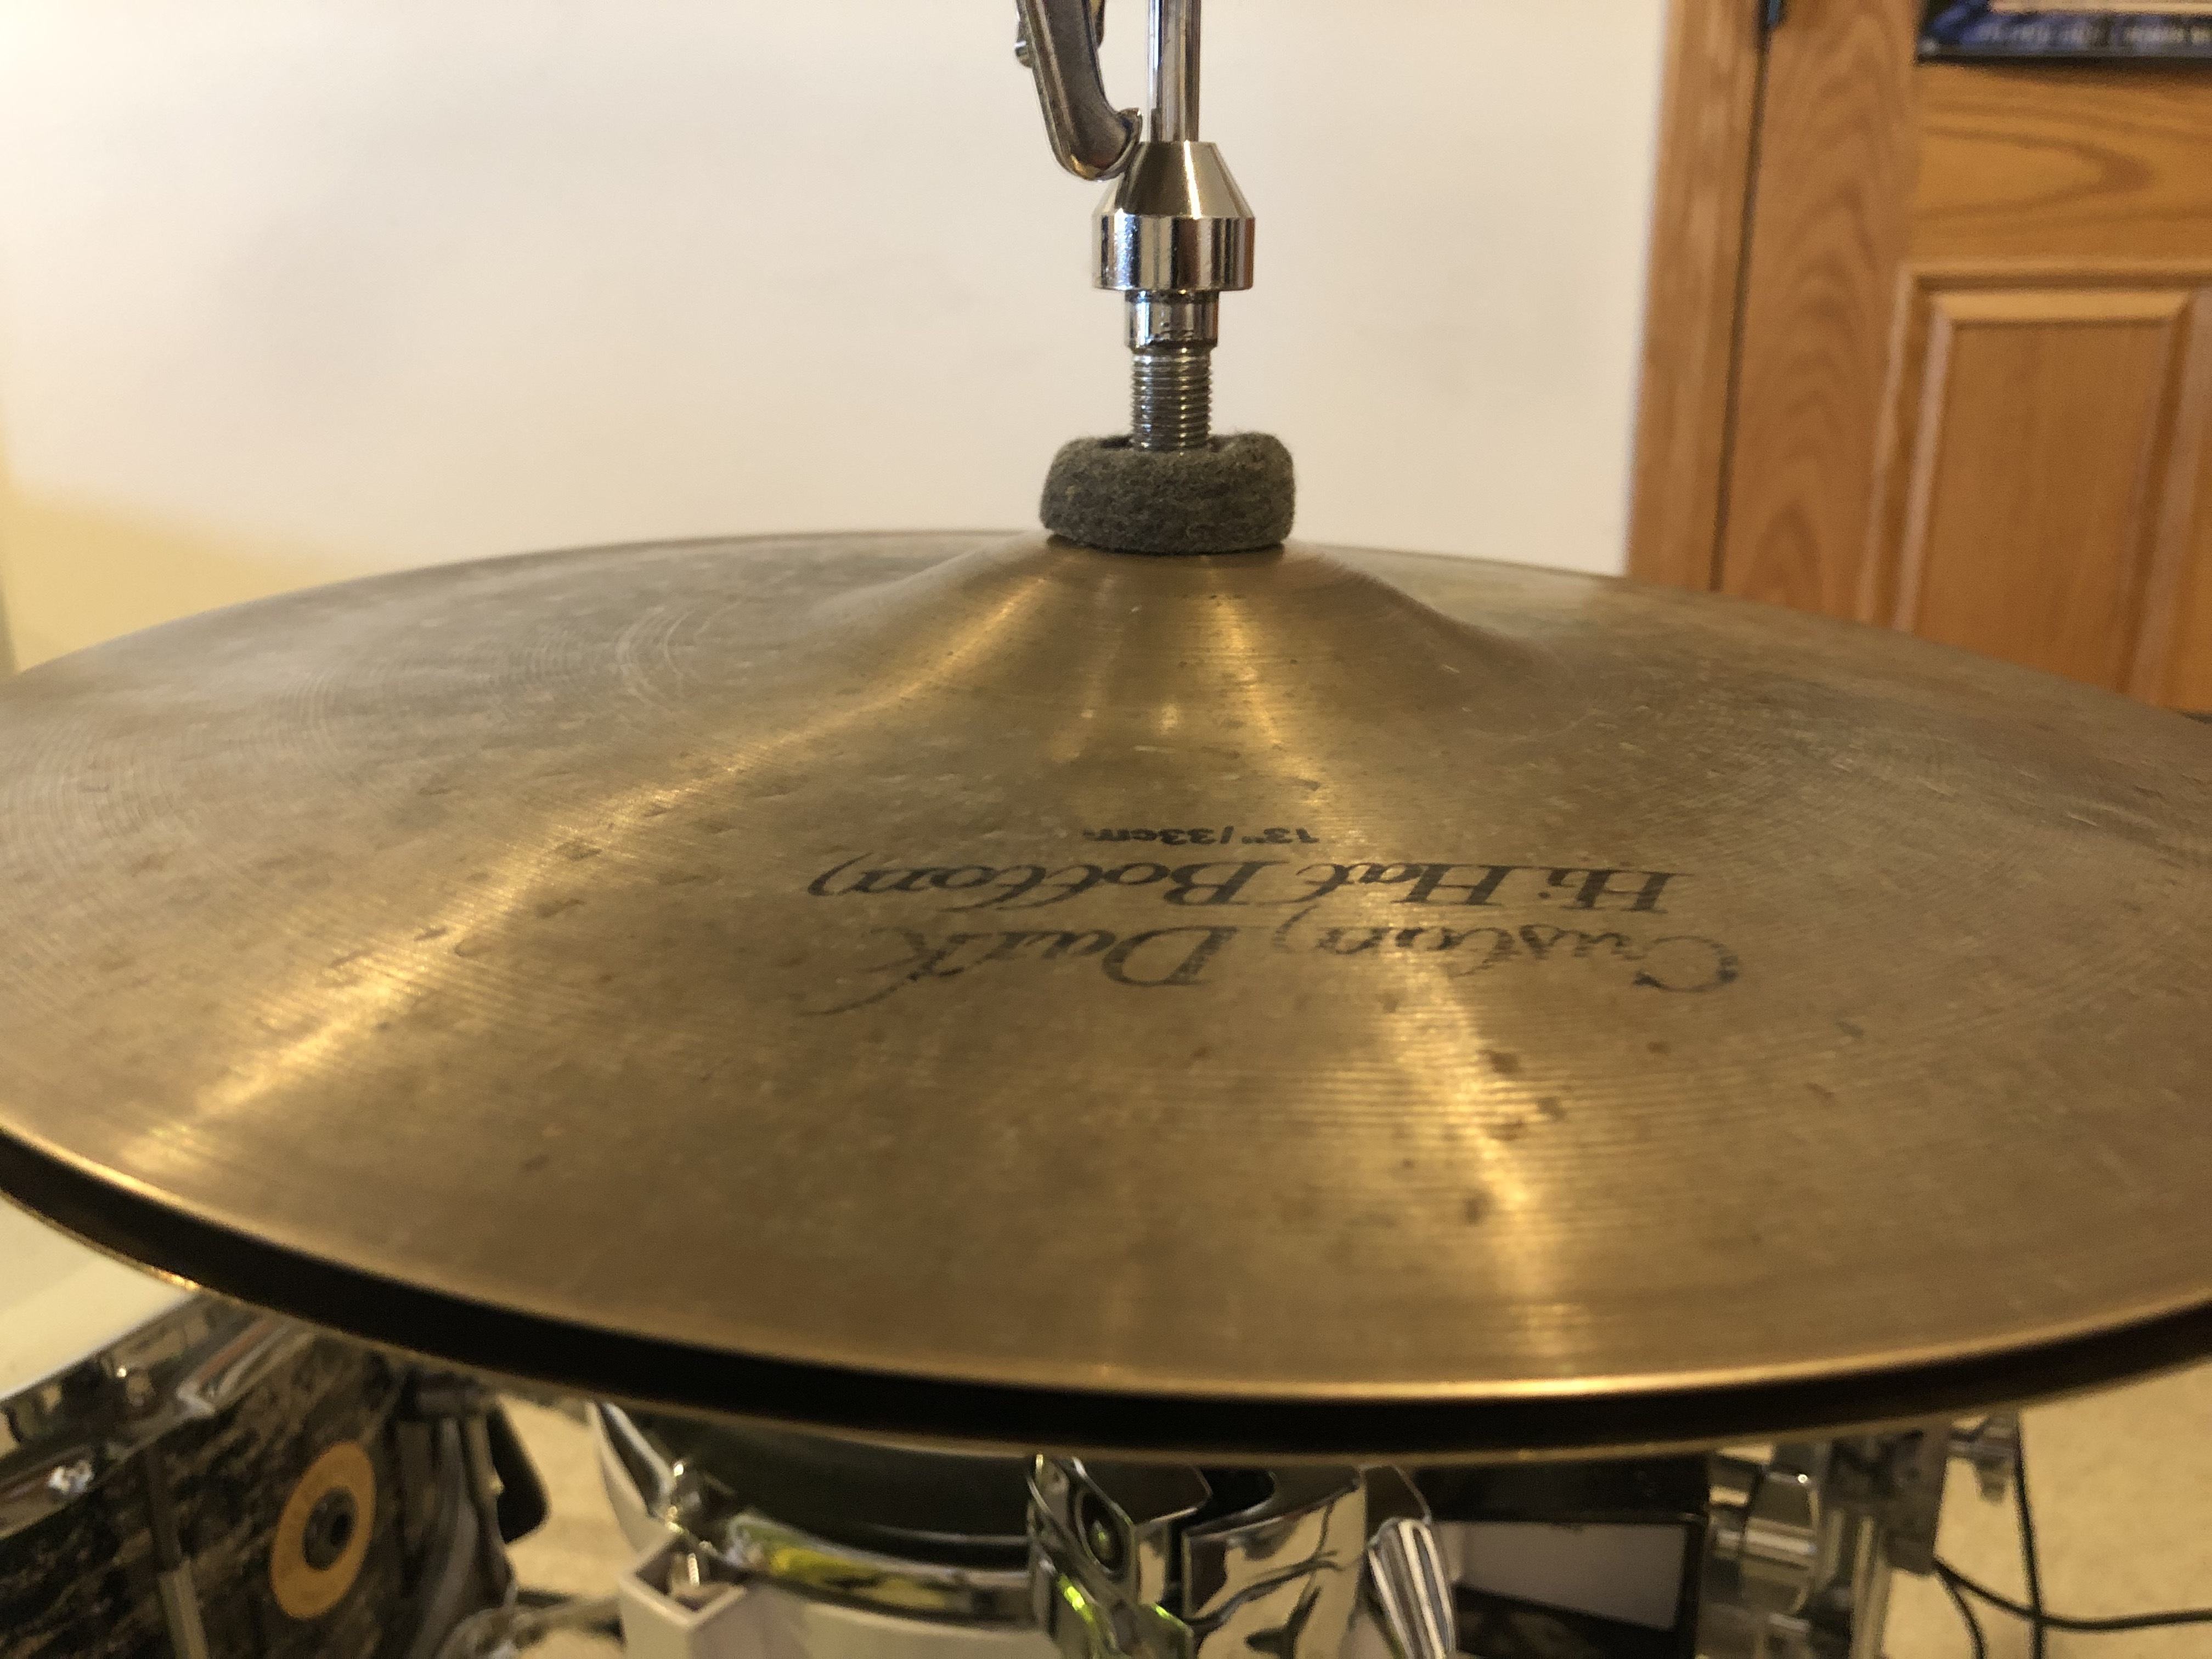
I think their needs to be a more affordable product to achieve the slosh sound when playing double bass. Long before this even came out, I came up with my own drum hack that literally costs around a dollar. Simply buy a strong spring that can fit around your hi-hat shaft. Most hi-hat stands have a 1/4" shaft so you would need a 3/8" spring like this one: 3/8" by 3/4" spring. Cut it to length and place it in between the two cymbals. This will hold the top cymbal up slightly when your regular hi-hat clutch is dis-engaged for a slosh and still allow for your pedal to work when the clutch is engaged.

However, this only gives you the option for slosh when playing double bass. Gavin Harrison likes to have the option for slosh or tight as he explains in this official Tama video:

Meinl Cymbal Tuners

Meinl Cymbals MCT Tuners (view item on Amazon.com) (commissioned links)

A lot of people talk about the Meinl tuners in articles like this so you have probably heard of them. There are mixed reviews on these and I think there's a couple things that need to be said about them. First of all, they don't just make you cymbal quieter. They transform your cymbal into a different but more quiet cymbal depending on where you place the magnets. I like the sounds I can get out of these, but it does depend on the cymbal you are using. I would urge your local drum shop to keep a set of these in the cymbal room so you can test them on different cymbals.

So, yes, these do make your cymbals more quiet at the expense of sometimes wanted overtones. If you want quiet cymbals, you really need to learn to play them more quiet with finesse. This is an important skill to work on especially when you're in the studio. If you are playing your cymbals too loud, it will bleed into the other microphones requiring you to gate or use other production techniques. It can also completely take over your overhead mics forcing you to turn down the overheads at the expense of losing bulk and essential overall room sound. Keep that in mind if you buy this product.

Drum Hack
There are some cheaper options to achieve this but they may not work as well as the Meinl tuners. I used to put duct tape on the underside of the cymbal but it left a nasty residue. Then I heard about these super strong neodymium rare earth magnets online for a fraction of the cost. You just need to put some sort of adhesive felt on them so they don't scratch your cymbal. I have not tried this but have heard that they work just as well. Comment below if you have tried this!

Nexlevl Super Strong Mini Fridge Magnets 1/4" x 1/16" (view item on Amazon.com) (commissioned links)

Gibraltar Shock Mount Cymbal Adapter

Gibraltar SC-GMCMA Shock Mount Cymbal Adaptor (view item on Amazon.com) (commissioned links)

I usually have more cymbal stands sitting around rather than mic stands. This is perfect for that. It mounts to most cymbal stands. This product is intended for use on a cymbal stand when you have a cymbal mounted as well, that is why it also has shock absorption. It also absorbs the shock when you mount the stand on a rack.

I have wrapped tape onto cymbal stands so I could mount mic clips on them but this only works for a while until they fall off, damaging your microphone. I was definitely happy to find this product! I see the reviews aren't very good but that's because the rubber piece, which absorbs the shock, breaks...just be careful!

Drumgees

Drumgees (view item on Drumgees homepage) (commissioned links)

This product allows you to "bungee" any sound source to a drum. If you have ever experimented with putting pans, towels, or anything else on your drums, these hold them in place. They also have clips that can quickly and easily secure them into place. This is right up my alley, I just wish they weren't so spendy!

Drum Hack
I hate to suggest this option because I like to support small businesses but there are some decent options that are WAY cheaper. Just buy a mini bungee cord with a plastic hook (to prevent scratching). I found these elastic buckle cords on Amazon and the hook works well with a drum rim. You can untie the bungee and put a second hook on it. They won't work as well as the Drumgees though...especially with their the ease of use when playing live.

Drumlites

DrumLite Electronic Drum Accessory DL2N (view item on Amazon.com) (commissioned links)

These Drumlites are amazing! I have an acrylic "see-through" drum set but these also work great with wooden kits. The remote control allows you to pick a bunch of different presets and colors. I chose to buy the Global DMX Controller so I could have the lights react to my music. This is definitely the way to go because with DMX control, you can do anything.

I will mention that the Global DMX Controller only allows you to show the same color on all the Drumlites you have (hence the name global). However, the Independent Controller with DMX Function allows you the ultimate control to do anything...at a really hefty price tag!

They also sell Drumlites that are triggered by sound, but they are not interchangeable or upgradable to the DMX controlled lights. I easily found a way to trigger the DMX controlled lights by sound with my setup in Ableton Live. But, in order to use it on each drum separately, I would have to buy the independent controller. That's where the triggered Drumlites are much more affordable. I still chose the Global DMX Controller for now with hopes to eventually upgrade to the independent controller.

My drum transcription video of "Moon" by Little People shows the first time I programmed my Drumlites in sync with the music. Check it out here: Moon by Little People - Drum Transcription by Robin Rapsys

Here are a couple official videos from Drumlite with Coop3rDrumm3r explaining their setup and uses. The second video shows their "triggered" version which cannot be interchangeable with the DMX controller. Like I said, with a little setup, you can easily do this with Ableton and a DMX controller. I will be releasing some videos on how I do this soon.

Trick Drums Cymbal Quick Release

Trick Cymbal Quick Release 3-pack (view item on Amazon.com) (commissioned links)

The Trick Drums Cymbal Quick Release is by far the best of its type. There's a reason they're so expensive! They screw onto almost any cymbal stand, include felt washers, adjust for tightness, and of course...quick release when you pull on the top. And trust me, they do not "accidentally" pop off.

I have to be honest, the Tama Quick-set Cymbal Mates do not work very well; they fall off numerous times on a gig. The Vater Slick Nut works pretty well but you do have to adjust them with an allen wrench every so often and they can also mess up the threads on your stand. I spent $60 on three of the Trick Quick Releases and I am set forever...no more problems! Amazon also offers the Trick Cymbal Quick Release as a 2-pack or a 1-pack.

The KickStrap - Bass Drum Creep Solution

This is the best solution for bass drum creep I have found. It's basically a strap that hooks to your bass drum pedal or hi-hat foot pedal and then to the center pipe of your drum throne. There's another product out there called "KickLock" which is similar to this product. However with KickLock, the strap hooks to one of the throne legs so I would have a concern of accidentally lifting my throne leg while I'm playing and disconnecting the KickLock. It also wouldn't work with raised bass drums because the strap attaches to the lugs of your bass drum causing the strap to sit up off of the ground and trip you up when you move or stand during play.

The people at Kickstrap are very nice and have great customer service. That kind of thing goes a long way and I like to support businesses that care about their customers! When you order, they will help make sure you are getting the correct KickStrap that will fit your pedal. I had a great experience overall with Benson's Music and the KickStrap.

Meinl Cymbal Bacon

Meinl Cymbal Bacon (view item on Amazon.com) (commissioned links)

The Meinl Cymbal Bacon is a pretty well known product to create a sizzle effect on your ride or crash cymbal. I found this one to work the best because it's not so bulky and the built-in washer fits right on top of your felt washer. I didn't like the Pro-Mark Sizzlers because they were too bulky. The built-in felt and plastic piece didn't fit on some cymbal stands too.

Drum Hack
Of course, you can always take a necklace and drape it over you cymbal stand. Sometimes you need a piece of tape or something to secure it to the cymbal stand. I found that the "dog tag" style necklaces create the best sound which is the same material as the Cymbal Bacon. However, most necklaces will cost more than the Cymbal Bacon and require an extra step to secure it. But, if you have an extra necklace lying around, it could be a quick solution.

Zildjian Anti-Vibe Sticks

Zildjian 5A Wood Tip Anti-Vibe Sticks (view item on Amazon.com) (commissioned links)

Zildjian 5B Anti-Vibe Sticks - Nylon or Wood Tip, Colored Dips, Birch, Natural, Maple (view item on Amazon.com) (commissioned links)

Have you seen the Zildjian Anti-Vibe Sticks before? They've been around for a while, but they've come a long way. They now offer them with colored dip grips, birch, natural, or maple and nylon or wood tips. There is a little nub on the back end that drastically reduces vibrations from coming down the stick which can cause wear on your wrists, elbows, and shoulders. They feel really nice but the rebound is very different and they take some getting used to. If you have any sort of pain in your hands, wrist, or arms, these sticks can help with that. I think the vibration reducing sticks will become more common in drumming. Anything to prolong the ability to play drums is a good thing!

Pearl Drum Key (Multi-Tool)

Pearl PTT13 Drum Key (view item on Amazon.com) (commissioned links)

I used to keep a little ziplock bag in my stick bag with allen wrenches, screwdrivers, drum keys, etc. This Pearl Drum Key Multi-Tool alleviates all of that. Vic Firth, Tama, and Zildjian all make a similar version of a multi-tool but Pearl's design is better. It has more allen wrench sizes, more screwdriver sizes, and longer shafts. CruzTOOLs also makes a very similar product that is great, but Pearl 'one-upped' them by adding a bottle opener and a couple more screwdriver sizes. I prefer using this to tune my drums as well because the grip is better than any standard drum key. Definitely the best drum multi-tool on the market.

Tama Tension Locks

Tama Tension Locks (view item on Amazon.com) (commissioned links)

Tama Tension Locks lock your tension rods in place so your drums don't go out of tune while you're playing. There are a bunch of other products out there for this issue but these are the best ones. Why? Well, some of the other products out there wrap around the tension rods underneath the drum hoop which make tuning and changing heads a complete headache. The products that snap onto the top of the rods (Gibraltar Lug Locks, Pearl Tension Keeper, Tuner Fish Lug Locks) are easier but Tama Tension Locks are the only product that allow you to tune the drum while they are installed.

They just push onto the top of your troublesome tension rods and the O-ring allows you to tune the drum while they are on. These are probably one of the more expensive products of this kind but that is because they are the best! You don't need to put these on every rod of every drum either. Only install these on the lugs that seem to fall out of tune due to rim shots.

Evans Torque Key

Evans Torque Key (view item on Amazon.com) (commissioned links)

I am a big proponent of tuning your drums by ear. Recognizing pitches and overtones is an important skill for any musician in general. That is why the Evans Torque Key is the best aid in getting your drums close to "in tune" followed by fine tuning by ear. The DrumDial and Tunebot are so much more expensive of a product when you are only using them to get close.

To use the Torque Key, just turn the bottom dial to a desired tension and turn the key on the tension rod until it clicks. After tuning that same tension on every rod, the drum should be very close to in tune. Record your "tension number" when you find the best tuning for each drum.

I will mention that the Torque key only works well with higher quality drums and tension rods free of rust. Lower quality drums will tend to have inequalities in their tension rods that can lead to uneven torque.


Thank you for reading! I hope the products and/or hacks were helpful in simplifying your drumming life. If you haven't checked out some of my other helpful articles, do so below!

Part 2 of this series:
The Coolest Drum Gadgets you Didn't Know You Wanted - Part 2

Other articles that may interest you:
Everything You Need to Become an Online Session Drummer - Part 1 – Getting Gear
Definitive Drum Practice Guide from Beginner to Advanced - Part 1 - Scheduling and Gear
Definitive Drum Practice Guide from Beginner to Advanced - Part 2 - Practice Session

**Full Disclosure: I earn a commission if you click any of these links and make a purchase, at no additional cost to you.**
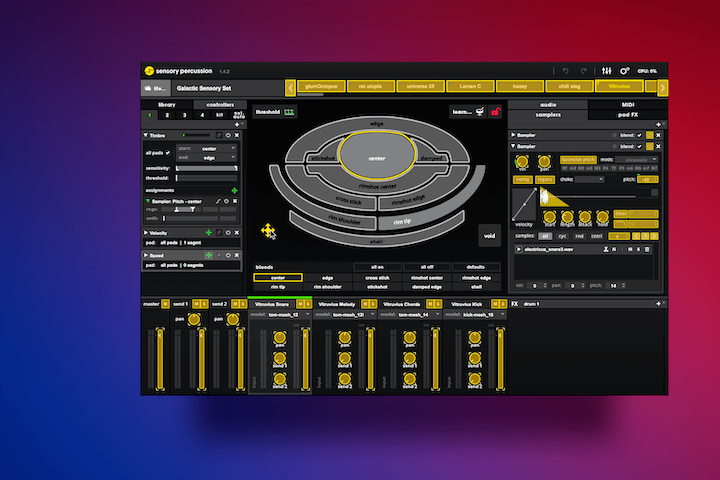
Definitive Drum Practice Guide from Beginner to Advanced – Part 2 – Practice Session

If you didn’t see part 1, go to: 

Definitive Drum Practice Guide from Beginner to Advanced - Part 1 - Scheduling and Gear

It covers some very important things like scheduling what you practice and when. We’re about to move onto our actual practice session, but there’s one topic that I need to cover: lessons.

Should I get lessons?

I have an opinion on “lessons vs. self-taught” that I would like to explain so I can help you decide on whether you should get lessons or not. If you are self-taught or would prefer to be a self-taught drummer, then ok, but hear me out.

When you self-teach, in any subject or discipline, it only takes you longer to reach your goals if you do it without the direction of someone that has already reached similar goals. I understand that everyone learns a bit differently, but as long as you have a good teacher, they will always find a solution faster than you can. Otherwise you're just taking shots in the dark to try to figure out techniques, licks, etc.

Bottom line is, good teachers will always help you reach your goals faster. But, if you prefer to take longer in facilitating your drumming skills just so you can have the pride of being self-taught, then I won’t stop you. I understand there could be other reasons, but hopefully it’s not the pride thing. Anyway…

Setup

I am sure you already have some sort of setup that you may be particular about. If it’s working, then that’s great. Just remember that the “no pain, no gain” model is not ideal here. You’re essentially doing millions of repeated movements over time and if that movement is causing pain, it will become a problem. I would like to point out that I am not a doctor and you should consult a physician for any definitive answers. I just have some suggestions that could help you on a basic level.

Seat Height

Your current seat height will almost always feel the most comfortable because your accustomed to it right now. However, a physician did tell me that in the seated position, the human body will have the most control of it’s leg movement when the knee is at a 90 degree angle. I would urge you to try this seat height. I chose to “get used” to this seat height and it has worked well for me.

Cymbal Height

When you extend your arm above your head, or your shoulders past a 90 degree angle, you increase the wear on your shoulder. Your arms naturally hang downward as the most relaxed position so you would like to be as close to that as possible. As a suggestion, it’s better to keep your cymbals at eye level when seated or lower.

Stick Grip

I have a simple exercise that has helps me dramatically when it comes to stick grip. Stand up, drop your hands to your sides and completely relax them. Then, freeze one of your hands in that position and bring it up to look at it. Your fingers will naturally be curled a bit. This is your hands most relaxed position. Now, with your other hand, place your drumstick in your frozen hand. After that, you can unfreeze your hand to grip the stick with your thumb and pointer finger as the “fulcrum” while the other three fingers lightly touch the stick. With minimum movement from a fully relaxed position, you should be able to hold onto the stick with the fulcrum and guide the stick with the other three fingers.

Warm-ups

Warm-ups are essential to a fruitful practice session. To really get the most out of it you should get your body temp up so your not “cold”, then stretch, then play some exercises. All in all, this should not take more than 10 minutes. I know it seems like a long time when you don’t have much, but it is essential. You only have to do it once in a day. If you work out in the morning, you should already be warm and stretched and then you just need to play a few exercises. Just take about 3-5 minutes and stretch these areas out:

  • Neck Rolls

  • Cross-Body Shoulder Stretch (Very helpful in preventing shoulder strains when crashing cymbals)

  • Arm Twirls

  • Wrist Flexor Stretch

  • Wrist Extensor Stretch

  • Straddle Stretch

  • Quad Stretch

  • Hamstring Stretch

Here are some stretches explained if you are unfamiliar with these stretches:

Wrist and Arm Stretches on aaptiv.com
Body Stretches on Self.com

Also, this drummer specific stretch feels great: the stick wrist twist. Just grab your drumstick in the middle and use your other hand to twist the wrist either direction until you feel the stretch and hold for about 10 seconds.

Right hand twisted to the left

Right hand twisted to the right

Hand Warm-up Routine

I have a hand warm-up routine that warms up my hands AND integrates rudimental practice along with polyrhythms over a metronome click to work on timing. It’s not as complicated as it sounds.

I select two tempos; a slow starter tempo and a fast tempo. I set the metronome so that instead of a click on every beat, it clicks every four beats, or every downbeat. I just divide the tempo I want by 4. So if I want to play this at tempo 60, I have to set my metronome to 15. This might take some time to get good at it so don’t allow it to frustrate you too much! I actually have this setup in an Ableton Project if your metronome doesn’t go this low or if you would like to bring some metronome work to a new level. (look below)

It can be very difficult at first. If you need to, you can start at 80 bpm (which means you would set metronome at 20 bpm). I repeat each segment as many times as necessary and move to each segment without stopping while maintaining the same tempo regardless of the polyrhythmic activity. I have provided a PDF download of my warm-up exercises for you below.

Foot Warm-up Routine

For the feet, I do alternating right-hand/right-foot AND left-hand/left-foot groupings. I play them at a slow tempo and a fast tempo and repeat each segment as necessary just like the hand warm-ups. These really wake up my feet and help me sync my hands and feet better in all of my playing. This exercise is also notated in the warmups PDF below.

Metronome Tools

The last piece of the warm-up I sometimes do I call the “Hold Groove”. I pick any tempo and play a groove for 32 bars using my “Hold Groove” clip in Ableton Live. Basically, the metronome plays fewer and fewer times throughout the 32 bar clip. First it’s on every downbeat, then it’s every two bars, and eventually it doesn’t click for 4 measures. This is a test to see how well you can maintain the tempo. Make sure you try drastically different tempos each day.

In this Ableton project, if you switch over to arrangement view, there is a clip that progressively adds 1 bpm to the tempo every four bars. This works great if you’re trying to work up a new lick or groove. The instructions on how to use all of these features will be in the email I send you.

Practice Session

Finally it’s time to practice! So what do you practice? That question could ask a million more questions. What are your goals? What styles do you like? What are you good at and what do you need to work on? I’m hoping I can help you answer those questions by making some suggestions here.

Books

First of all, it is quite difficult to learn new musical styles or exercises without being able to read music. To play music, it’s not essential, but, it will help you move forward so much faster if you learn to read music. It opens an entire world of interesting books with exercises and concepts that would be difficult to utilize without knowing how to read music. Most beginning method books for any instrument teach how to read music. Here are some of the tried and true, best drum books out there.

Snare Drum

The Alfred series’ are always high quality and this one has been around forever. It has a fantastic method for learning to read rhythms and music and it goes over all the rudiments in a sensical chronology. This one is necessary if you're just starting out. (view item on Amazon.com) (commissioned links)

This book is comprised of snare drum solos that are somewhat advanced. The rhythms can be complex and the dynamics are very challenging. These snare drum solos can help you with drum set dynamics, rhythm, fills, and everything in between. (view item on Amazon.com) (commissioned links)

Rock

Another Alfred book! I literally learned to play drum set from this book. I still use a bunch of excerpts from this book in my lessons I teach today. It starts with the basics and starts to add simple beats and drum fills. There’s even an introduction to jazz in the second half. I would highly suggest getting it with access to the audio examples/CD. (view item on Amazon.com) (commissioned links)

This book was written by the legendary Peter Erskine of Weather Report (Listen on Amazon Music)  and countless other groups. It is more of a complete series that starts basic and progresses quickly by the third book. I also think the beats in this series are very applicable in music today. I use a lot of exercises from this book in my lessons. Just start with book one and go from there. (view item on Amazon.com) (commissioned links) 

Jazz

Both written by John Riley, an amazing drummer and educator in his own right, these two books are staples for learning jazz drumming. Not only are the exercises interesting and relevant, these books teach the entire concept behind bop music from forms and phrasing to motifs and soloing. (Art of Bop Drumming on Amazon.com / Beyond Bop Drumming on Amazon.com) (commissioned links)

I like this book because it just has a ton of usable swing exercises to go over which can give you new rhythmic ideas for comping. (view item on Amazon.com) (commissioned links)

World Music

This book integrates authentic musical styles from Brazil, such as the samba, and combines their numerous percussion parts into ambidextrous, challenging, drum set grooves. I absolutely love the grooves in this book. (view item on Amazon.com) (commissioned links)

Another book from the same series as “Brazilian Rhythms…” that covers the challenging music of West Africa and applies it to the drum set. (view item on Amazon.com) (commissioned links)

Drum 'n' Bass/Electronic

Extremely thorough book with tons of content and exercises written by the great live drum ’n’ bass drummer Johnny Rabb. It walks you through how to come up with improvised drum ’n’ bass beats that sound interesting and authentic. (view item on Amazon.com) (commissioned links)

All Styles

I found this book very thorough and accurate judging by the amount of research the authors did to compile it. This book is a compilation of almost 500 different drum set styles along with a brief history of each and listening suggestions. This isn’t a book you work through from beginning to end. You use it as an encyclopedia when you encounter a new style that you want to learn how to play. (view item on Amazon.com) (commissioned links)

Concepts

Stick Control, written by George Stone, is a very old book of relatively simplistic patterns in sticking and rhythm for which it was used to teach snare drum for marching music. Since its inception, people have taken Stick Control to a whole new level and reconfigured the use of the patterns in very unique ways. It has become one of the most important drum set practice books ever written. Many years later, Joe Morello (of notoriety from Dave Brubeck's classic "Take Five"(Listen on Amazon Music)) a student of Stone, wrote the book Master Studies which takes the patterns and a slew of new ones in Stick Control and explains the different ways you can use them. “Master Studies” is the perfect title for this book. (Stick Control on Amazon.com / Master Studies on Amazon.com) (commissioned links)

A very interesting conceptual book that integrates a series of systems into your playing to ultimately help you develop your own creativity. I especially like the addition of your “fifth limb”, your voice, which synchronizes your breathing and entire body with the rhythms at hand. (view item on Amazon.com) (commissioned links)

I will also implore you to check out the comprehensive list of timeless drum books from Modern Drummer:
Timeless Drum Books from Modern Drummer

Now, here are some practice tips to keep your eyes on the prize.

How do I work on my "groove" ?

The great Jon Fishman of Phish once used a great analogy to describe time and groove. Just picture a road where the yellow line represents perfect time and the outer white lines to the left and right represent playing on top of the groove and behind the groove. The road's center is usually defined by the rhythm section in the band and where they are implying the song's time exists.

It usually goes unspoken about where each musician chooses to lie on this road. Sometimes the bass player will sit on the back while the drummer pushes the time a bit. Sometimes it's the opposite. The years you spent listening to the music you love by master musicians has given your playing a natural feel that probably sits on its own unique position.

At your next rehearsal, try to start a conversation about where everyone likes to sit in each song. Sometimes when you talk about it, it can solidify the groove. But it can be a confusing concept to some so don't push the idea too hard.

If you are playing slow funk, soul, or any music that asks for a relaxed feel, you would want to consistently play a little bit behind the groove. You should also make sure you relax your shoulders and body when you play. At first, you may feel like your falling behind but as long as you consistently hit your beats a little bit behind, it will have a naturally relaxed feel or sometimes heavy feel.

If you want to give the song some energy, you can sit on top of the beat. This sounds like your speeding up but if you consistently playing a little bit ahead of the beat, you will give the song a front-edge sort of energy. Most rock and metal drummers play like this naturally. If you're not aware of this, it can limit your ability to offer different feels for other songs that might require a relaxed feel like ballads or slow heavy tunes.

Some great examples of drummers playing laidback feels that sound great are ?uestlove of The Roots on the album "Things Fall Apart" (listen on Amazon music), Jeff Porcaro of Toto on the album Toto IV (listen on Amazon music), Chad Smith of the Red Hot Chili Peppers on the album "One Hot Minute" (listen on Amazon music).

Some great examples of drummers playing a front-edge energetic feel are Stewart Copleland of The Police on the album "Regatta de Blanc" (listen on Amazon music), Nicko McBrain of Iron Maiden on the album "Piece of Mind" (listen on Amazon music). (commissioned links)

These are just a few but there are countless other examples you can explore. Here's an article from DRUM! magazine that lists some of the best groove drummers of all time: 15 Greatest Groove Drummers of All Time

This article from DRUM! magazine covers the idea of groove and what kind of feel fits with different styles/genres. Check it out here: Vital Beats Every Drummer Must Know

To work on your groove without a band, you can experiment with a metronome. Try taking different grooves that you are working on and consciously play them on top of the beat, then behind the beat, and then right in the middle of the beat. The more you practice different grooves and styles this way, the easier it will be to hear the differences and apply them to music.

Is it a physical limitation or a coordination issue?

Depending on how long you have been playing and how developed your muscles are, you could find yourself with some physical limitations. These are limitations that require muscle building over time in order to execute. One of the best examples of a physical limitation would be speed.

Hand or foot speed is not something you can work out in a day…it takes time. So, you have to differentiate the elements of what you’re working on so you don’t get frustrated. If there’s an element of speed as part of the groove or style you are working on, allow yourself the time to build the muscles. You could set a time aside during your practice session to work you hand or foot muscles until they burn! If you stay consistent, you will eventually build up that speed.

If you are finding a coordination issue in what your working on, it usually takes a lot less time to work it out. If you slow down the exercise and repeat it over and over slowly, the coordination with come around. You can also work on coordination with mental practice and visualization which I will cover in the next section!

“Amateurs practice until they get it right. Professionals practice until they can’t get it wrong.”​ -Unknown

Mental Practice

Sometimes we don’t have the time to practice…or, maybe we have idle time when we are away from our drum set. How about when your riding the bus home from work? …when your on an airplane? …when your working out? These are all times that you could visualize practicing and receive the benefit of practicing. Visualizing your practice helps you almost as much as actually practicing!

Here’s a great article from the reputable “Scientific American” which explains that this actually does work:
Can Visualizing Your Body Doing Something Help You Learn to do it Better?

As I said, visualization is a great way to work on coordination. While your riding the bus, plane, treadmill, etc., think of the groove you were last working on and visualize yourself completing the necessary movements to kill that groove.

You can also use mental practice for memorization. Repeating patterns over in your head will engrain them into psyche so you can improvise with them comfortably—especially odd meters! Also try repeating that complex song form in your head so you stop going to the bridge at the wrong time at band practice!

Ari Hoenig wrote a fantastic series of articles for Modern Drummer with the idea of mental practice called “Polyrhythmic Coordination”. He talks about one way to practice mentally is to teach yourself rhythms you couldn’t hear before. The articles he wrote appear in the July 2012, September 2012, November 2012, and February 2013 issues of Modern Drummer. Unfortunately, there’s only the fourth part available online unless you have a digital subscription to Modern Drummer. Here’s a link to Part 4:

Modern Drummer: "Polyrhythmic Coordination" - Part 4 - Six Note Base Rhythm

I hope you enjoyed this article and got something out of it. Be sure to check out some of the other articles I have on my page and keep up the good work.

Be well!

Other articles that may interest you:
Definitive Drum Practice Guide from Beginner to Advanced - Part 1 - Scheduling and Gear
Everything You Need to Become an Online Session Drummer - Part 1 - Getting Gear

**Full Disclosure: I earn a commission if you click any of these links and make a purchase, at no additional cost to you.**

Ableton Live Tutorial – Copper Core One Man Band Setup – Toggle Mutes

This tutorial will show you how I set up my Ableton live session for live performance in my electronic solo act, Copper Core. It covers a little bit of my composition technique that coincides with how I improvise while muting and unmuting tracks along with all the settings you need.

You will need a virtual midi port setup for this to work. Here is an article on how to set that up for Mac or PC: Ableton Help: Using Virtual MIDI Buses

I have also provided a printable STEP BY STEP GUIDE if you want to save this for later. Grab it:

>